Heather Cottage Knits

Garter Stitch Scarf

Knitting PatternsSarah Jane PitchfordComment

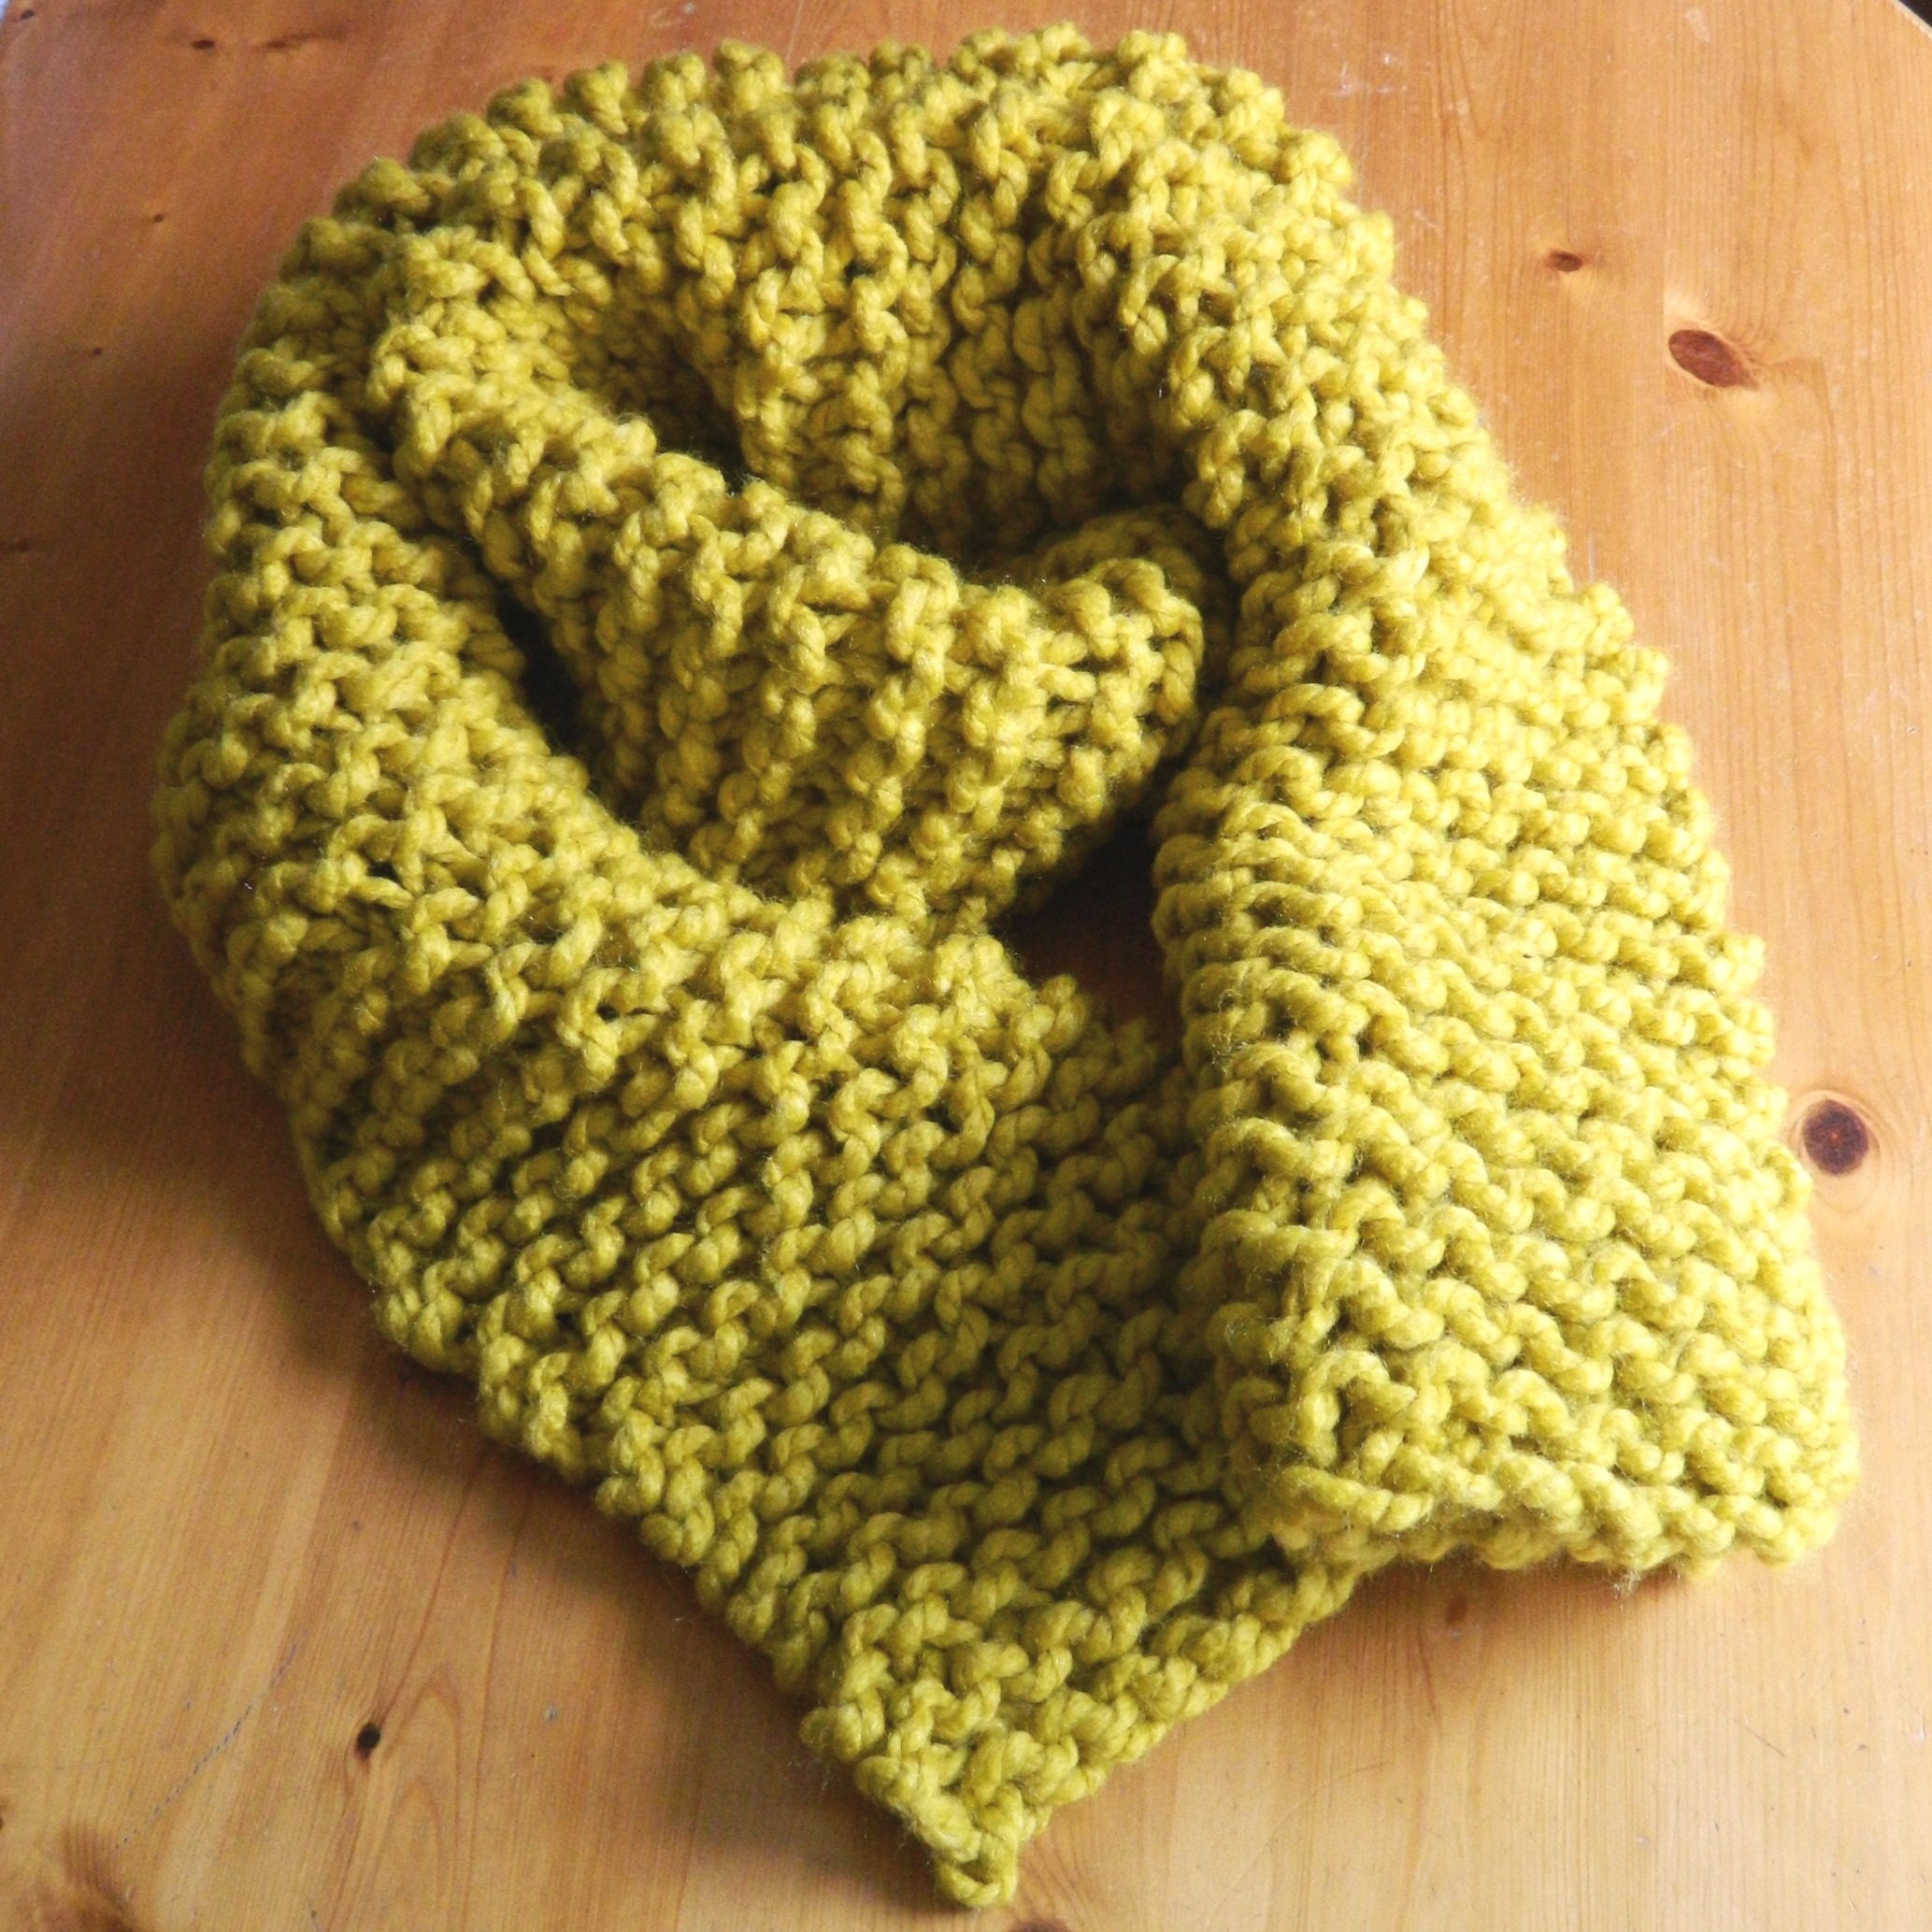
This scarf is probably the simplest knitting project to complete. To master the Garter Stitch Scarf you will need to use a basic knit stitch and join several balls of wool, weaving in the ends of wool as you knit.

Using extra chunky yarn makes this project quick to build. This great statement piece for your wardrobe will keep you warm and cosy all winter. This scarf makes a perfect gift as it can be completed in an evening or weekend.

The scarf pictured is 9” x 80” (23cm x 203cm) which is long enough to wrap around the neck twice or to tie around the collar of a coat. As a general guide a scarf for an adult should be equal in length to their height.

Following the pattern below will produce a 9” x 80” (23cm x 203cm) scarf, if you would like to increase the size you can a) add extra rows which will make the scarf longer, b) add extra stitches to make the scarf wider. The pattern indicates where to add extra rows and stitches to alter the size.

You can download a free PDF version of this pattern here.

 You will need:

  • · Chunky wool – I used Cygnet Seriously Chunky Wool – 4 x 100g balls*

  • · 12mm knitting needles

  • · Crochet hook / large blunt needle for weaving in the ends

* If you chose to increases the size of the scarf you will need to increase the amount of wool accordingly

Abbreviations:

St – stitch

K – knit

Gauge

Measuring a 10cm (4”) square of the scarf you should see 6 stitches across and 9 rows. If you find that your working is tighter you can add more stitches until you are happy with the width of the scarf.

Scarf Pattern

Cast on 15 stitches – to make the scarf wider increase the number of stitches here.

Row 1: Knit all stitches

That’s it! Just keep knitting all stitches of every row until you have the desired length.

Cast off all stitches and weave in the ends of wool. NB You will need approximately 50” – 55” to cast off your knitting so make sure to measure before starting to ensure you have enough wool to finish!

Alterations & Inspirations

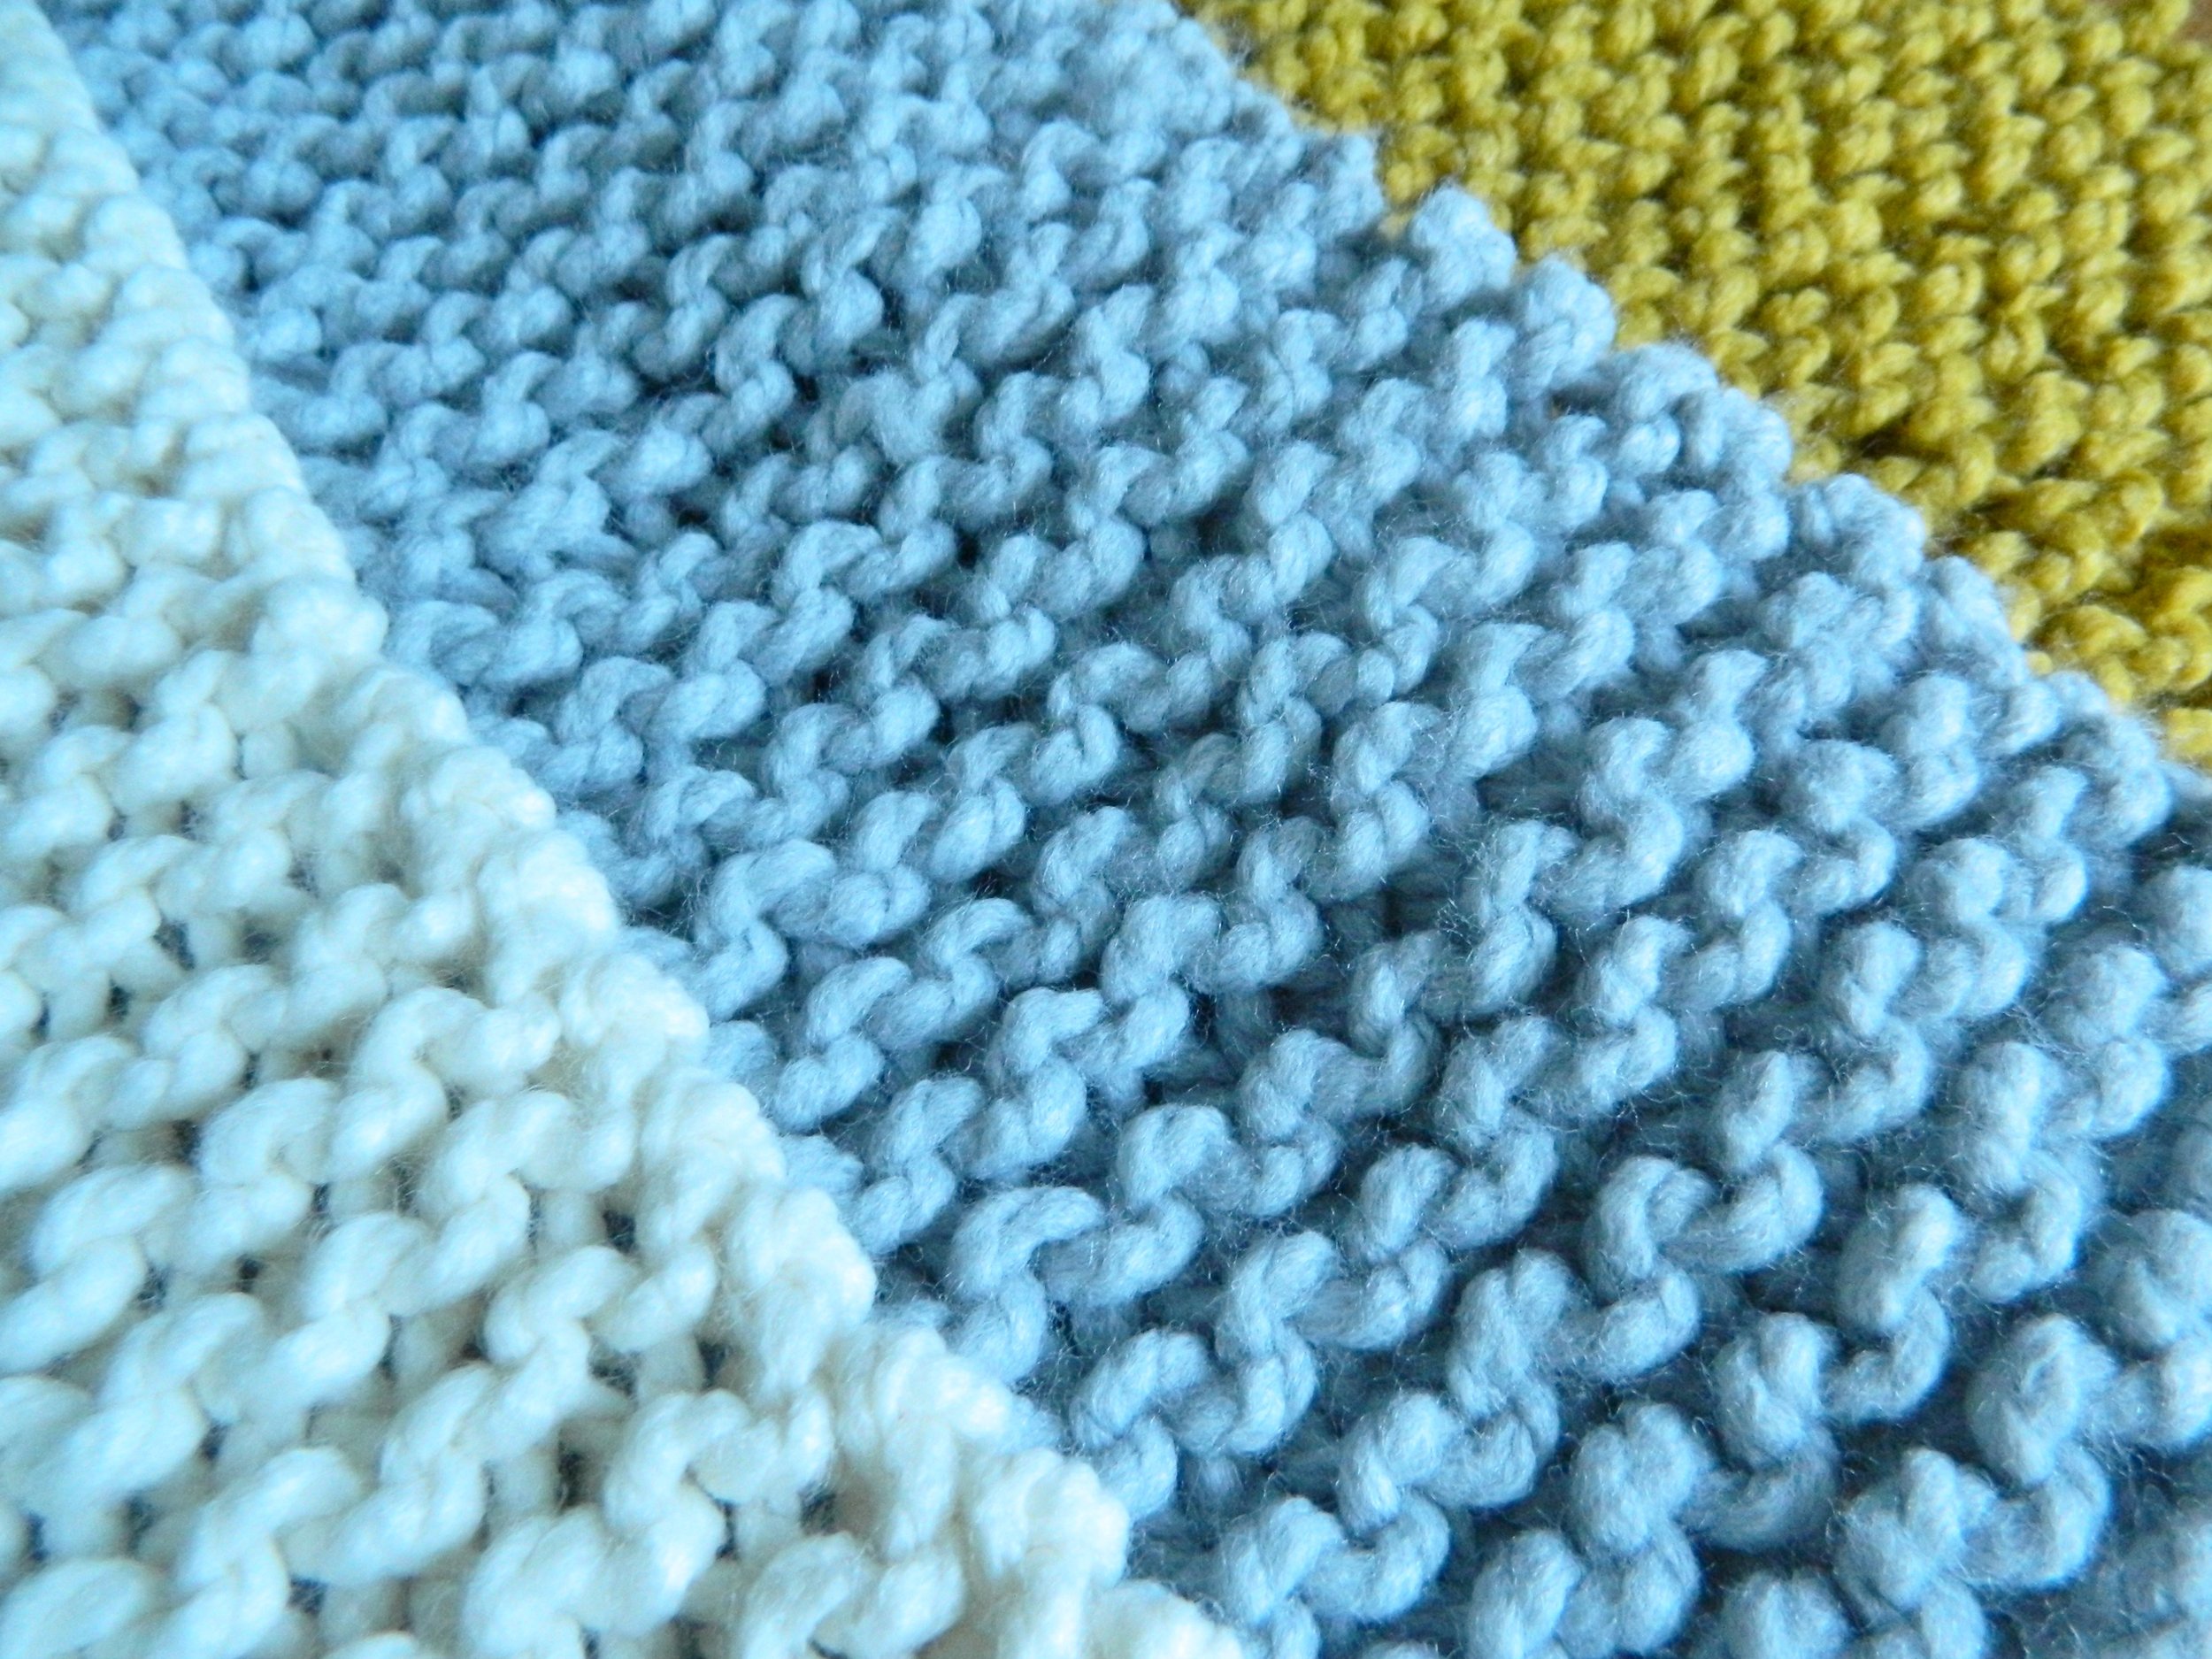
The garter stitch is a knitting staple and is a great stitch to use for a range of products. The garter stitch gives a stretchy feel and stops the edges of your work from curling up. You can use this stitch with any wool and for a great range of projects.

Changing Colour & Joining a New Ball

When joining two balls of wool it is important to make the smallest join to avoid large knots in your knitting. The easiest way to do this is to join your new wool at the end of a row. This will mean that the join is at the edge of your work which make it easier to hide.

Continue with your first ball of wool until you have ~4” remaining OR you have reached the end of your row with not enough wool remaining to complete the next row.

Take your new ball of wool and begin to knit with this new strand. Once you have knitted 4 or 5 stitches return to your two loose ends of wool. Tie the ends together pulling gently to ensure that the loose stitches are the correct size and tension.

Now that your ends are secure you need to ‘weave in’ your ends. That means taking a needle, or in the case of very chunky wool you can use a crochet hook or your hands, to tuck the loose ends into the surrounding stitches to hide them and to stop them from unravelling.
Waffle Wash Cloth Knitting Pattern

Knitting PatternsSarah Jane PitchfordComment

Washcloths are great beginner projects and quickly become a must-have item for your home. They are infinitely reusable if washed and cared for correctly.

This pattern is quick and easy to follow which uses just two stitches - the knit and purl stitch.

You will need:

  • 50g cotton DK yarn

  • 4mm knitting needles

  • Tapestry needle for weaving in loose ends

  • Scissors

Needles - I prefer to use bamboo needs as I like that they are very light weight and have a soft grip to keep your stitches in place while you knit without causing any snagging. KnitPro and Pony are good, reliable brands - you can find a Pony Bamboo pair of needles here.

Tapestry Needles - tapestry needles are large, blunt needles with a large ‘eye’. These needles allow you to thread your loose ends and to weave these in to finish your item neatly. You can find a Pony brand set of needles here.

Sizing and Tension

A washcloth for the bathroom will usually be between 6” - 11” square, you can choose the size that is best for you. As a guide, the washcloth pictured is 6” square. To adjust the size of your cloth you will need to add more or fewer stitches when you cast on making sure to keep the total number of stitches cast on in multiples of three.

This pattern is simple to master and the Waffle Stitch can be used for many items such as blankets, dishcloths, and scarves as the pattern creates a nice, flat piece without the need for a border.

Download a free PDF version of this pattern here.

Knitting Abbreviations

K - Knit

P - Purl

Pattern

Cast On: Begin your cloth by casting on 24 stitches, I like to use the long tail cast on method for a neat cast on edge.

Row 1: * K1, P2, repeat from * to the end of the row.

Row 2: *K2, P1, repeat from * to the end of the row.

Row 3: Knit all stitches.

Row 4: Purl all stitches.

Repeat these four rows until your piece measures 6”. Bind off all stitches and use your tapestry needle to weave in any loose ends.

Finishing

Finish your cloth by blocking to create the desired shape. Dampen your cloth then pin this onto a soft, clean, flat surface and allow to dry; a towel on a table top or large cushion works quite well for smaller items. Make sure to use pins that wont rust and to measure your item to get the sides pinned to an even shape.

Patchwork Blanket Pattern - Part 3

Sarah Jane Pitchford

This is part three of my knit along pattern. You can find part 1 here and part 2 here. You can also purchase a complete PDF pattern on my Etsy shop here.

Step 5 - Reverse Stocking Stitch

Reverse stocking stitch is, as it sounds, the reverse of the stitching stitch that we used earlier in the blanket. By reversing the order of the knit and purl rows we show the reverse, more textured side to the right side of the blanket.

As with stocking stitch this stitch will give a smooth and stretchy fabric which is liable to roll at the edges so a border is a must with flat pieces.

To work your reverse stocking stitch stripe work the following rows:

Row 1: K10, purl to the last ten stitches, K10

Row 2: Knit all stitches.

Repeat these two rows until your stripe measures 5” (13cm) finishing on an even row with an odd row facing for your next.

Step 6 - Double Moss Stitch

The Double Moss stitch is similar to Moss Stitch, this stitch is worked over multiples of two stitches ans two rows of alternating knit and purl stitches. The double moss stitch is soft and textured and reversible making it a great stitch for blankets and scarves.

To make your Double Moss stitch stripe work the following four rows:

Row 1: K10, ^ K2, P2, repeat from ^ to the last 12 stitches, K12

Row 2: K10, ^ P2, K2, repeat from ^ to the last 12 stitches, P2, K10

Row 3: K10, ^ P2, K2, repeat from ^ to the last 12 stitches, P2, K10

Row 4: K10, ^ K2, P2, repeat from ^ to the last 12 stitches, K12

Repeat these four rows until your stripe measures 5” (13cm) ending on an even row with a wrong side row facing for your next row.

Patchwork Blanket Pattern - Part 2

Knitting PatternsSarah Jane PitchfordComment

You can find Part 1 of the Patch Stripe pattern on my blog here

Step 3 - Stocking Stitch

Stocking stitch is the second stitch pattern that any knitter must learn - the stitch uses just knit and purl . The ‘right side’ of your work is knitted and the ‘wrong side’ is purled which gives you one smooth side and one more textured side.

The smooth side of stocking stitch…

…the textured side of stocking stich.

Stocking stitch has less vertical stretch than Garter stitch and makes a great base for all knitting projects. In this blanket is makes for a smooth stripe to contrast with the more textured stripes.

To work your Stocking Stitch stripe work these two rows:

Row 1: Knit all stitches

Row 2: K10, Purl all stitches to the last ten stitches, K10

Repeat these two rows until your new stripe measures 5” (13cm). The K10 at the start and end of each wrong side row will create your garter stitch side borders.

Step 4 - Moss Stitch

The Moss Stitch is formed by alternative knit and purl across each row. The moss stitch is reversible, meaning that is looks the same on the right and wrong sides, and is soft, textured, and has a unifrom stretch. Moss stitch is great for blankets and scarves and it is reversible and, as used for borders, the edges wont roll.

To make your moss stitch stripe work the following rows:

Row 1: K10, ^K1, P1, repeat from ^ to the last 10 stitches, K10

Row 2: K10, ^P1, K1, repeat from ^ to the last 10 stitches, K10

Repeat these two rows until your stripe measures 5” (13cm) finishing on an odd side row with a right side row facing for your next stripe.

Your blanket should now measure 15” (38cm) in total.

Patchwork Blanket Pattern - Part 1

Knitting PatternsSarah Jane Pitchford1 Comment

Knitting a blanket for your home or as a gift for a loved one is a traditional first ‘big’ project for new knitters. Those that are new to knitting, or those who are finding their way back to an old hobby, need to find a balance between a simple stitch that’s easy to master and a pattern that is intricate enough to keep the piece interesting. The Patch Stripe Blanket pattern uses a mix of essential knitter stitches to make a pretty, structured, and (almost) reversible blanket.

This pattern can be scaled up and down to make a bedspread or a baby blanket, this pattern is going to make the best gift.

I have broken down this pattern into steps which you can complete as you like; a goal of one stripe per week is reasonable and achievable but hardcore knitters will find a stripe per day is manageable. You can follow along here as I add weekly updates. You can find a PDF of the full pattern available to purchase from my shop here

You will need:

Sizing & Tension

The Patch Stripe Blanket is made from five different stitches each with similar tensions. Your blanket begins with garter stitch, a four inch square should contain 14 stitches and 28 rows. My blanket is 42” wide and 55” long, to make your blanket wider or narrower you can cast on more or fewer stitches

Step 1 - Casting On

Using your 5mm needles cast on 150 stitches using the long tail cast on method. The long tail method requires two lengths of yarn looped together to create each stitch. I find using two balls of yarn is easiest as you can cast on all of your stitches without the fear of running out of yarn. To begin, join your two strands of yarn with a knot. Use that knot to centre your length of yarn on your needles. hold each strand in your left hand with your needle in your right and begin to form your stitches.

When you have 150 stitches on your needle you are ready to begin your Garter Stitch border.

Step 2 - Garter Stitch Border

A border to your blanket will frame the piece and will also help to keep your edges straight and neat. Garter stitch is the ultimate beginners stitch which gives a classic, simple contrast to the blanket’s more intricate and textured stitches.

Garter stitch is the simplest of stitches created by knitting all stitches. To form your 5” border you will need to knit 34 rows of knit stitches. You will end on an even row (wrong side) ready to begin your next stitch on an odd numbered row (right side).

The Long Tail Cast-On Method

Sarah Jane Pitchford

The long tail cast on method using a length of yarn double over and held in the left hand. The needle held in the right hand is then used to pick up stitches from the two strands in the left hand. This method makes for a neat, stretchy cast-on edge which works well for blankets and ribbed edges.

Begin with a length of yarn that will be approximately four times the length of your cast on edge. Fold your yarn in half and insert your needle into the fold and holding your right hand.

Hold the yarn ends in your left hand with a grip that will allow for a soft tension as you work.

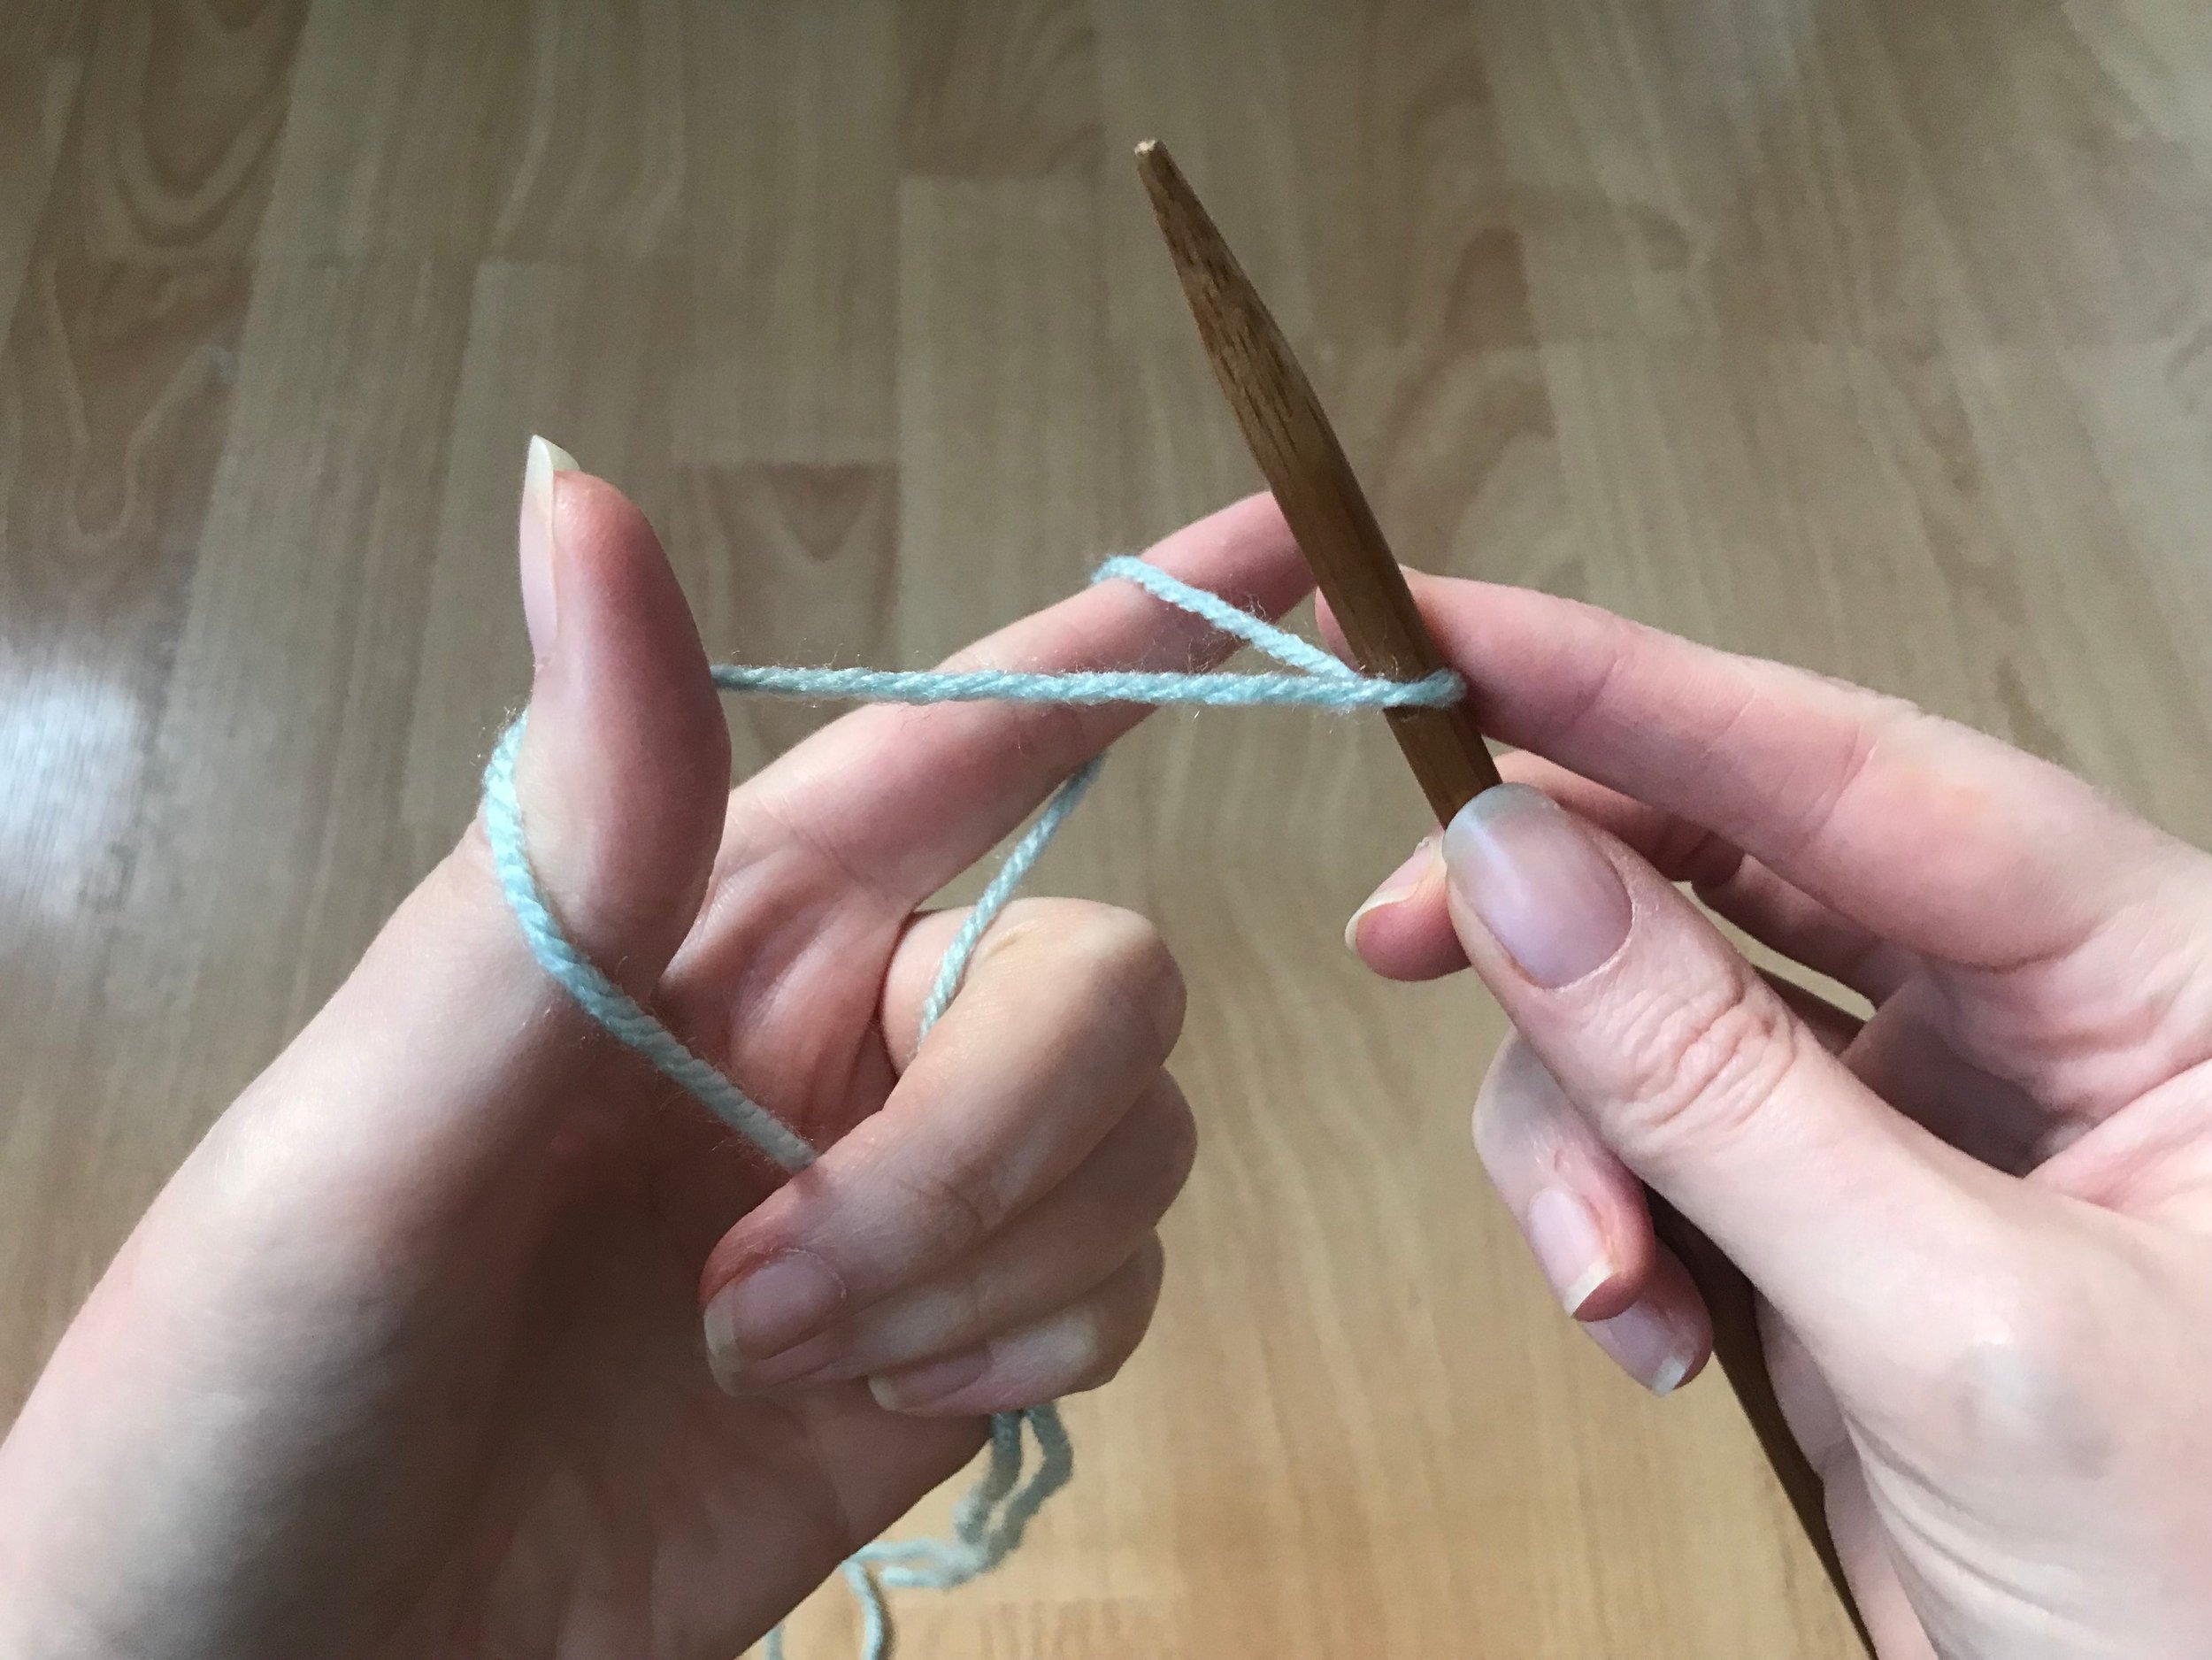
Open out your strands of yarn using your thumb and forefinger ready to begin working your stitches. Wrap the back strand of yarn from inside your fist round behind your forefinger. Wrap the front strand of yarn from your fist round the front of your thumb.

Pick up the front strand of yarn using your needle tip from in front of your thumb from bottom upwards. This creates a loop through which you will pull the back strand.

Now pick up the back strand of yarn from your forefinger from top to bottom, back to front. Pull this strand through the loop that you created from the front strand.

Draw the yarn tighter until the two strands combine to make a stitch on your needle.

Readjust your yarn if needed to keep a consistent tension and repeat these steps again until you have your desired number of stitches.

Tips & Techniques

Some practice is required to accurately gauge how long your yarn tail will need to be. When knitting larger pieces such as blankets, i recommend combining your yarn from two sources, e.g. the inside and outside of your ball of yarn, or from two balls of yarn with a knot. Centre your knot on your needle and work your stitches. You can then cut one length of yarn when all of your stitches are cast on without the risk of under- or over-estimating how much yarn you will need.

Chunky Knit Cushion Covers

Sarah Jane PitchfordComment

This cushion pattern is a basic starter to create a simple cushion cover. You can add some decoration, try using different colours, or leave your cushion plain for a cosy finish.

What you’ll need:

  • 500g Super Chunky Wool

  • 12mm Knitting Needles

  • Large Blunt Needle *

  • Scissors

  • 45cm (18”) Square Cushion Insert

    * this is an affiliate link, you can find similar needles elsewhere and you can even choose to use a crochet hook if you don’t have a wool sewing needle.

Tension & Sizing

When laid flat and not stretched your work should have six stitches and nine rows in a 4” (10cm) square.

This pattern gives instructions for a 18” (45cm) square cushion cover made with two identical panels. If you would like to change the size or shape of your cushion cover you will need to change the number of stitches cast on and/or the number of rows worked and the amount of wool accordingly.

Pattern

  1. Cast on 24 stitches using the long tail cast on method.

  2. Work in stocking stitch as follows:

    Row 1: Knit all stitches

    Row 2: Purl all stitches

  3. Repeat these two rows 23 times more until you have 48 rows in total.

  4. Bind off all stitches, cut your yarn leaving a 4” (10cm) tail and secure through the final stitch to end.

    It’s worth noting that my piece when laid flat was 21” (54 cm) long and quite skinny however that width shrinks to 18” (45cm) when the piece is stretched widthways to 18” (45cm). I held my cushion next to me and kept testing the size as I went to make sure that I didn’t make the panel too long or too short.

  5. Make your second panel in exactly the same way.

  6. When both panels are finished you can begin joining them. This cushion cover is seamed all the way around meaning that you won’t be able to remove the cushion insert to wash it so consider that when choosing the type of insert to use.

Joining Your Panels

  1. Lay your panels together right sides out, making sure that the grain of the work matches.

  2. Thread a long length of yarn onto your blunt needle and begin to sew the panels together using your mattress stitch.

  3. Work all the way around your cushion and secure the final stitch with a knot. Weave in and trim any loose ends and your cushion is complete and ready for decoration!

Decoration & Finishing Touches

Tassels and Pom-poms love chunky wool. Tie lengths of yarn to the outside edges to form a tassel border.
Make four pom-poms and attach one to each corner. Try different colours for a bit of flare.
Attach lengths of yarn on a diagonal to add a fringe and some extra texture.
Add a macrame panel by attaching lengths of yarn at the top of your cushion.

Summer Retreat into Knitting

Sarah Jane Pitchford
Adjustments.jpeg

After a year and a half in busy London working long hours and generally living on fast-forward, it took just two days in my family home in Norfolk before my creative urges began to resurface.

Lockdown has been an extraordinary experience for us all and I, like some many of us, have been surprised (and a little disappointed) by just how rudderless and uninspired I felt. Crafting has always been a retreat for me, something to focus on to forget the everyday stresses that can wear you down. Somehow, the extra time at home left me feeling distracted and anxious to an extent that even knitting could not aleviate!

IMG_1342.jpeg

Back in Norfolk and I am embraced by the quiet and the stillness. No busy streets, no sirens or car alarms, just a gentle breeze in the trees and the chorus provided by the birds. I soon found myself on an archeological dig through years of test patterns, frogged wool, and half-finished projects. After some serious detangling I found myself with a strong desire to finish something, nothing new but something old. I feel like I am trying to help tidy the world one loose end at a time.

I have been working on a cotton baby blanket, inspired by a friend who has recently completed her first ever knitting project. I have a limited supply of cotton yarn in a beautiful, soft ‘pebble’ shade which seems perfect for calming cuddles on a warm summer day. The pattern itself is simple and uses my faviourite stitch, the moss stitch, to create a pretty grid of squares.

Working with my friend to help her create her first baby blanket reminded me just how much I take for granted as a knitter. I wanted to make a pattern that looks great and intricate whilst also giving the knitted an easy to follow pattern which has in-built pattern checking features. Looking back I can recall the beginner errors that I made which, without a knitter friend to call for help, I found overwhelming and which made me give up so many projects.

I will be finishing the blanket and publishing the pattern over the coming weeks, taking my time for walks in the garden, of course.

Monday - Smaller but not necessarily faster...

Sarah Jane Pitchford
FullSizeRender.jpg

Today I have been trying out some new baby and toddler patterns. I love busy little prints and this lovely floral cotton from Higgs & Higgs was the perfect match for these little bloomers. I used a very simple pattern with four pieces sketched from my overalls template.  

I found a handy measurement table online to give me the waist and leg measurements but I will need to try these out on some willing toddlers to check the fit! The waist and leg openings use elastic to keep them in place whilst giving lots of room for cloth nappies.  

Traditionally worn under dresses nappy covers, knickers, or bloomers are great for keeping nappies hidden and for making little outfits even cuter. 


FullSizeRender.jpg

I love making clothes for babies and children, they seem to be more daring than adults when it comes to colours and patterns! Whilst the clothes are smaller they are certainly not simpler to design or quicker to make.

Children have sensitive skin that needs neat and soft seams, play time is serious business so clothes need to be tough and well fitted to make movement free and easy. Kids clothes use all of the same techniques as adults’ but on a smaller scale which can be fiddly when using a standard sewing machine. 

I’ve picked up a few tricks for creating neat and robust clothes, you can read more here about reinforcing seams ( http://sarahjaneseamstress.blogspot.com/2018/04/kids-dungarees-reinforced-seams-my-how.html?m=1 )which works really well with trousers and overalls. 

More baby & kids clothes will follow subscribe to my blog to get updates about new products and patterns! SJ

Sunday - Day Dreams of Summer

Daily UpdatesSarah Jane PitchfordComment

Sunday’s are, in my opinion, best reserved for pottering about. I seem to have picked up and put down half a dozen tasks today but have made at least a little progress with each. I spent a fair part of the day looking out of the window at a seriously grey day and hoping that thinking hard enough about summer might somehow bring it about. I worked a little more on my summer designs and, although the colours are purely for decoration and will not represent the fabrics that I will eventually use, I felt drawn to bright, summer colours. 

IMG_0878.JPG

I’m currently working on several new knitting and crochet patterns which I am loving.  Yet again I am being drawn back to this super chunky cable jumper as it both serves to ward off the cold and brings a sunny flash of colour. I hope to have the first draft ready for some friendly pattern testers within a week or two. 

FullSizeRender.jpg

I have added a few things to my to do list and have a batch of post it note ideas to mull over. I have two new projects in the works which should be finalised in the next week so I feel all set for Monday morning! 

I hope you enjoy the rest of your weekends, SJ  

Saturday - Designing & Drawing Clothes

Daily UpdatesSarah Jane PitchfordComment
IMG_0856.JPG

For me Saturday is a half way house between the working week and the weekend; I start late, have a proper breakfast while I check the headlines, check social media then I set about having a leisurely tidy up and start to think about some new projects.

Without the structure that I impose Monday - Friday I tend to get on to the little sparks which haven’t quite germinated into proper ideas yet. One of my goals for January is to finally settle on my Spring / Summer designs. I have some sketches and vague notions of frills, linen, and some colour palates but nothing is set in stone. Saturdays are perfect for settling down at my desk with pens, pencils, and paints ready to get those fancy notions down in ink and paper.

Essentially, Saturday is a day of ideas and I am content just to make mental progress without having to end up with a finished product at the end of the day.

Drawing patterns has been a new experience for me. The amazing designs that inspire me so much seem so effortless with sweeping lines and drafted female forms. When it comes to making my own my first attempts were shockingly bad and I was more than glad that they were just for my eyes. I have since done some research online and have found so many amazing resources to help budding designers like me.

Step 1 - Get a template form, known as a croquis, and use this for every design, this will keep your designs consistent and will ensure that you’re covering all aspects of your design in each set of drawings.

You will need to find a croquis that suits you and the designs that you are making. There are two styles that I have found, one uses regular person proportions and the other is a more ‘catwalk’ style which elongates the form, this is supposedly better for showing off your designs. You can find templates and inspirations here: (NB: I don’t have any affiliations with these sites I just found them useful)

How to draw your own croquis

Get some ready made templates

Once you have your template you can be modern and make your designs digitally, or, like me, use regular pencils, paints, and pens for your designs. I have my forms on paper which I then trace when I make a new design.

Once I have a drawing that I like I go back to the drawing board and consider how to make this design possible. What fabrics will work to create that particular drape, how will the pieces be joined, how practical will the finished piece be to wear? My final designs come in three stages; the pretty croquis, the blue print style diagram with exploded detailed sections, and, finally, the pattern pieces sketches with basic joining instructions.

Over the next few weeks I hope to have my new designs penned and I will be happy to show these to you. As ever I would be interested in hearing from you about your experiences of drafting, designing, and of making your own clothes. Thanks for reading, SJ.

Friday - Taking Stock & Making For Myself

Daily UpdatesSarah Jane Pitchford1 Comment

This week has seen my start my New Years Resolution part of which is to take stock of my progress.

I first began to sew when I was unable to find clothes to fit my taller-than-average frame. I was a teenager and was approximately 6” taller than any other girl I knew. My ankles were routinely shown off to the world by trousers too short, my sleeves constantly pushed up to the elbow to hide the fact that they didn’t reach my wrists and don’t get me started on finding a swimsuit. Being a teenager is hard enough without feeling like you will burst out of your wardrobe!

I would to buy larger clothes and cinch them in at the waist, albeit very roughly, until I began to get a sense of how clothes were made and how they could be taken apart and put back together. Frankenstein-ing my way through my wardrobe I learned to tailor what I could and to hide my height and size.

As an adult I invested in a dress-makers dummy and soon I had requests from friends and family to tailor jackets, to lengthen tops, or to shorten hems. All was practice which lead to me to feel that sewing and creating was what I wanted to do all day every day. I started to feel that I could make clothes to fit my body and that I would not have to try in vain to fit my body into ‘off the rack’ clothes. Not only was my wardrobe (and confidence) building but I knew that I wanted to share this new skill with others.

Inspired by a good friend, Nina, who had launched her Etsy shop to great success, I ventured tentatively into the world of online selling. I created some cushion covers and opened my Etsy shop. Cue a nervous wait of over a month until my first sale ‘cha-chinged’ its way into my life.

It was another few months before I gained the courage to leave my full time job in London. I knew if I was ever to make this business viable I had to remove the excuses and safety net of a paying job. Since then I have increased my online sales, taken stalls and pop-up markets by storm, and have now created my own website. I am still learning a great deal every day and I have a long way to go but I now feel that I have a solid grounding on which I can build my own future. That may sound a little trite but the sense of freedom and responsibility that comes from owning your own business, being both free to choose and entirely responsible for the consequences of your choices is quite surprising and, I am now realising, what I have always wanted. I always sensed that the 9 to 5 life was not for me…

This week alone I have settled into my new routine, bolstered by the new year I aim to write everyday, to reach out to people everyday, and to complete at least one new project everyday. I am finding that sharing my progress helps me to take stock, to evaluate, and to appreciate how far I have come.

You can see my latest projects below and, as always, I would love to hear from you. What’s your new goal or resolution? Have you tried any new projects or been inspired to take a big step? Have a great weekend, SJ

This week I have:

~ Created a new hat pattern - Chunky Cable Hat Pattern

~ Posted a new beginner’s crochet pattern & tutorial - Super Chunky Crochet Throw

~ Ventured into the city to pick up some fabric and inspiration….

~ Used that fabric to create some new PJs for myself!

~ Started work on two new patterns ~ Super Chunky Horseshoe Cable Jumper & Chunky Ripple Crochet Blanket

~ Added new products to my website shop ~ Double Duvet Cover Set

Chunky Cable Hat Knitting Pattern
Norwich Fabric
Ripple Blanket
Super Chunky Crochet Throw
Floral PJs

Thursday - Chunky Cable Hat Knitting Pattern

Knitting Patterns, Daily UpdatesSarah Jane Pitchford1 Comment
IMG_0836.JPG

The weather has been completely up and down today and the need for knit wear is still very apparent! We’ve had rain, bright blue skies, snow, and hail. Some of my most popular knitted items and knitting patterns feature chunky wool and cables, there’s something quite special about a cable knit item.

My latest pattern uses plaited cables along side garter stitch to make a soft, repeating design which is easy to master for those just starting out with hat making. You can find the knitting pattern here or, if you’d rather have the hat ready made, you can find the hat with your choice of pompom here.

IMG_0821 (1).jpg

The hat is knitted from the bottom up with circular needles; this means that the hat can be made without the need for seams. Sewing seams is a great rival for least favourite thing to do, just one place behind weaving in loose ends…

I use Cygnet Chunky wool which is 100% acrylic, I like to use animal friendly materials where every possible and I love Cygnet products. The chunky wool is, as you might expect, lovely and chunky but also soft and itch-free for all of us who don’t like to wear animal wools. You could use any chunky wool for this pattern and, with a little scaling you could adapt this pattern for use with a thinner or thicker wool.

I like to finish my hats with a pompom, sometimes a wool pompom to match the hat and sometimes I go all out with a faux fur pompom, you can find these hand sewn faux fur pompoms in my shop, too.

The pattern is available now in my shop and also on Ravelry. I would love to hear your thought on the pattern. If anyone is keen to start making their own hats but you’re unsure about knitting cables or about knitting in the round please let me know - I am always looking for new ideas for my ‘How to…’ blogs. Happy knitting, stay warm! SJ

Wednesday Morning - Getting Out & About

Daily UpdatesSarah Jane PitchfordComment
IMG_0851.JPG

Every Wednesday morning I set out by bus for the city centre for a driving lesson. Years of living in central London have left me completely reliant on public transport and the occasional taxi. Moving to the country and starting a business has been a major change and the need for my own means of transport is becoming more and more apparent. Whilst the driving lesson fills me with nerves I love the uninterrupted journey time on the bus as it gives me two sessions to design time, I usually devote this time to knitting which helps the journey to pass in no time at all.

Knitting out in public always seems to bring a few odd looks and, more often than not, a comment or two. I’m always pleased to have a chat and to explain what I am making, many people like to share their own experiences and to swap tips on techniques or favourite yarns. Some of the most heart warming comments are from people who remember fondly a loved one knitting; a grandmother, a mother, a spouse, always kind memories of treasured knitted items. I often find myself reassuring those interested in knitting that it is easier than it looks and that anyone is capable of creating something beautiful with a bit of practice. I hope that while I make progress with my projects I might also infect others with the knitting bug!

IMG_0857.JPG

Another great benefit of visiting the city each week is a chance to visit the independent shops and market vendors. I picked up some beautiful cotton fabric which I plan to use for some PJs. The market is such a great place for shopping, there is a great mix of established vendors and pop-up stalls which change on a regular basis meaning that there’s an ever-changing source of inspiration.

All this means that my regular day starts a little later on a Wednesday but with an added boost of inspiration from the bustling city and a little extra progress made with my latest WIP (see my Super Chunky Jumper Pattern post to follow…). SJ


Tuesday Morning - The Average Morning Workspace

Daily UpdatesSarah Jane PitchfordComment
IMG_0828.JPG

Something that surprised me a little about opening my little shop was the time that is eaten up my admin and social media. I worked for many years in an intense office-based job yet somehow in my dreams of a creative business all those emails, invoices, and paper chains were mystically missing.

In an effort to keep organised and focused on creating I devote my early mornings to admin, a little social media, and keeping my shop up to date. I start with a coffee and, when possible !, a clear work space. I work through my listings and I check my emails and shop enquiries.

I love to hear from shoppers, sometimes its a new order, sometimes a request to make something new just for them. The best messages of all are those thanking me for the items that I made for them. Often when an order is sent off I don’t hear much in response, sometimes just some stars in a review but no comment so its extra special to receive a comment of thanks and a photo of the finished item in its new home.

Today, I am updating the shop with the new products that I made yesterday. My Duvet Cover Set that I worked on yesterday is ready for the virtual shelves so that means some set-dressing and a mini photo-shoot. I am so happy with the way that it turned out and I now have the template pattern ready I can work on some matching new designs.

The rest of today will be working on my bedroom designs and finishing a new knitting pattern - I am in the trial phase and am close to finishing my last trial piece so I hope to have the new Chunky Cable Hat pattern posted this week.

I’d love to hear from you, how do you start your day? Any tips for a small business owner trying to get to grips with working from home? SJ

Monday Morning - Creating New a New Product

Daily UpdatesSarah Jane Pitchford1 Comment
Tools of the trade: fabric, cutter, tape and ruler, and coffee...

Tools of the trade: fabric, cutter, tape and ruler, and coffee...

Working from home can lead to some blurring of boundaries between home life and work life, especially with a creative business. I have spent the past year turning my hobbies and passions into a job so knowing when my work day ends and my relaxing time begins can be tricky to decide.

My plan for 2019 is to make a plan and stick to it; to focus my energy on those essential projects that will meet the demands of my little shop. All too often my personal passion for creating and helping others to invent their perfect item leaves me working furiously on a series on one-offs while my ‘to do’ list gets ever longer.

This year I am starting as I mean to go on by ticking off those essential items that have been waiting patiently for so long! Last year I made a series of bedding sets which sold out so quickly, I knew straight away that hand made bedding with interesting designs were in demand yet I never quite found time to plan, design, and create a new range.

Renforce Mini Mésange – offwhite.jpg

This beautiful grey song birds motif cotton is perfect for the bedroom, I am beginning with a duvet cover set and I will be working on a range of other bedroom textiles to match; bed runners, throw pillows, curtains, etc., all to be added to my ‘Home’ shop in the weeks to come.

Once I have the patterns made and I have tested these patterns I can start the next exciting part of the process - hunting for fabrics. Choosing fabric is such a personal thing, I try to look for two things - something I would love to have in my home and, secondly, something that I know I would see in a friend’s home and be envious of! The best part of creating for others is being able to use fabrics and materials that you would never choose for your own home or your own wardrobe; pushing boundaries and hoping that your clients will fit neatly within those boundaries.

So that’s my Monday morning planning / thought session. Updates on my new bedding sets will follow. In the meantime I would love to hear from other creatives about your process, SJ.

Super Chunky Crochet Throw Pattern Tutorial

Crochet PatternsSarah Jane Pitchford1 Comment
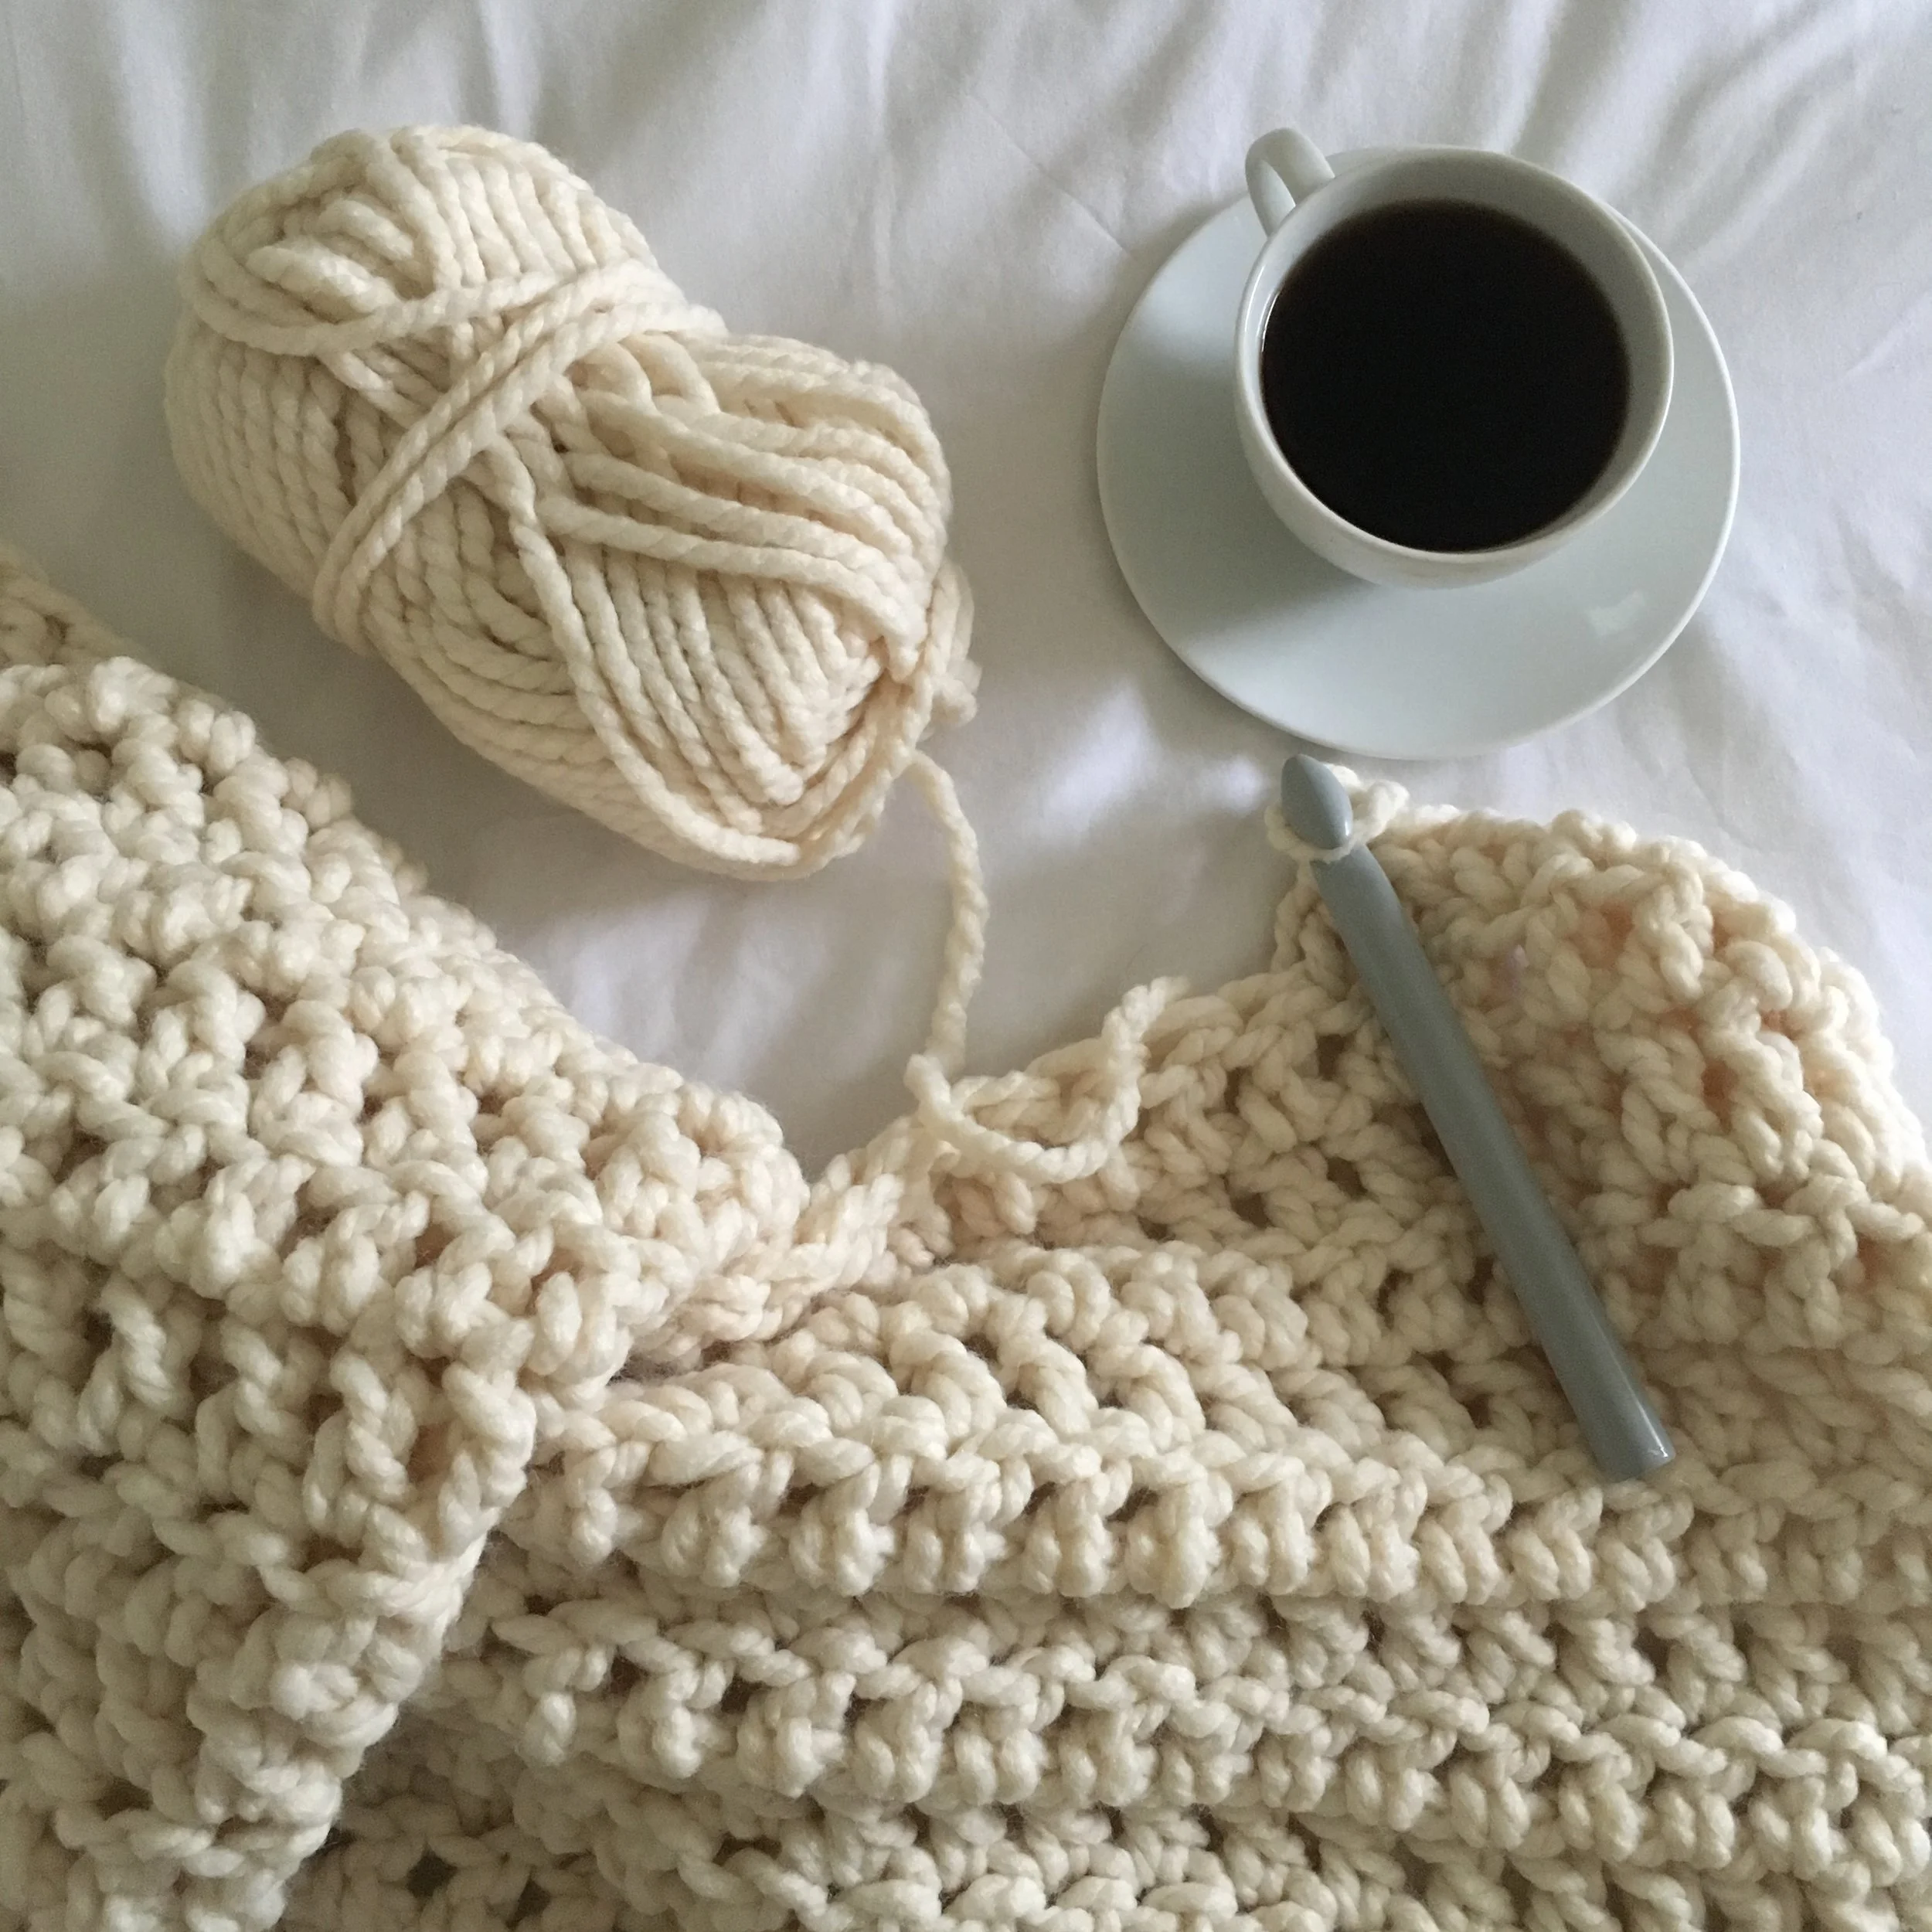
Coffee and Super Chunky Crochet Throw

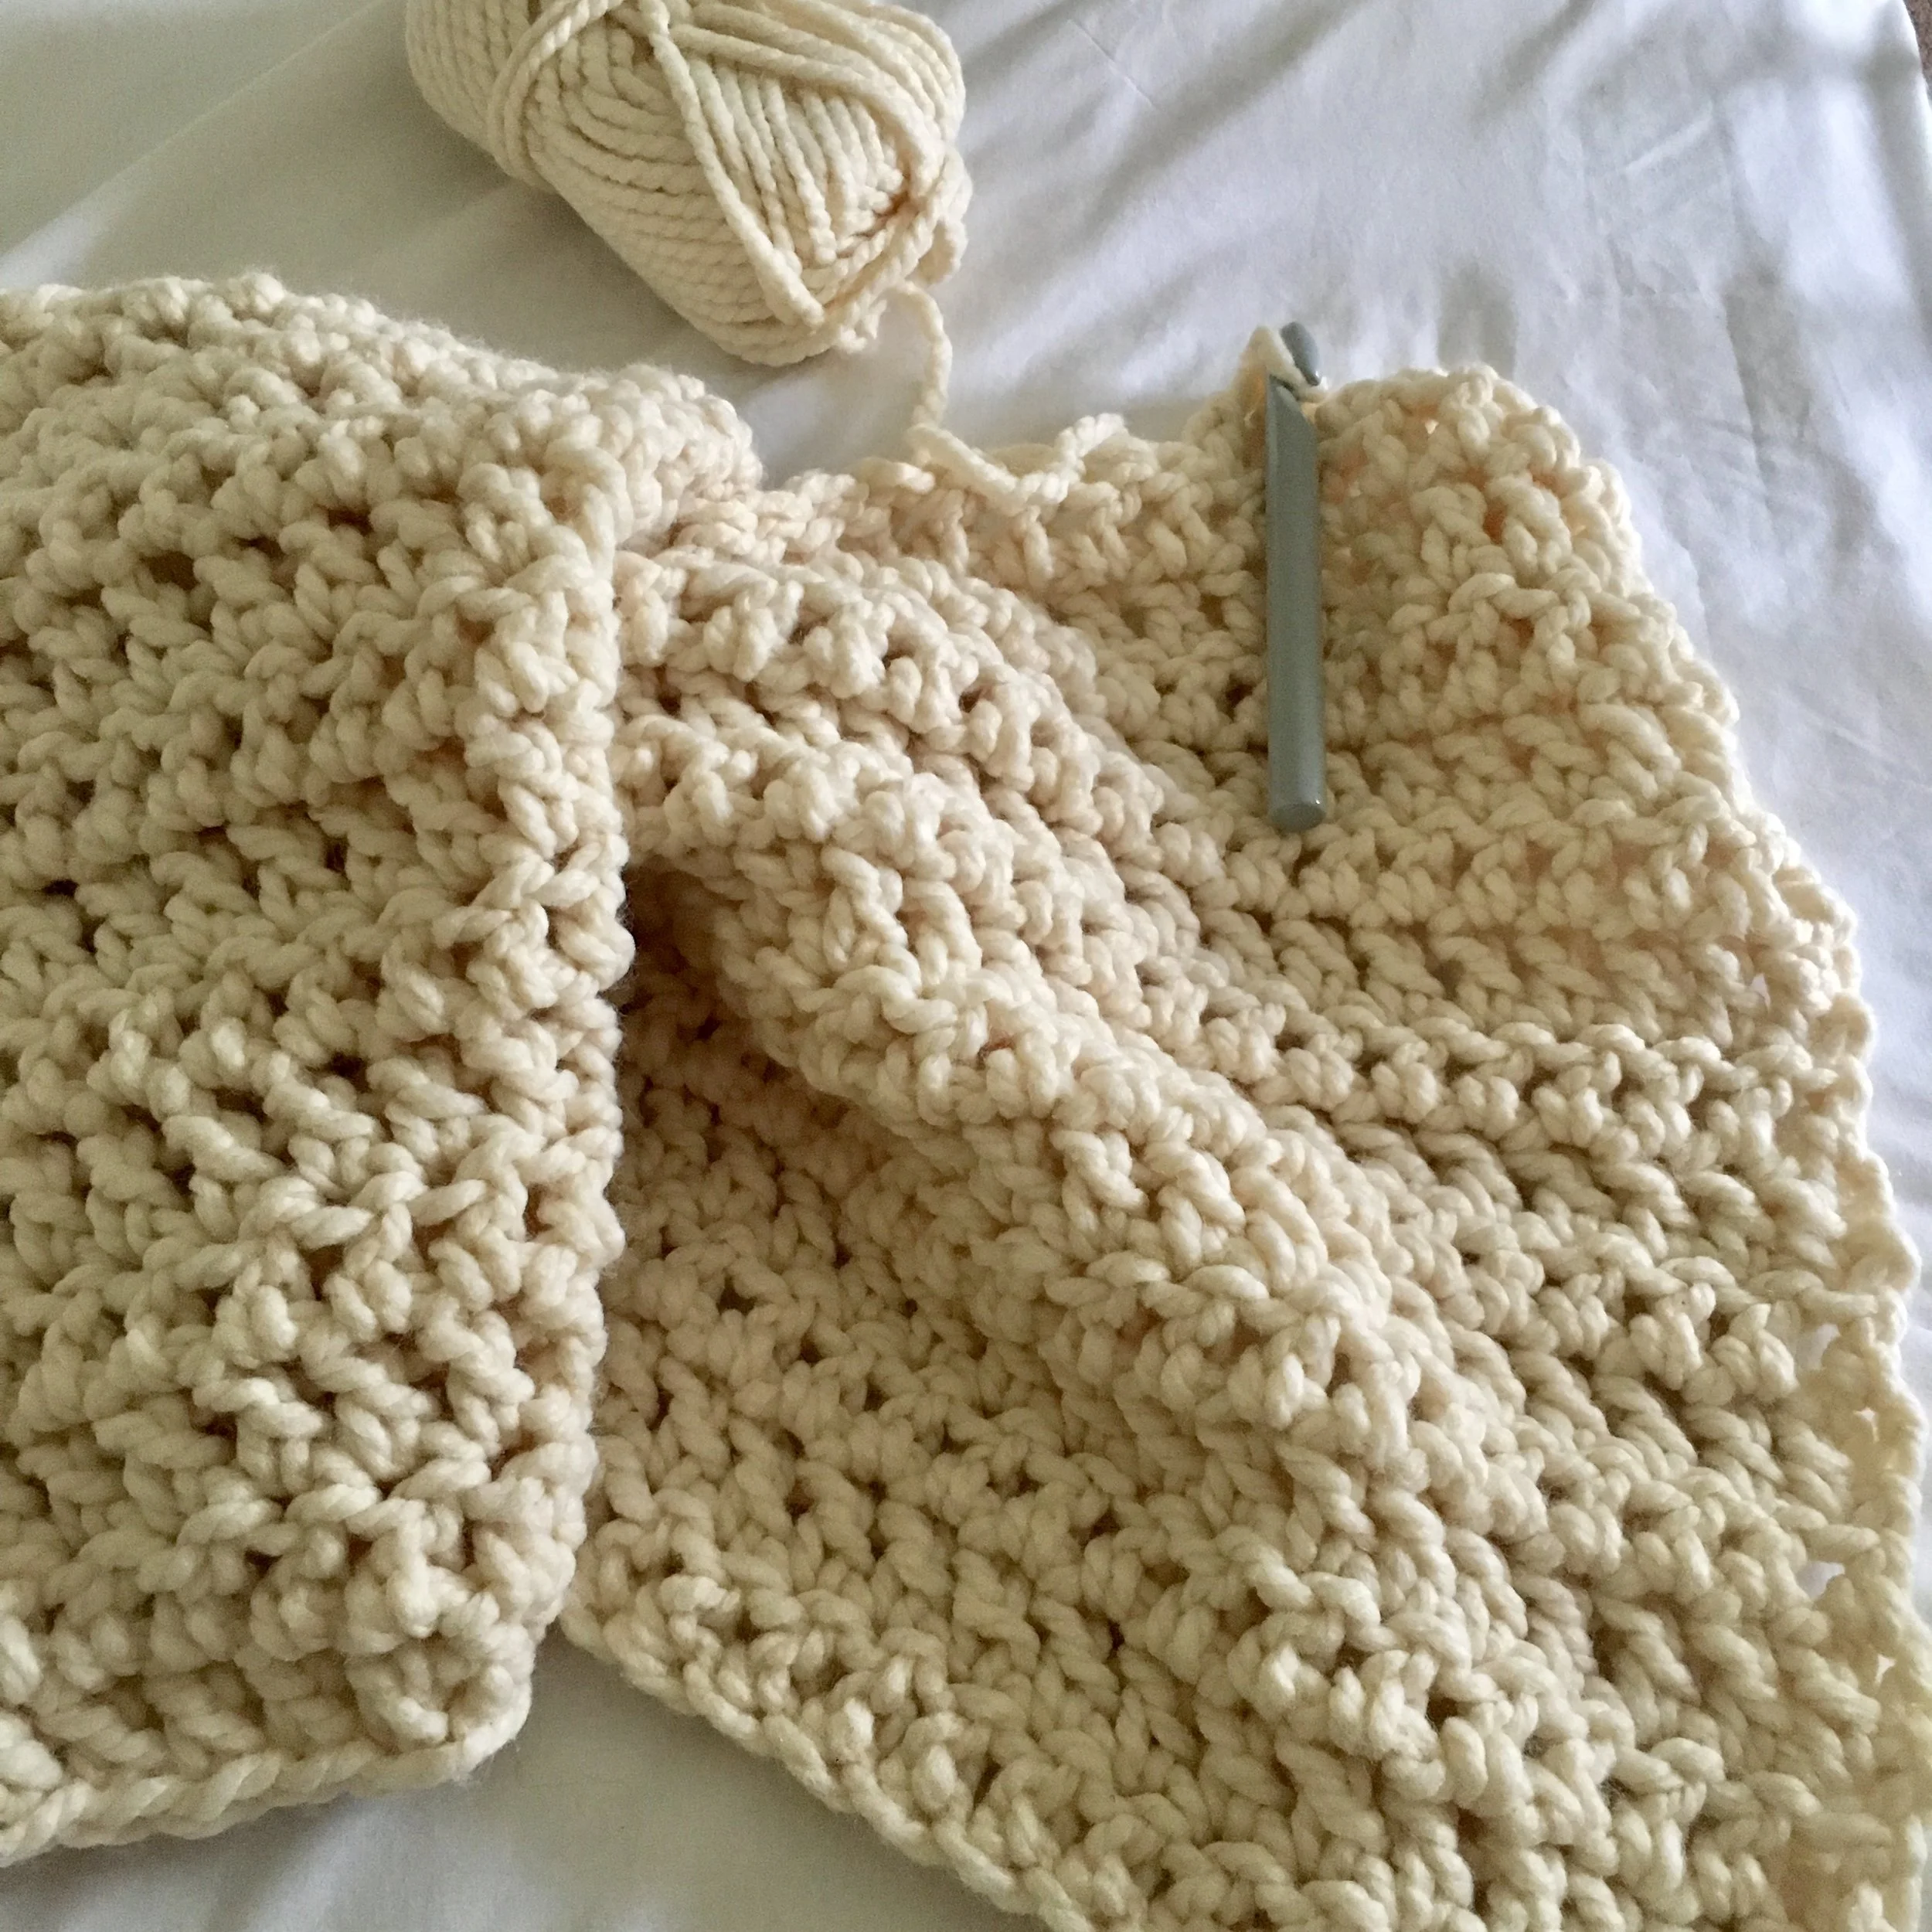
Super chunky wool and a big crochet hook make this crochet throw a speedy project perfect for beginners.

A treble crochet is an essential stitch for any crocheter’s repertoire, this pattern is simple and easy to master.

Super Chunky Crochet Throw

You can download this pattern for free from my shop here.

You will need:

· Super chunky wool

· Small throw - 11 x 100g balls

· Large throw - 17 x 100g balls

· 15mm crochet hook

· Blunt needle

Tension & Sizes

The super chunky stitches are very large, you should have approximately 4 stitches and 3 rows in a 4” (10cm) square.

The blanket pictured measures 50” (125cm) across and 40” (100cm) long. You can alter the size of your throw by working more or fewer rows and/or by adding more stitches as indicated in the pattern. The pattern gives instructions for a small throw (40” x 50”) first with the large throw (50” x 60”) instructions in brackets.

Abbreviations

St - stitch(es)

Ch - chain

Tcr - treble crochet

Pattern

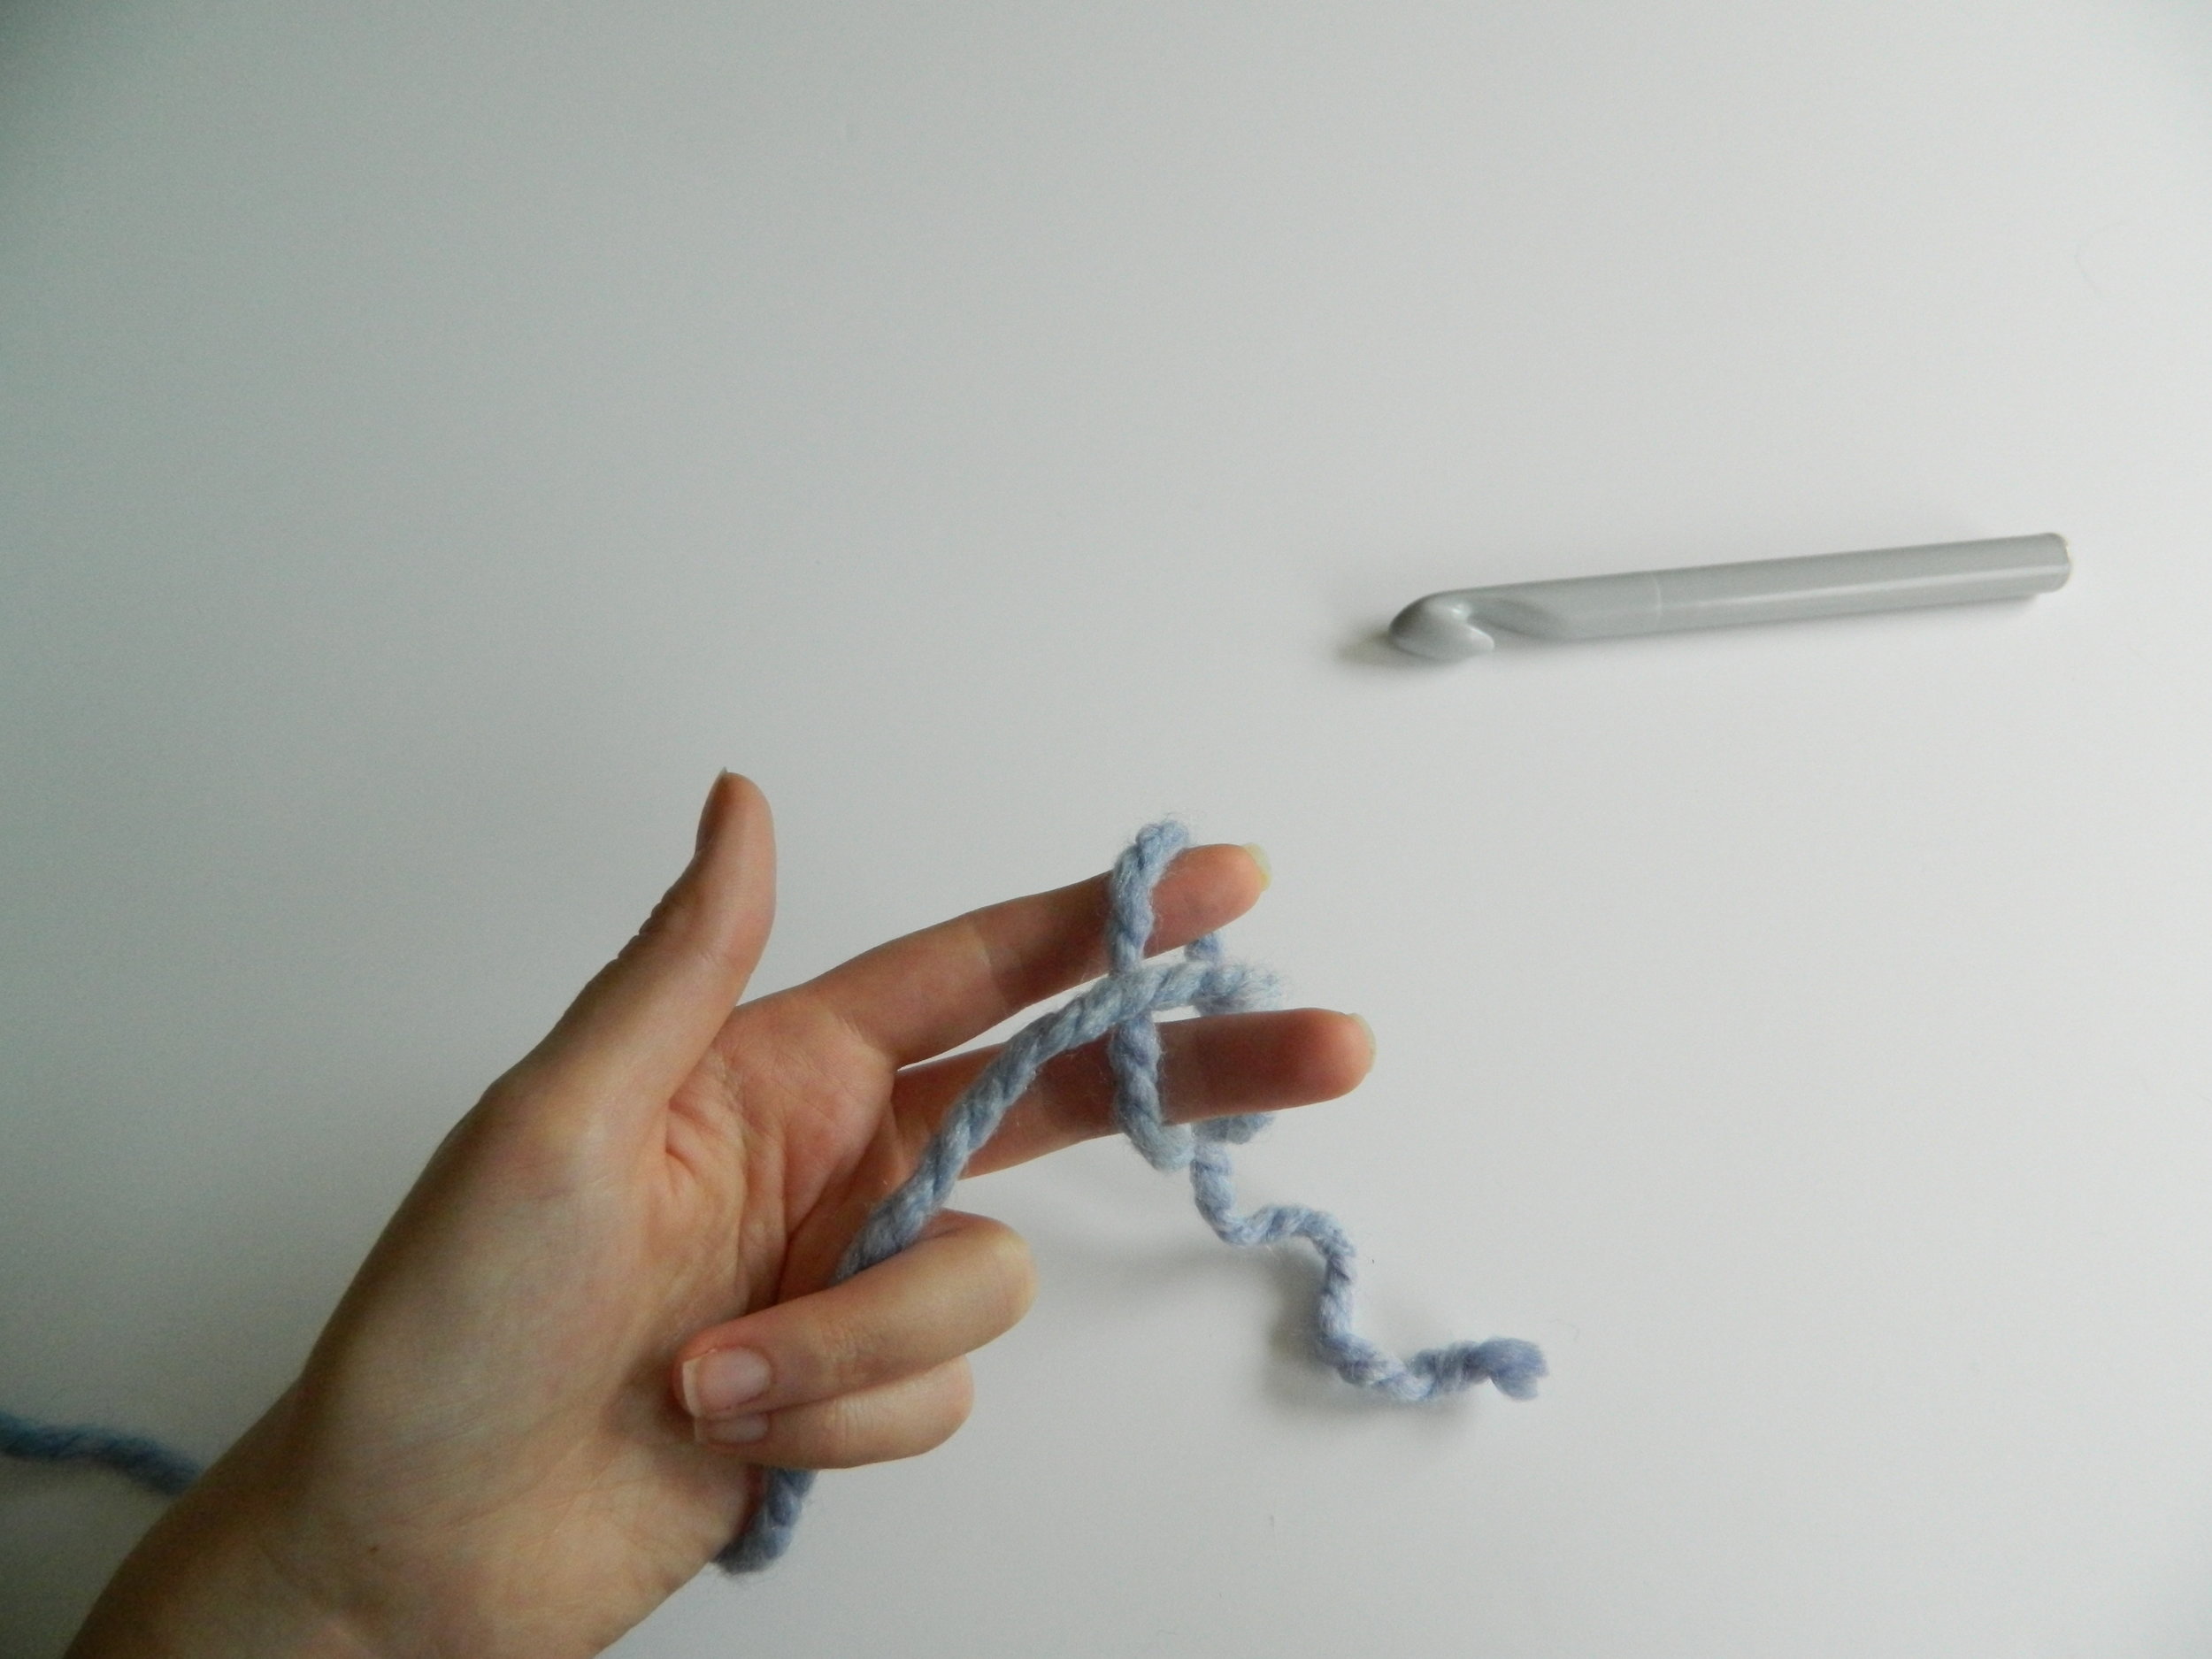
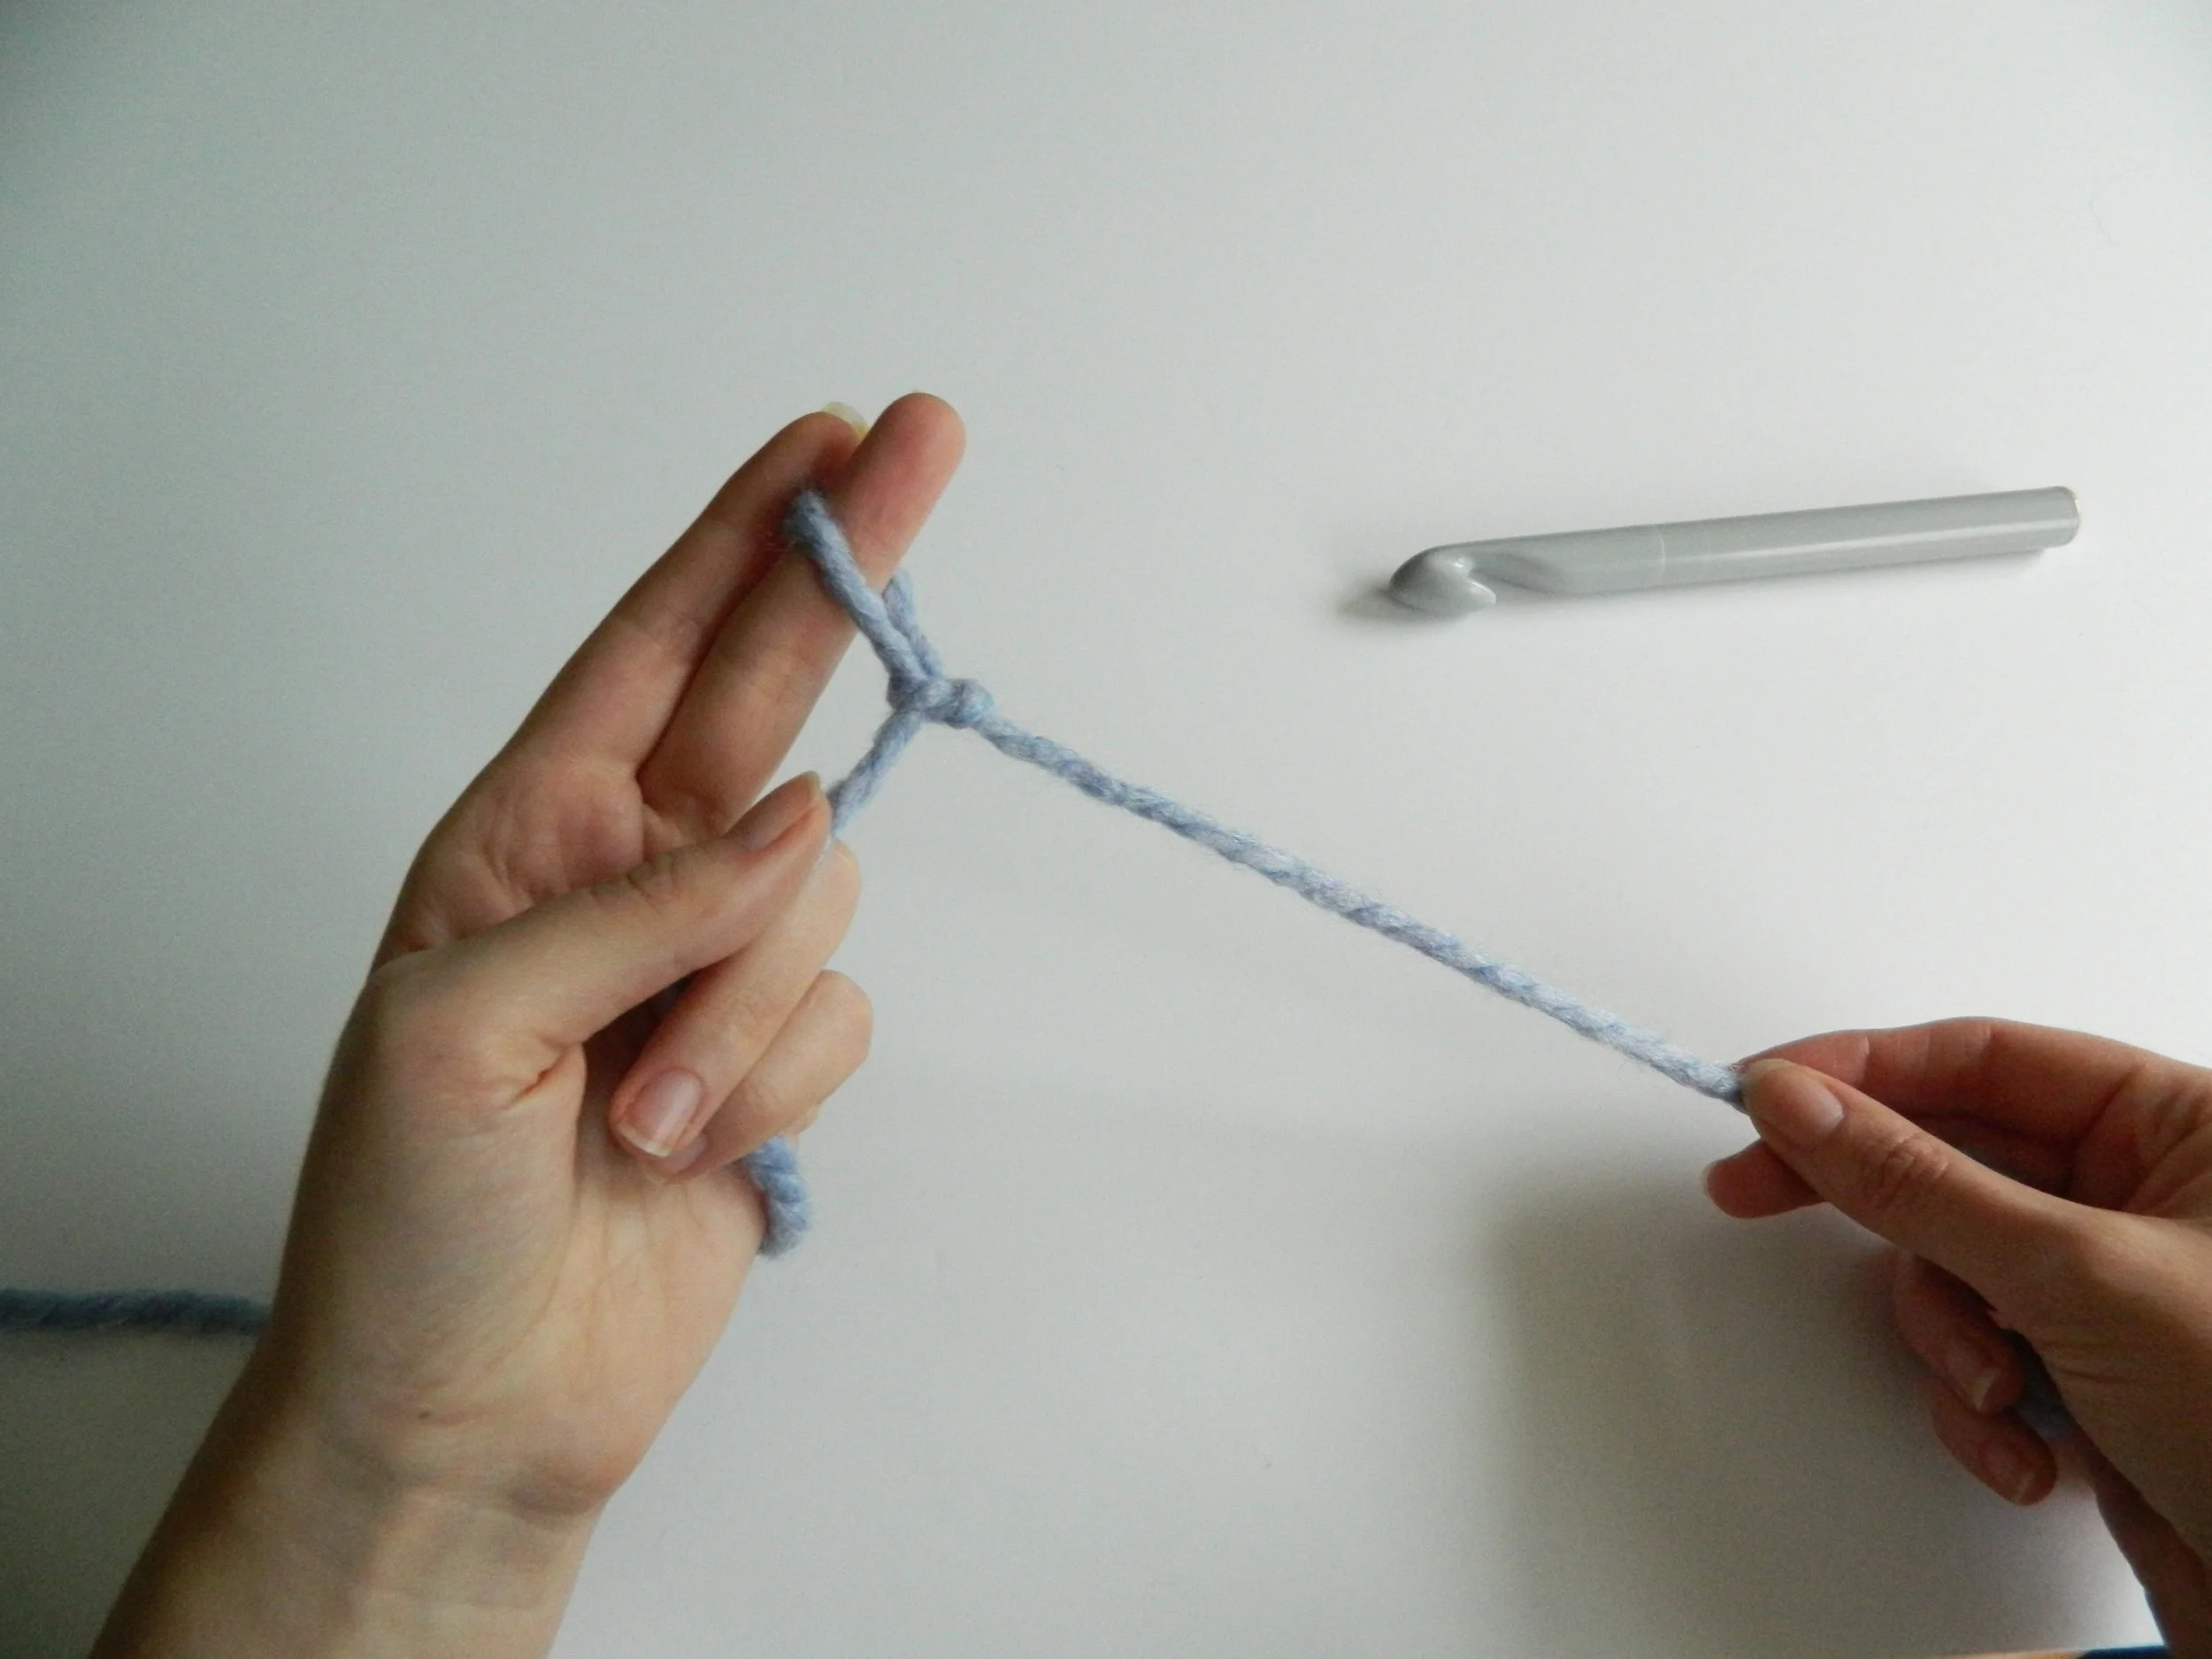
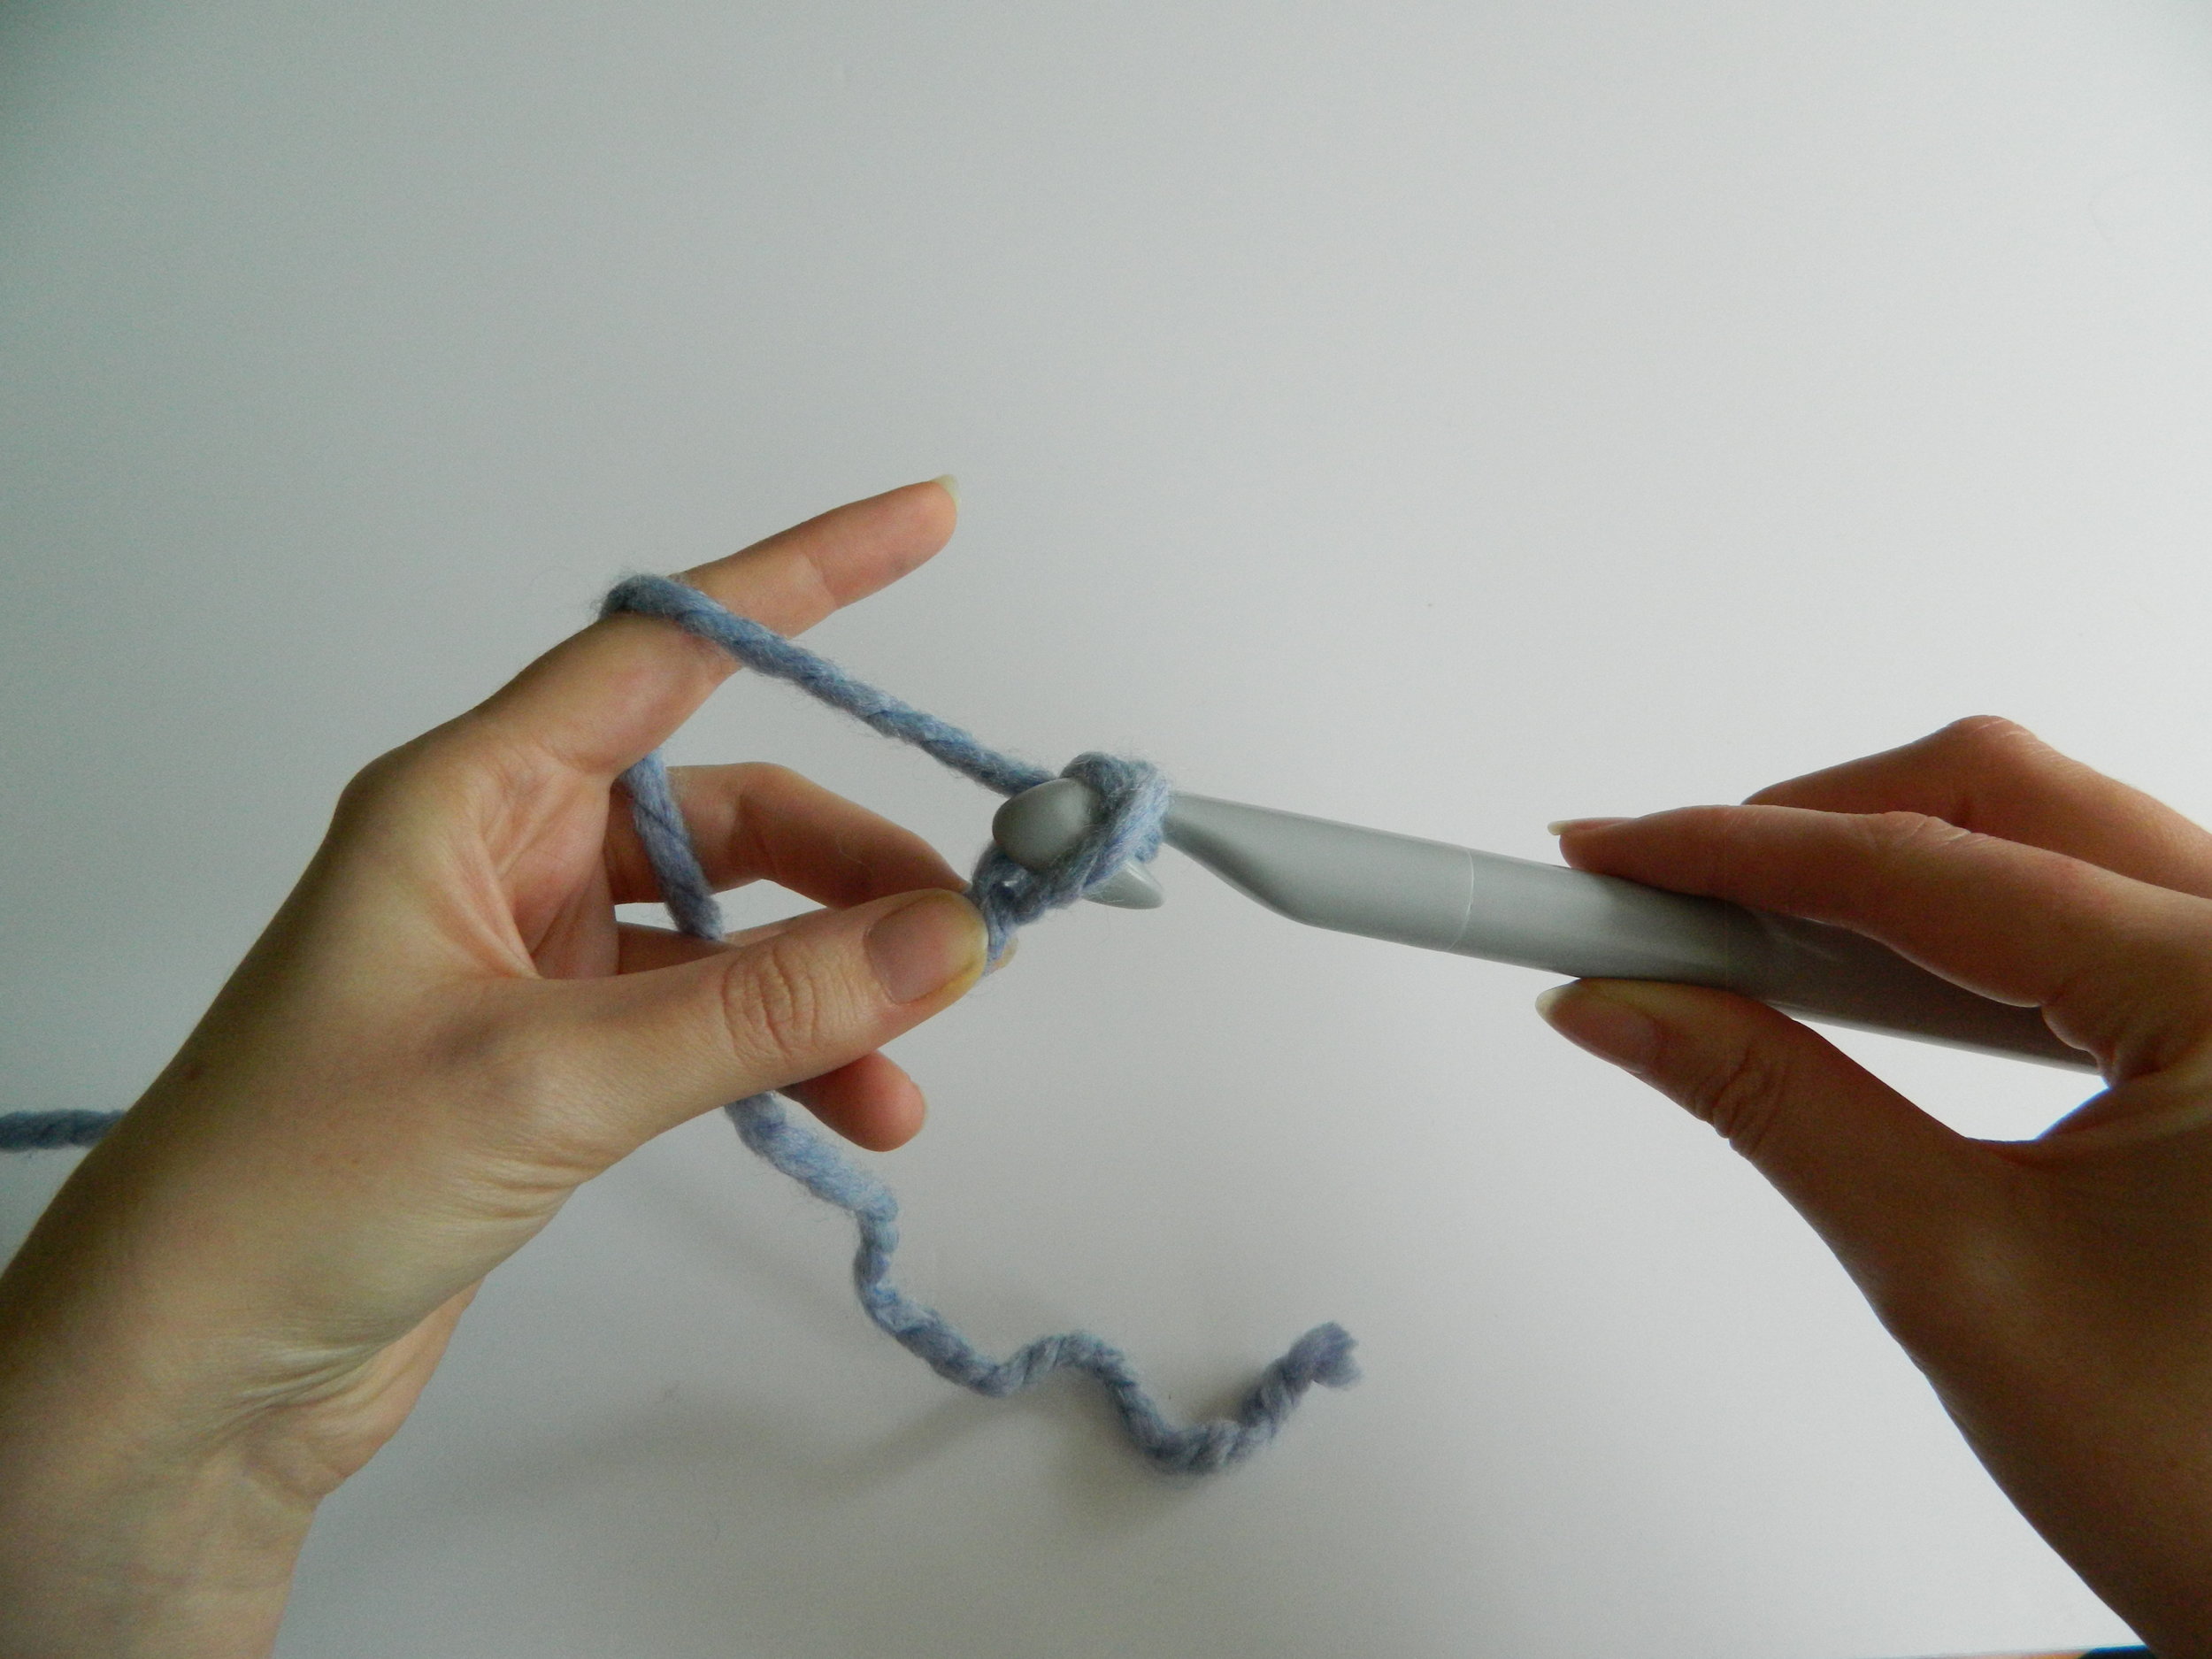
Step 1: Create a slip knot and place this onto your crochet hook ready to begin.

1.1

1.1

1.2

1.2

1.3

1.3

1.4

1.4

1.5

1.5

1.6

1.6

Wrap your yarn around your index and middle fingers (1.1), slip the left strand over the right and hold between your two fingers (1.2), slip the top strand over the middle strand and hold under your middle finger (1.3), your slip loop will now be hooked on your middle finger (1.4), place this loop onto your crochet hook and pull tight (1.5).

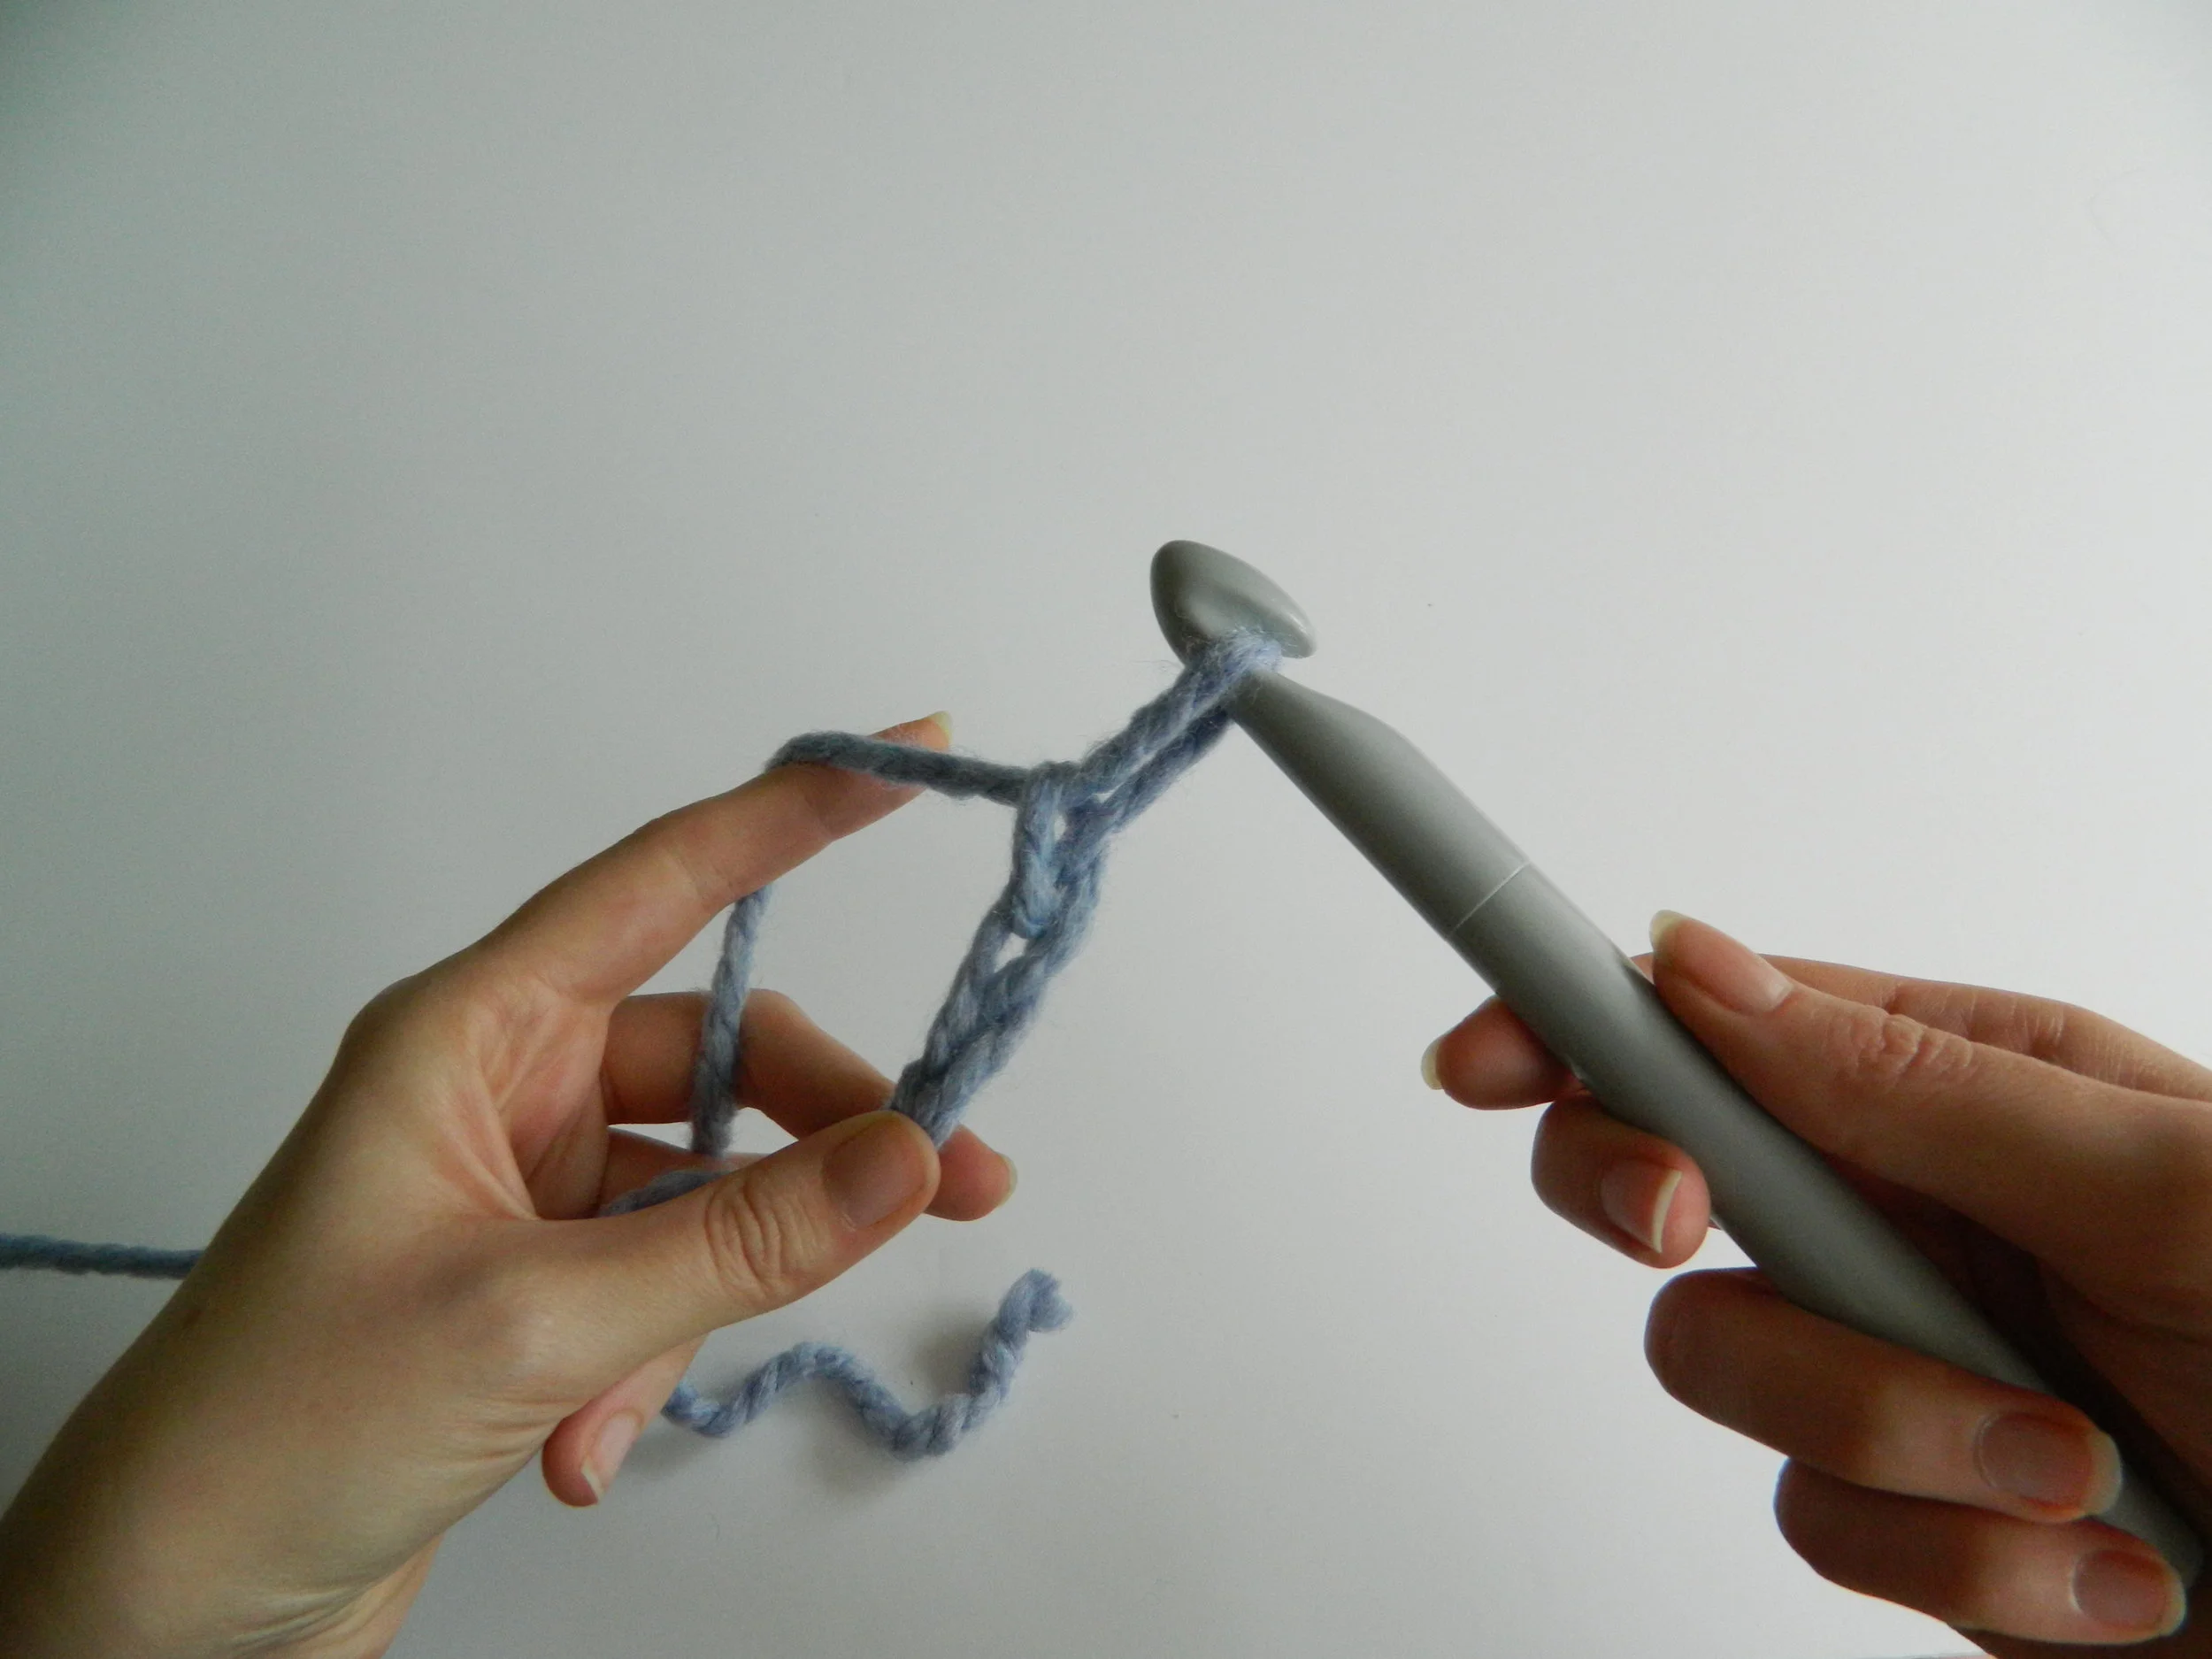
Step 2: Chain 44(56), this is the foundation row of stitches into which you will work your next row.

2.1

2.1

2.2

2.2

2.3

2.3

Hold your hook in your right hand and your yarn with your left, wind the yarn between your fingers to give you a good grip on the yarn (2.1 - 2.2). Hook your yarn with the hook and pull this through the loop on the hook (2.2 - 2.3).

2.4

2.4

2.5

2.5

2.6

2.6


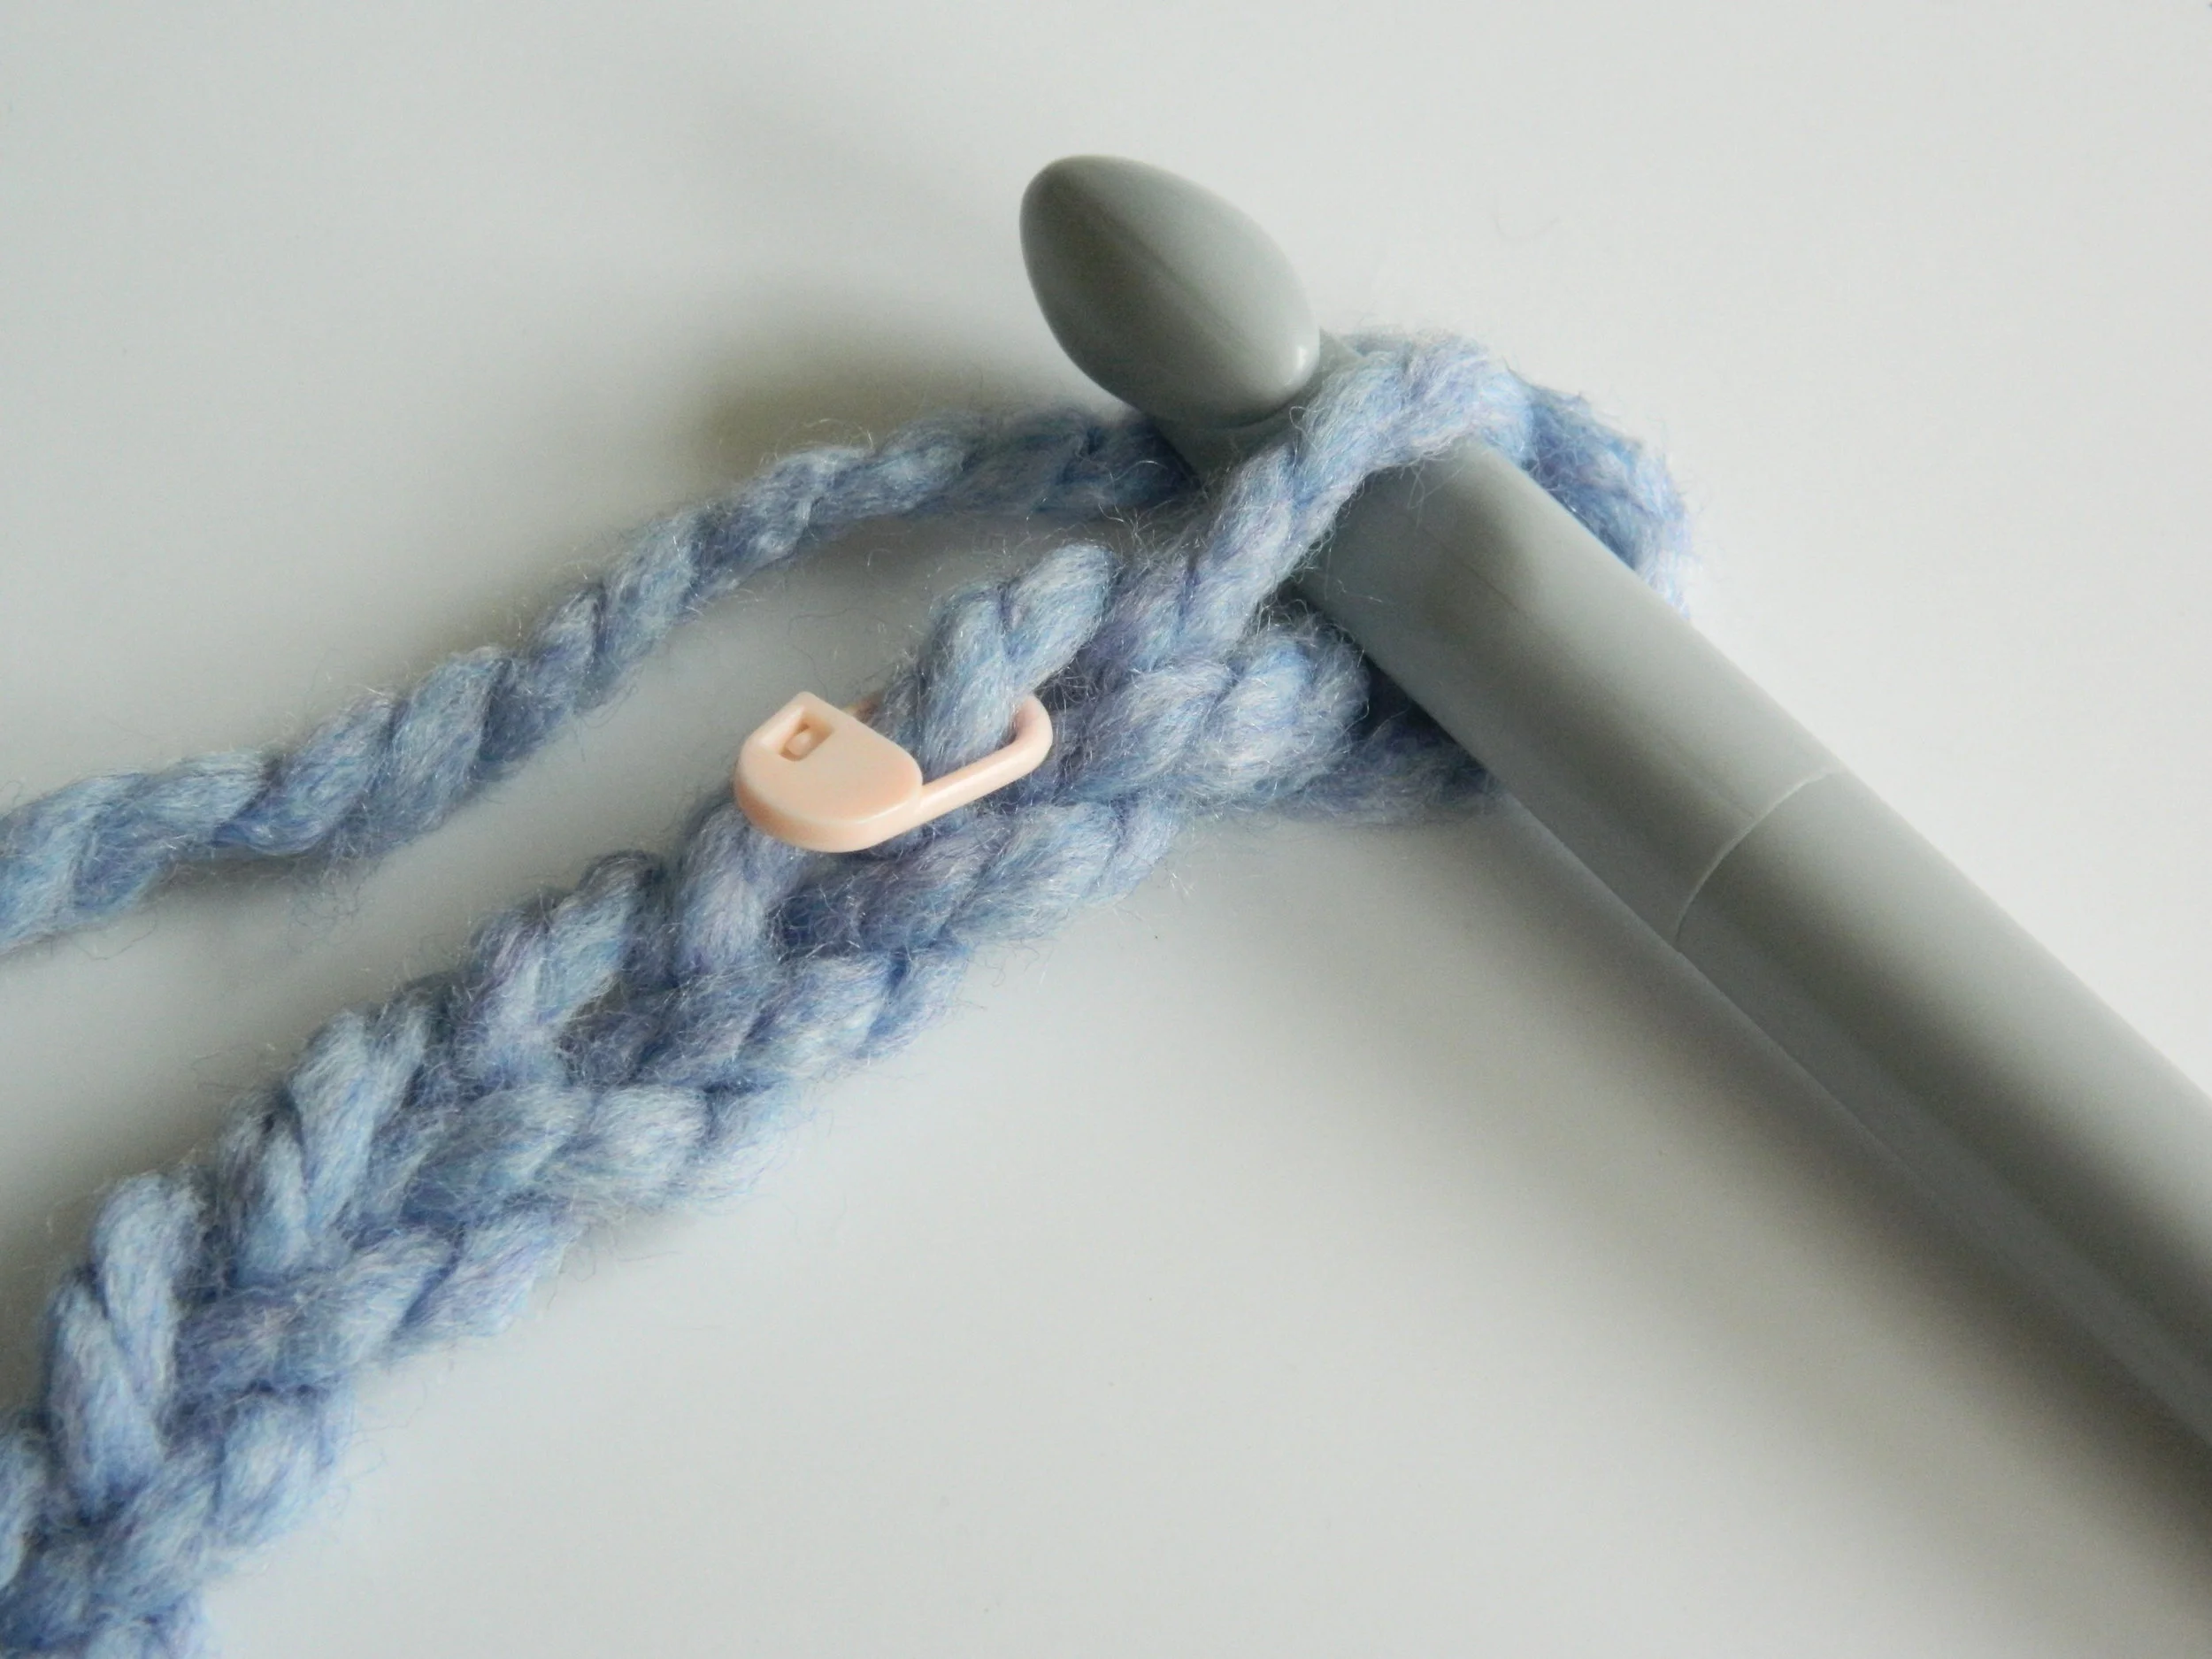
Repeat this process until you have your desired number of stitches. Place a stitch marker on your final chain to help keep your place (2.7).

2.7

2.7

Step 3: Ch 2 to create the height of your first stitch. Now, work one tcr into the first stitch and every stitch to the end of the row.

3.1

3.1

3.2

3.2

3.3

3.3

3.4

3.4

3.5

3.5

3.6

3.6

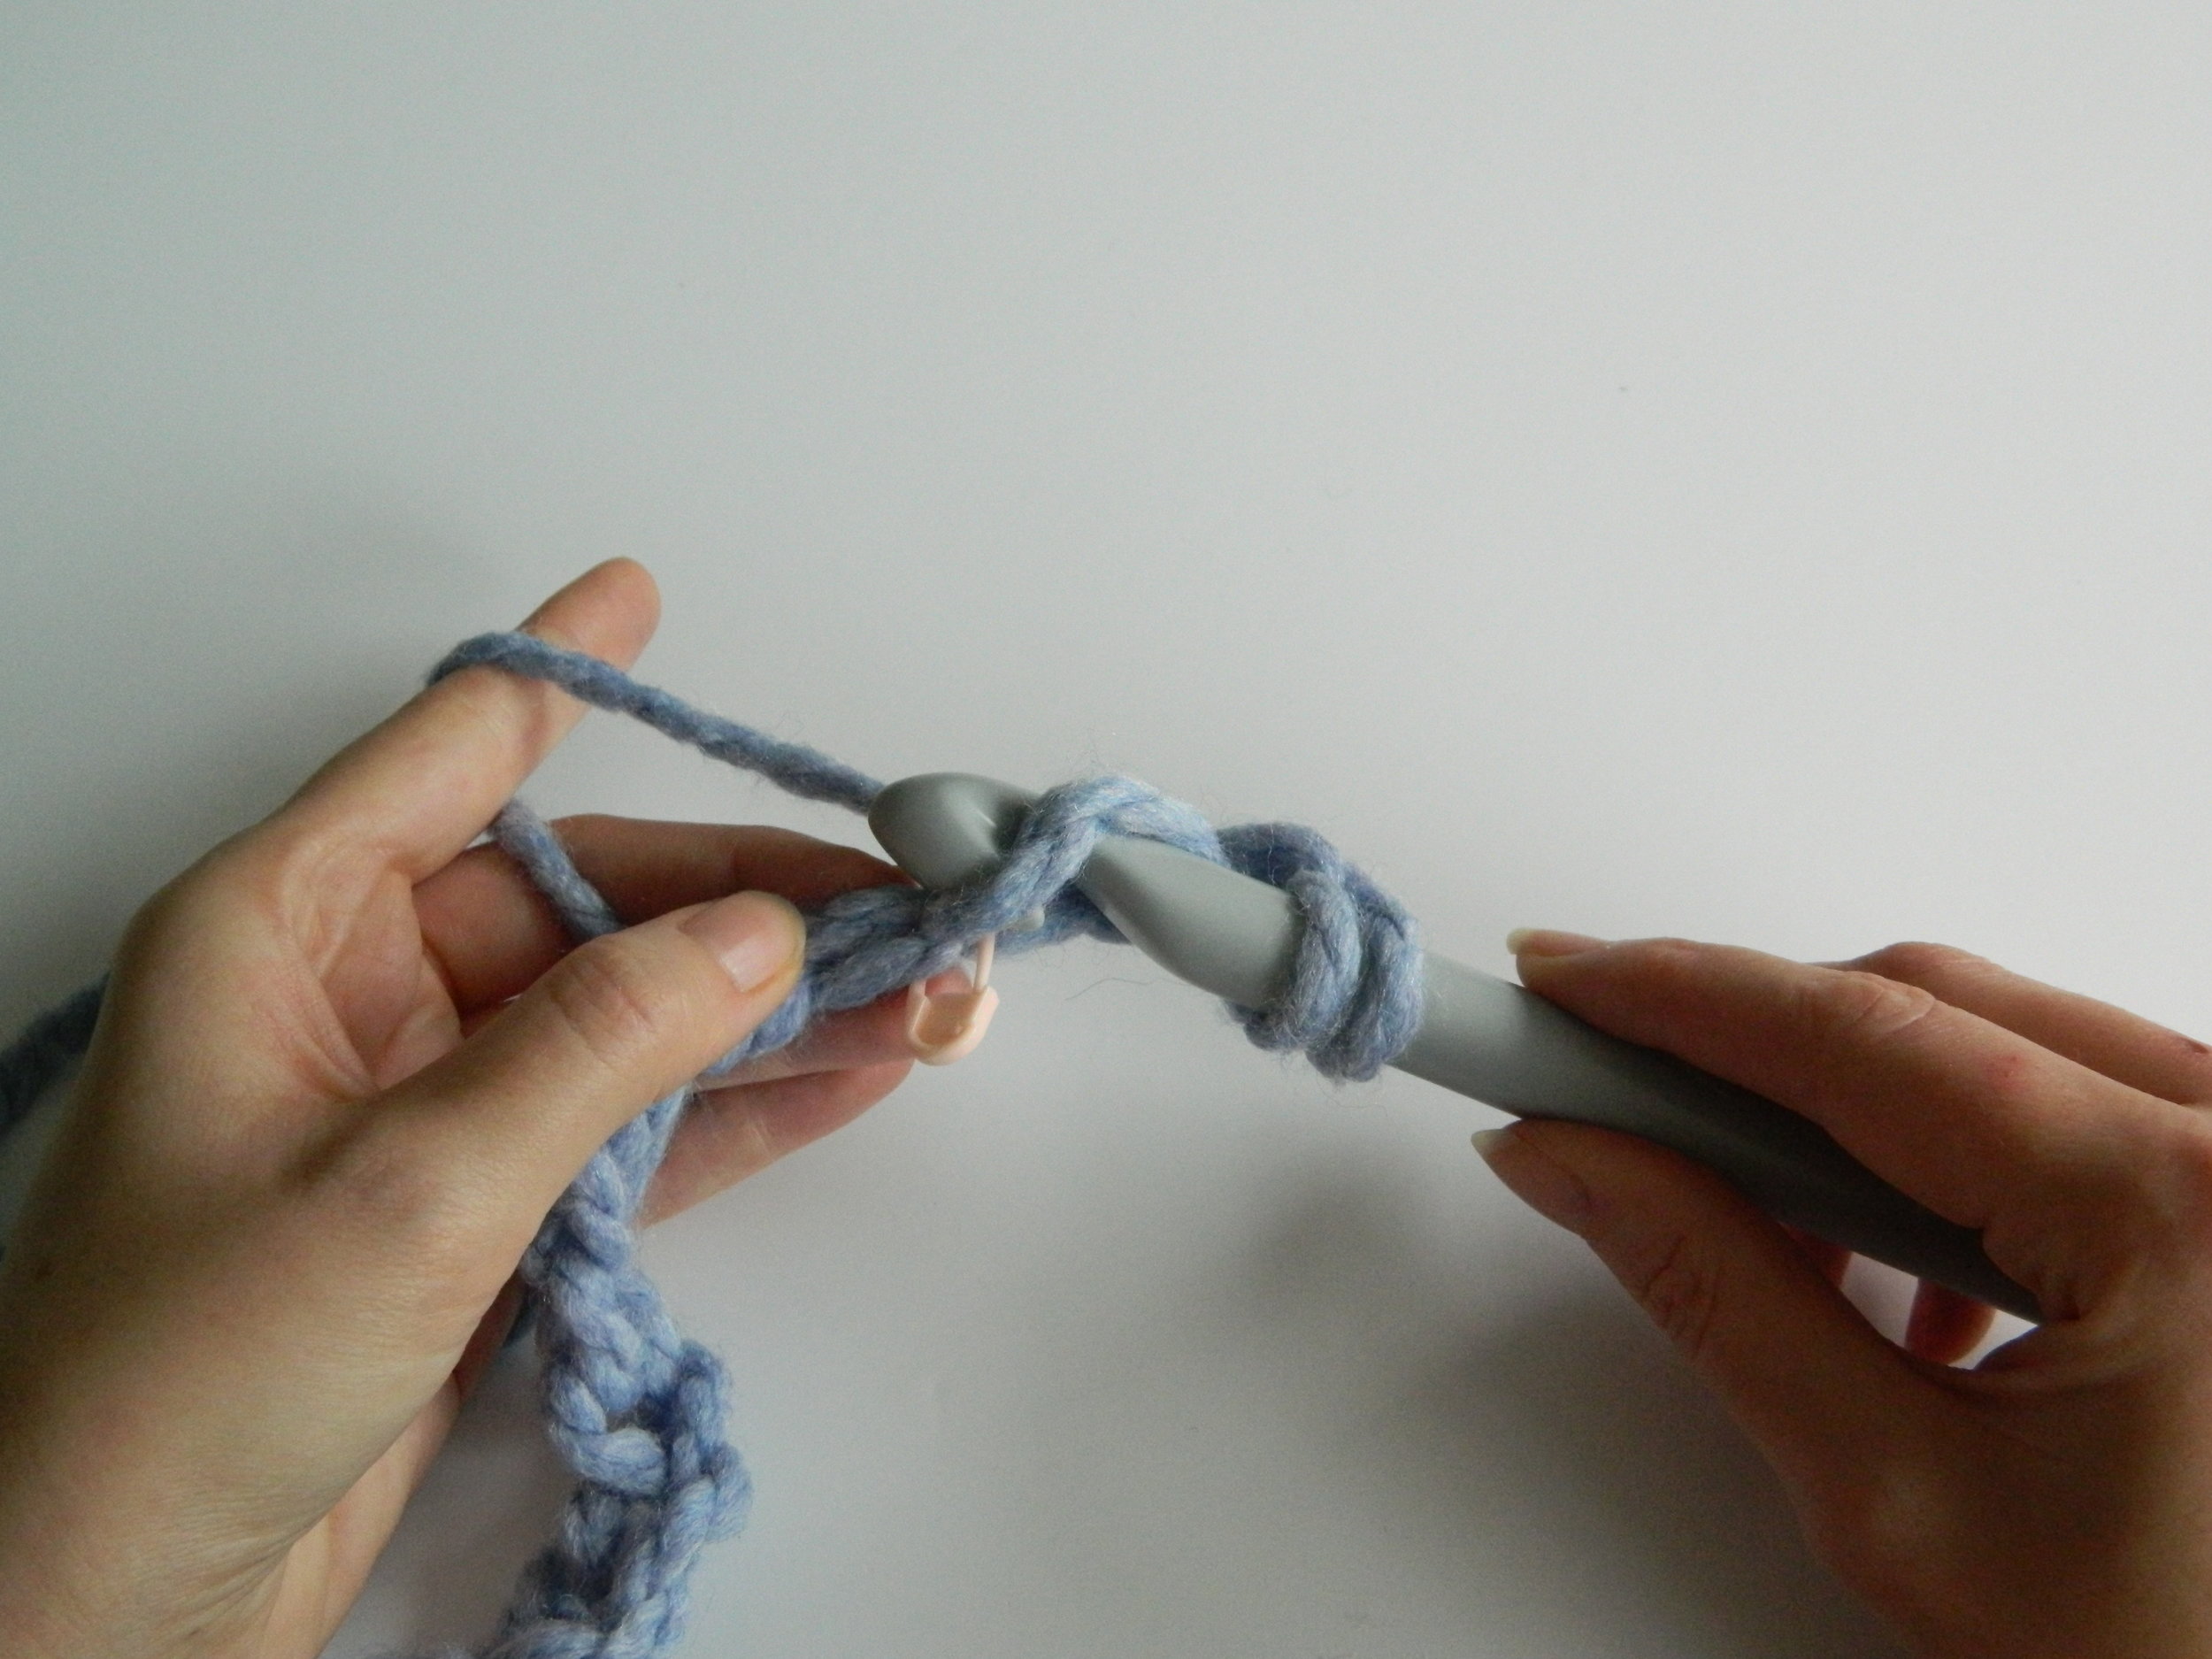
To create a tcr wrap your yarn around your hook (3.3), insert your hook into the stitch (3.4), wrap your yarn around your hook (3.5) and pull back through the stitch (3.6).

3.7

3.7

3.8

3.8

3.9

3.9

You will now have three strands of yarn on the hook (3.7). Wrap your yarn around your hook and pull this through the first two strands of yarn on your hook (3.8), wrap your yarn around your hook and pull this through the last two strands of yarn on your hook, you will now have one stitch remaining on your hook and your tcr is complete (3.9).

At the end of the row you should have a ch 2 and 44(56) trc.

 
3.10

3.10


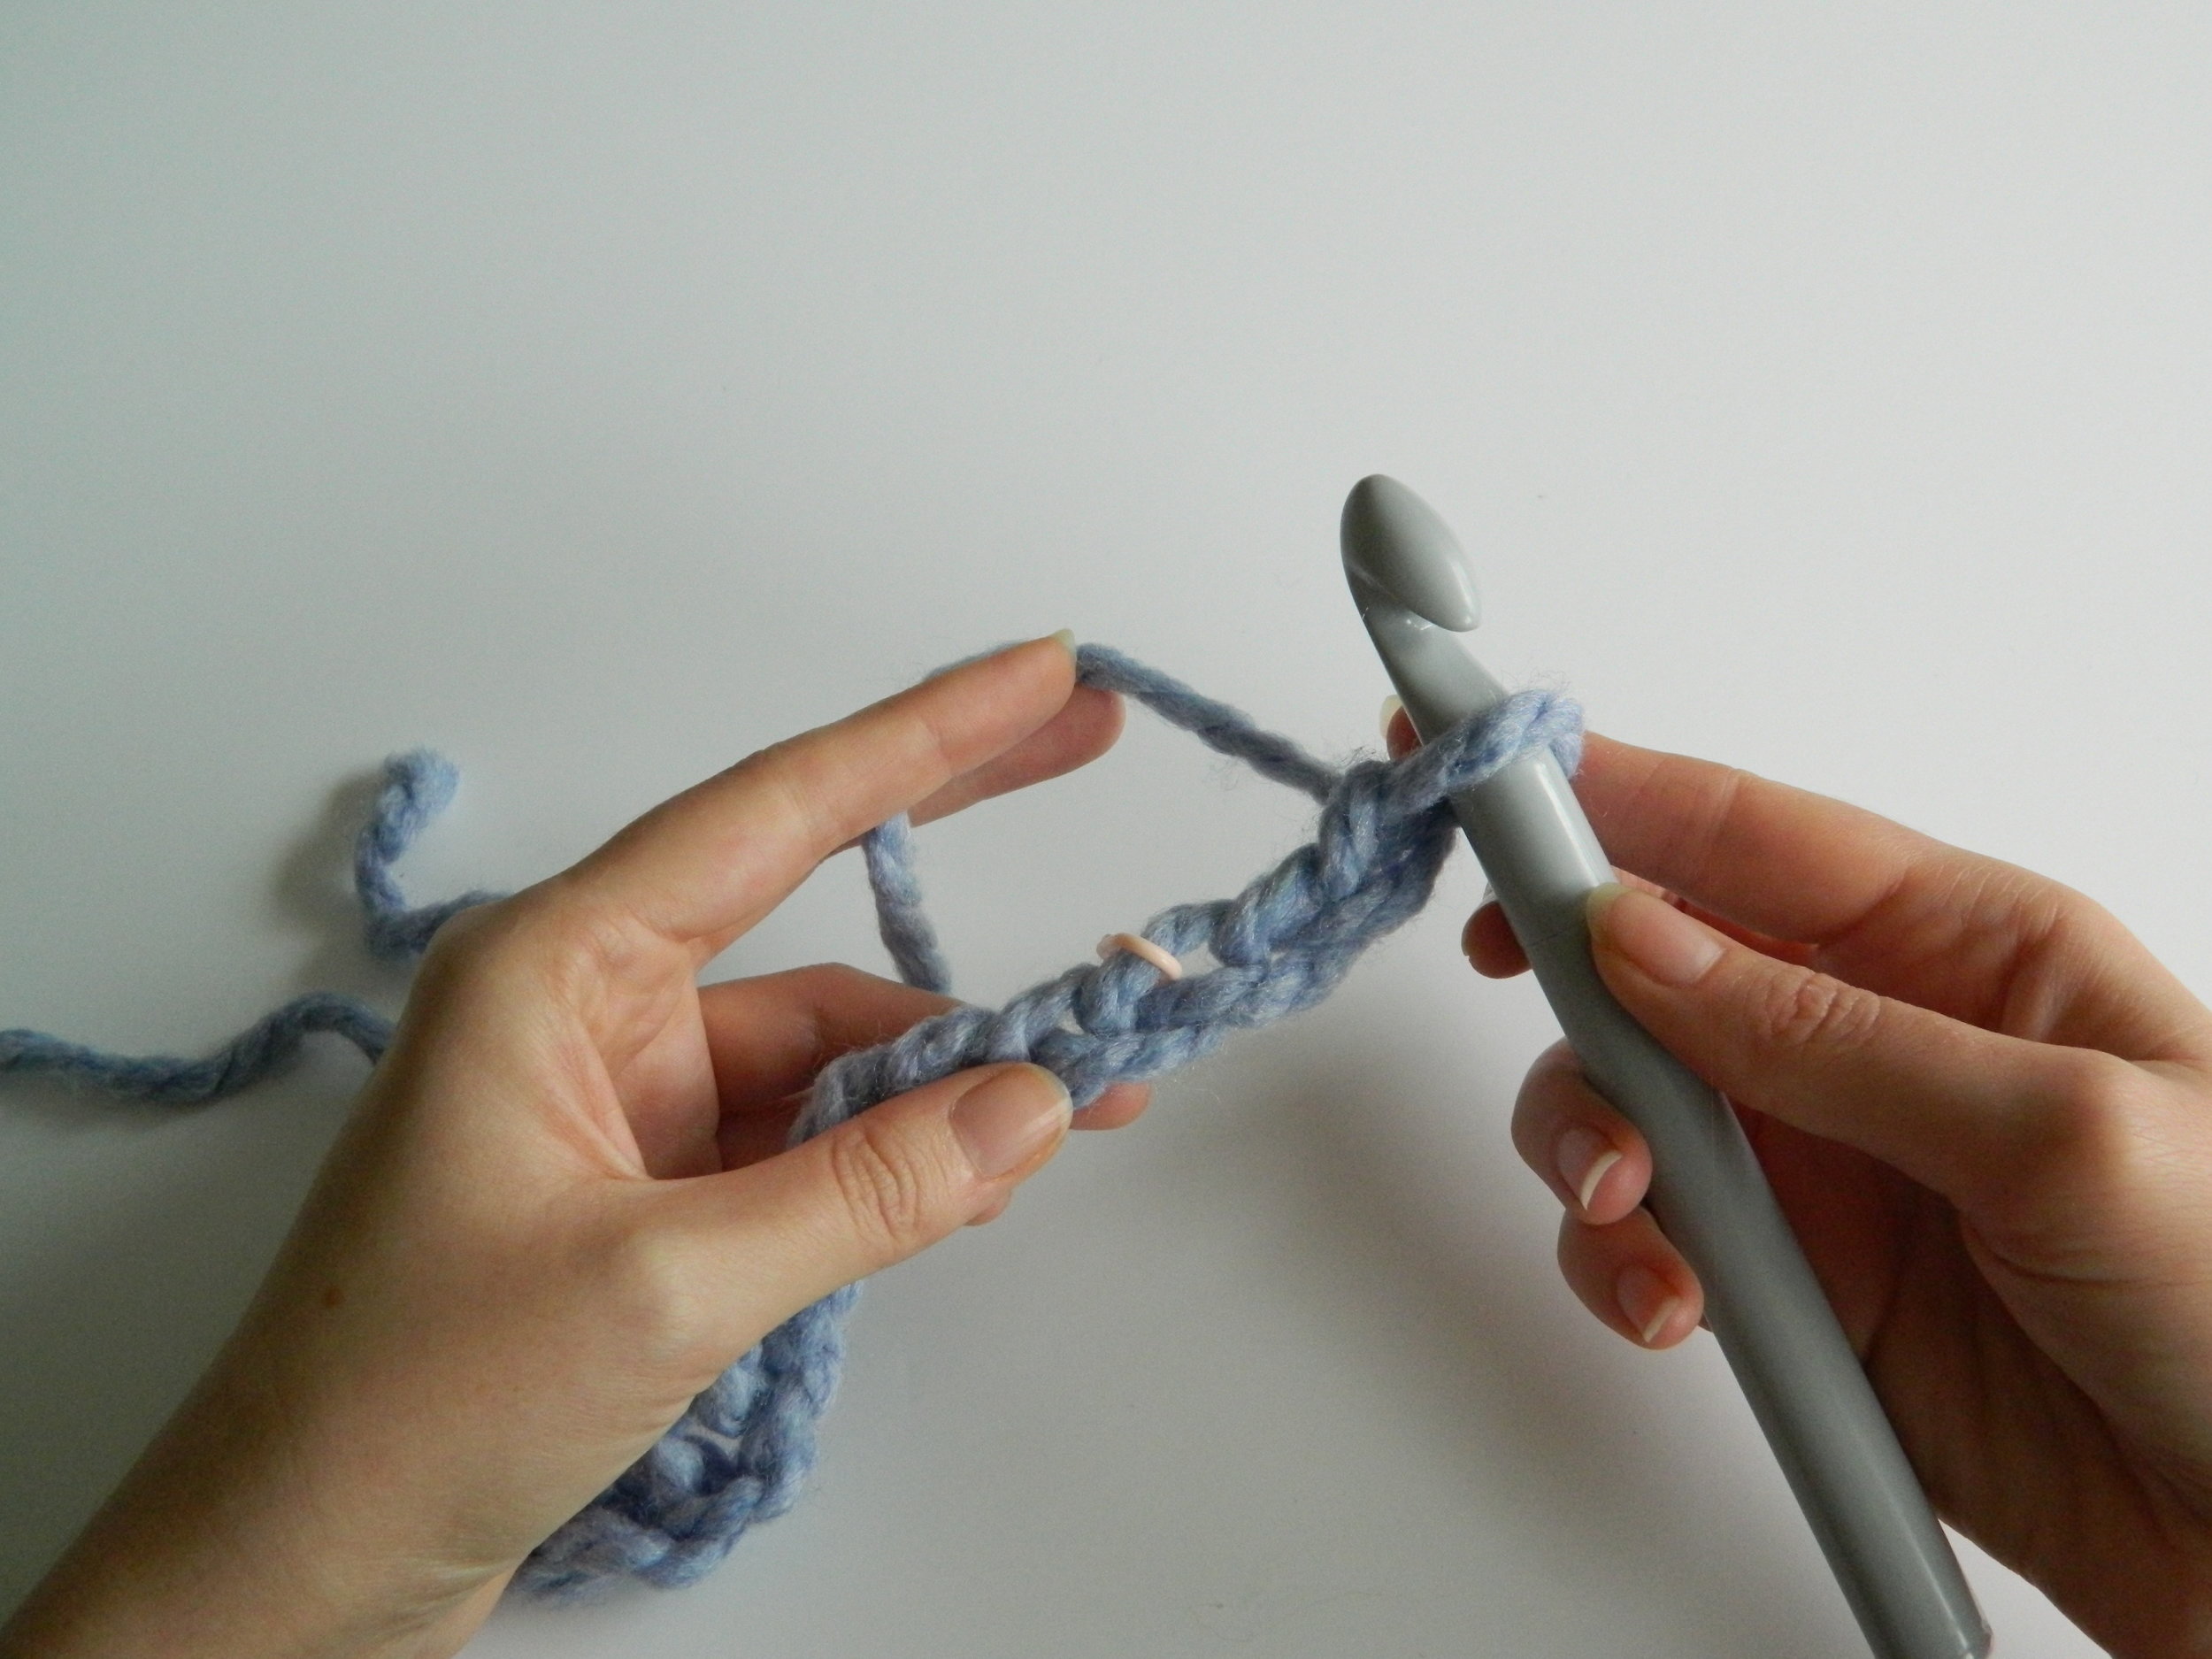
To maintain your work make sure to count your stitches regularly, it is easy to miss a stitch, particularly at the end of a row. You can see from image 3.11 that we have a ch 2 on the far right and 10 tcr starting with the stitch marker on the bottom right.

3.11

3.11

3.12

3.12

3.13

3.13

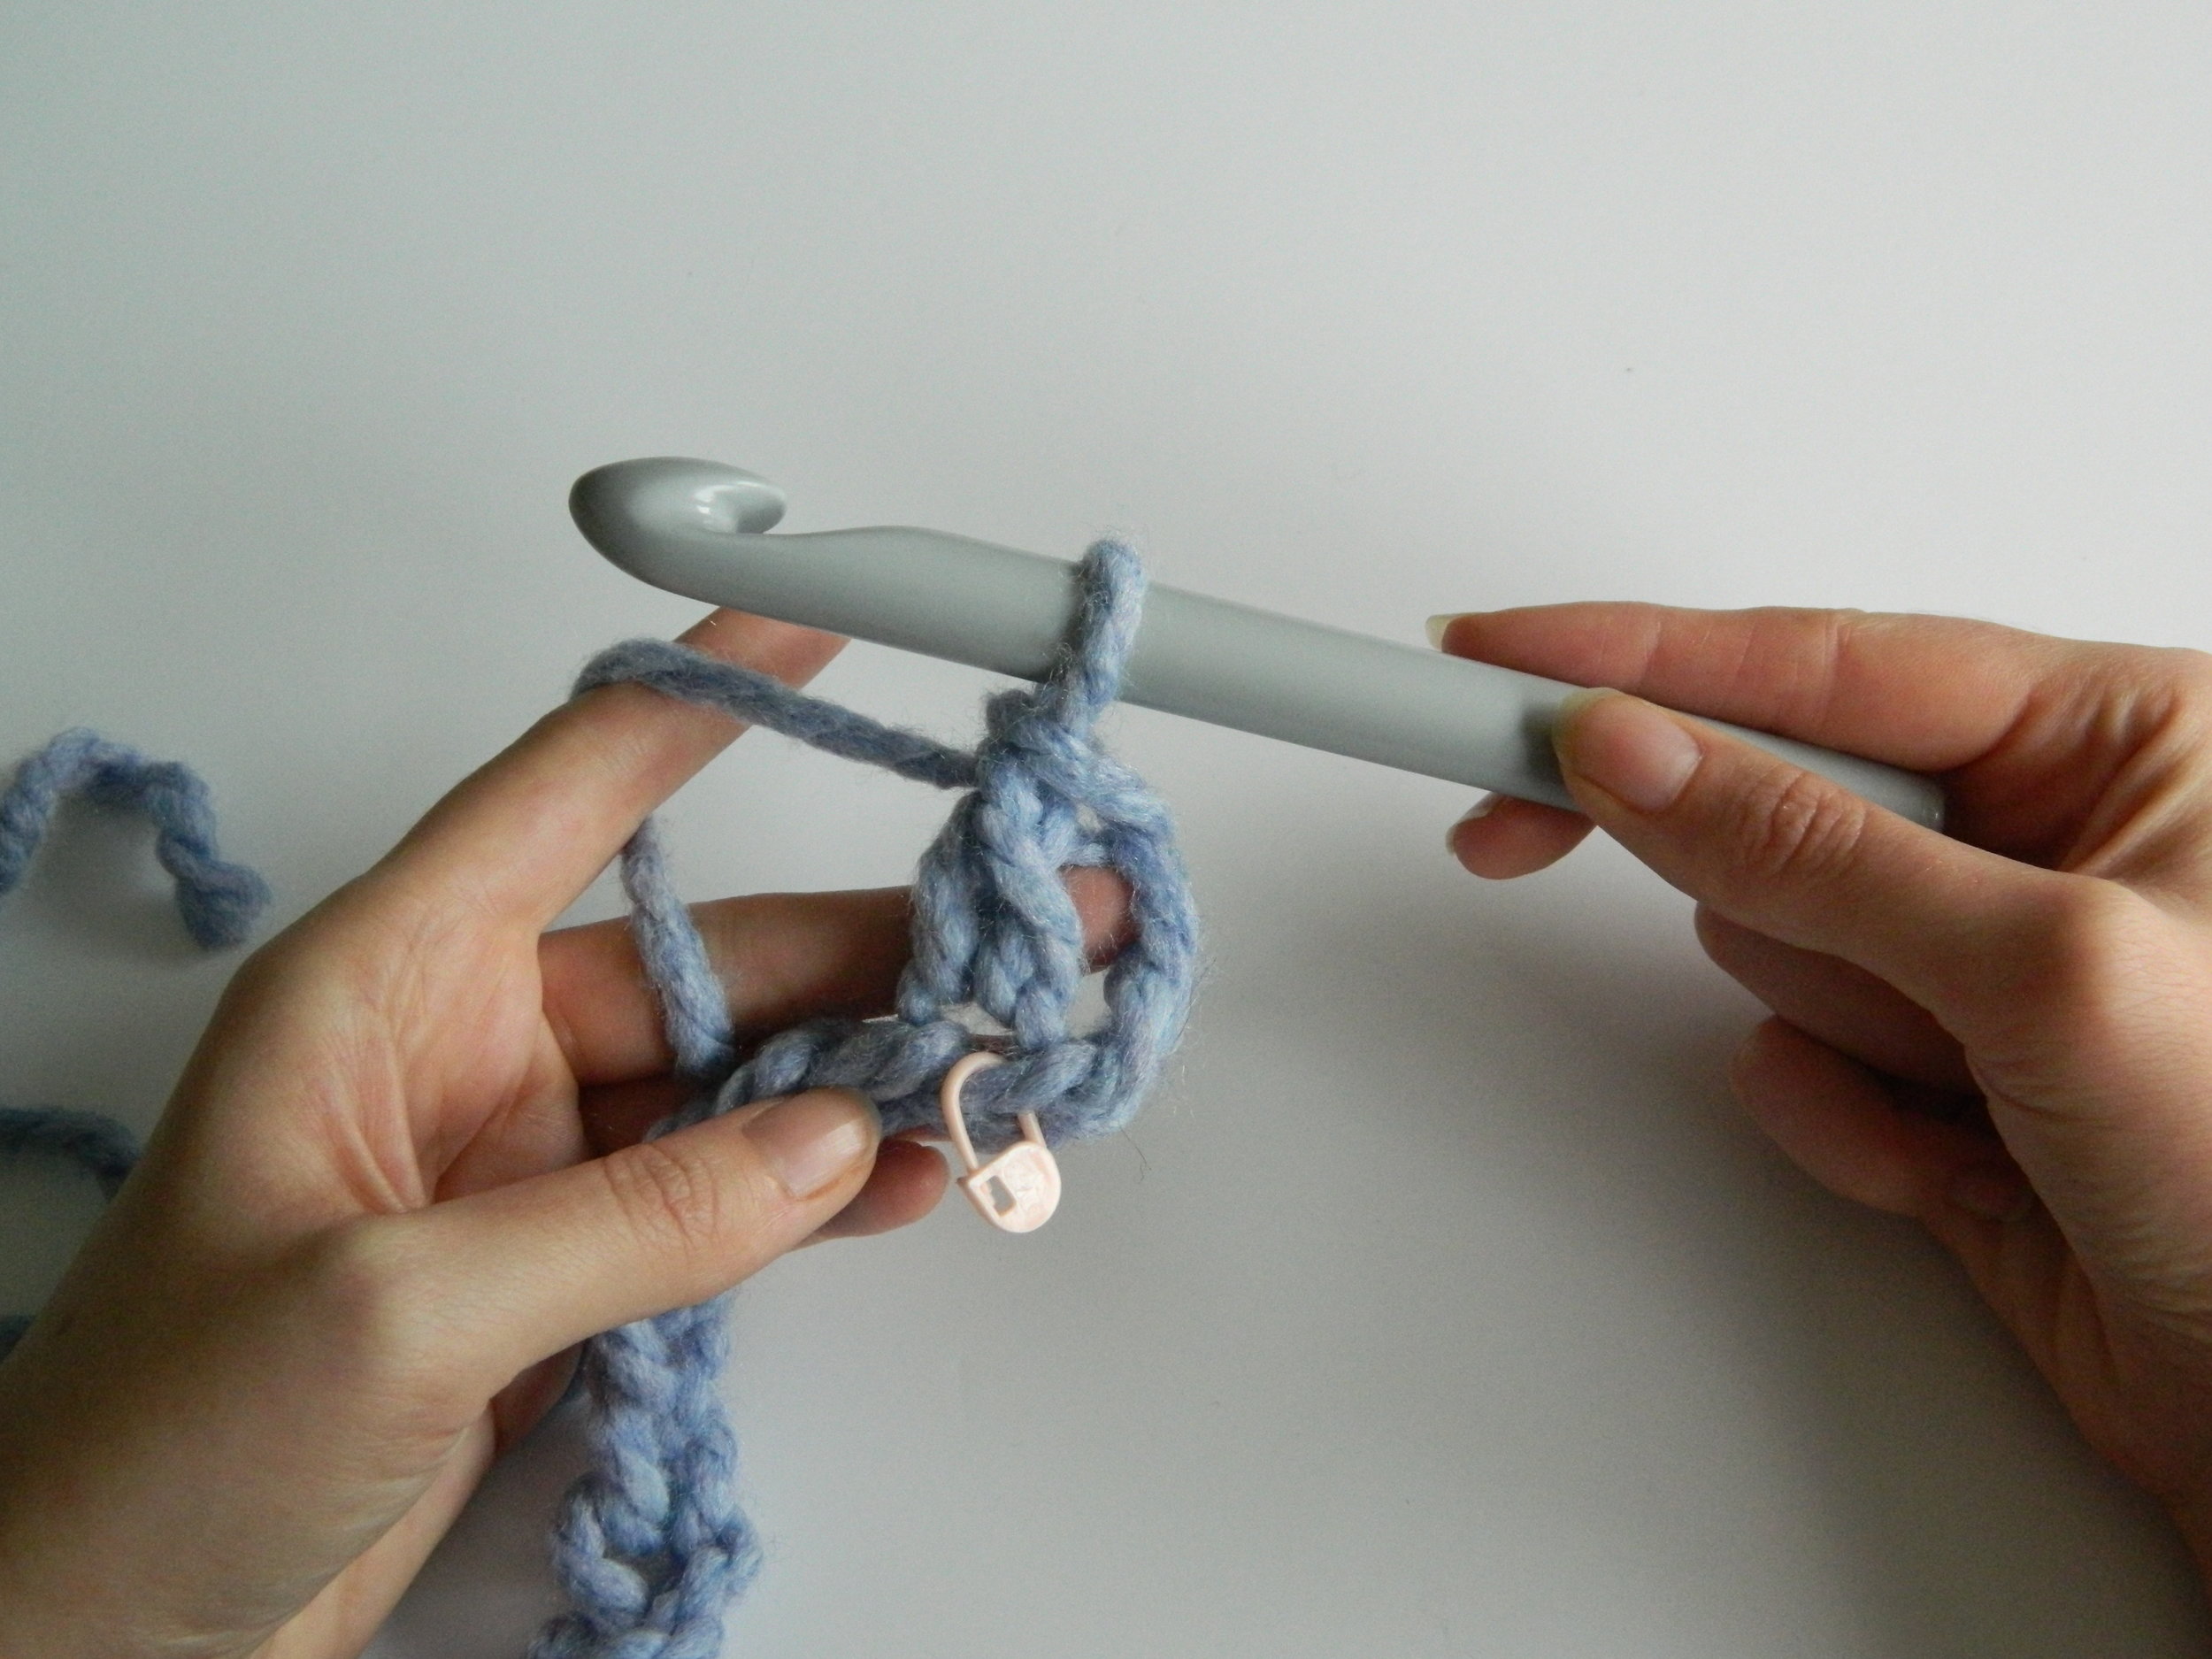
To begin your next row ch 2 to get the height of your row (3.11). Locate the top of the first stitch of the row below (3.12), this is where you will insert your hook for your first stitch (3.13).

Follow Steps 3.3 - 3.9 to create tcr in each stitch to the end of the row. The final stitch will differ slightly in its placement to that of the foundation row.

3.14

3.14

3.15

3.15

3.16

3.16

Work until you have one stitch left to work, look at the row below to locate the ch 2 and first tcr of the row below (3.14).

Rather than going into the top of the tcr as usual, insert your hook into the ch 2 (3.15), complete your tcr as usual.

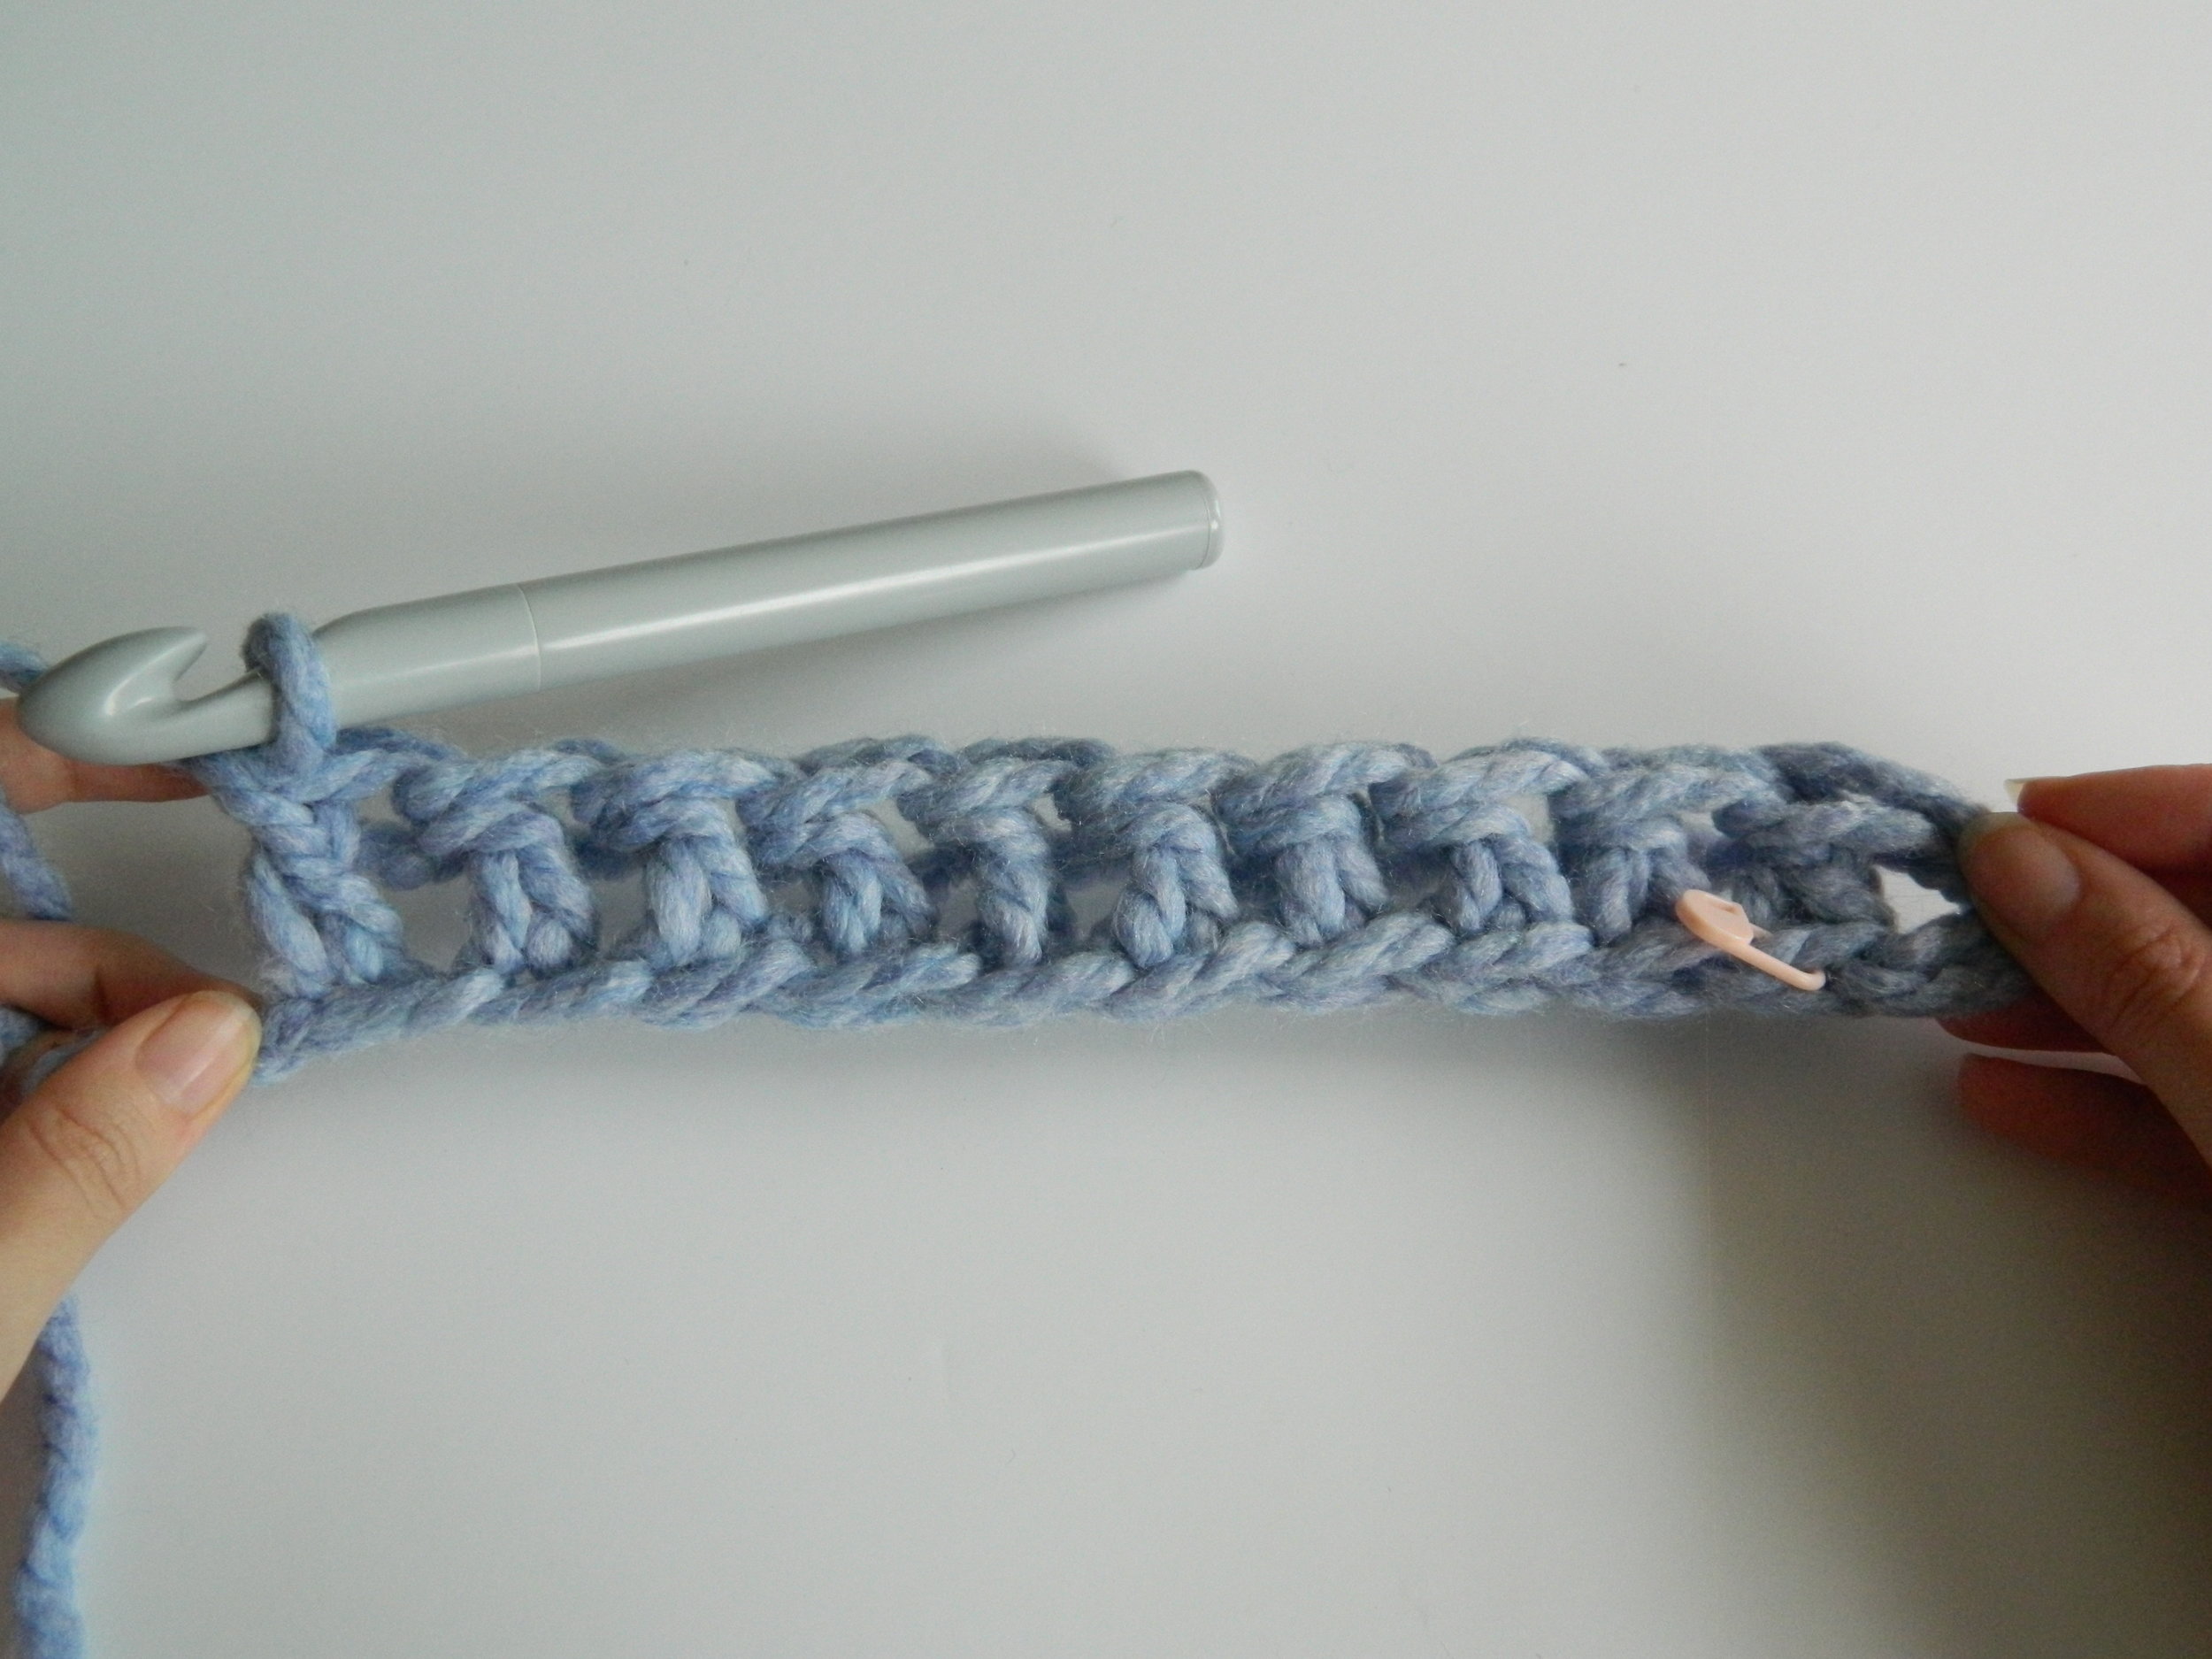
This will keep the edges of your work neat and straight and will help you to keep the correct number of stitches per row. You will notice a slightly larger gap between the last two tcr (3.16).

Continue to work in this manner, starting each row with ch 2 then working in tcr, until you have reached your desired length.

 
3.17 Crochet Tutorial
 

Step 4: When you have completed your final stitch cut your yarn leaving a 8” (20cm) tail, thread this tail through the final stitch to secure it. Using your blunt needle weave in all of the loose ends.

Super Chunky Crochet

Crochet Patterns, Daily UpdatesSarah Jane PitchfordComment
IMG_0766.JPG

Its been a hectic start to the new year but I have finally found some time to relax with a bit of super chunky crochet.

Wool is my favourite @cygnet_yarns Seriously Chunky in cream

Every pattern that I design starts with a tester session. Even the simplest design needs some careful thought and consideration to get the right tension and texture. This simple crochet throw uses a basic stitch making it a great beginners pattern. 

I’ll be posting this pattern with a guide for new crocheters soon, watch this space! If you have any comments or questions that I could add to my crochet guide please get in touch, I’d love to hear from you, SJ

The Provisional Cast-on Method

Knitting PatternsSarah Jane PitchfordComment

A provisional cast on uses a crochet hook to form loose, temporary stitches into which you can begin to knit. The loose, crocheted chain can then be removed to reveal live stitches. This technique is used with double brim hats such as my Aran Double Brim Hat Pattern.

You will need:

  • A length of scrap yarn

  • A crochet hook

  • Wool and knitting needles for your project

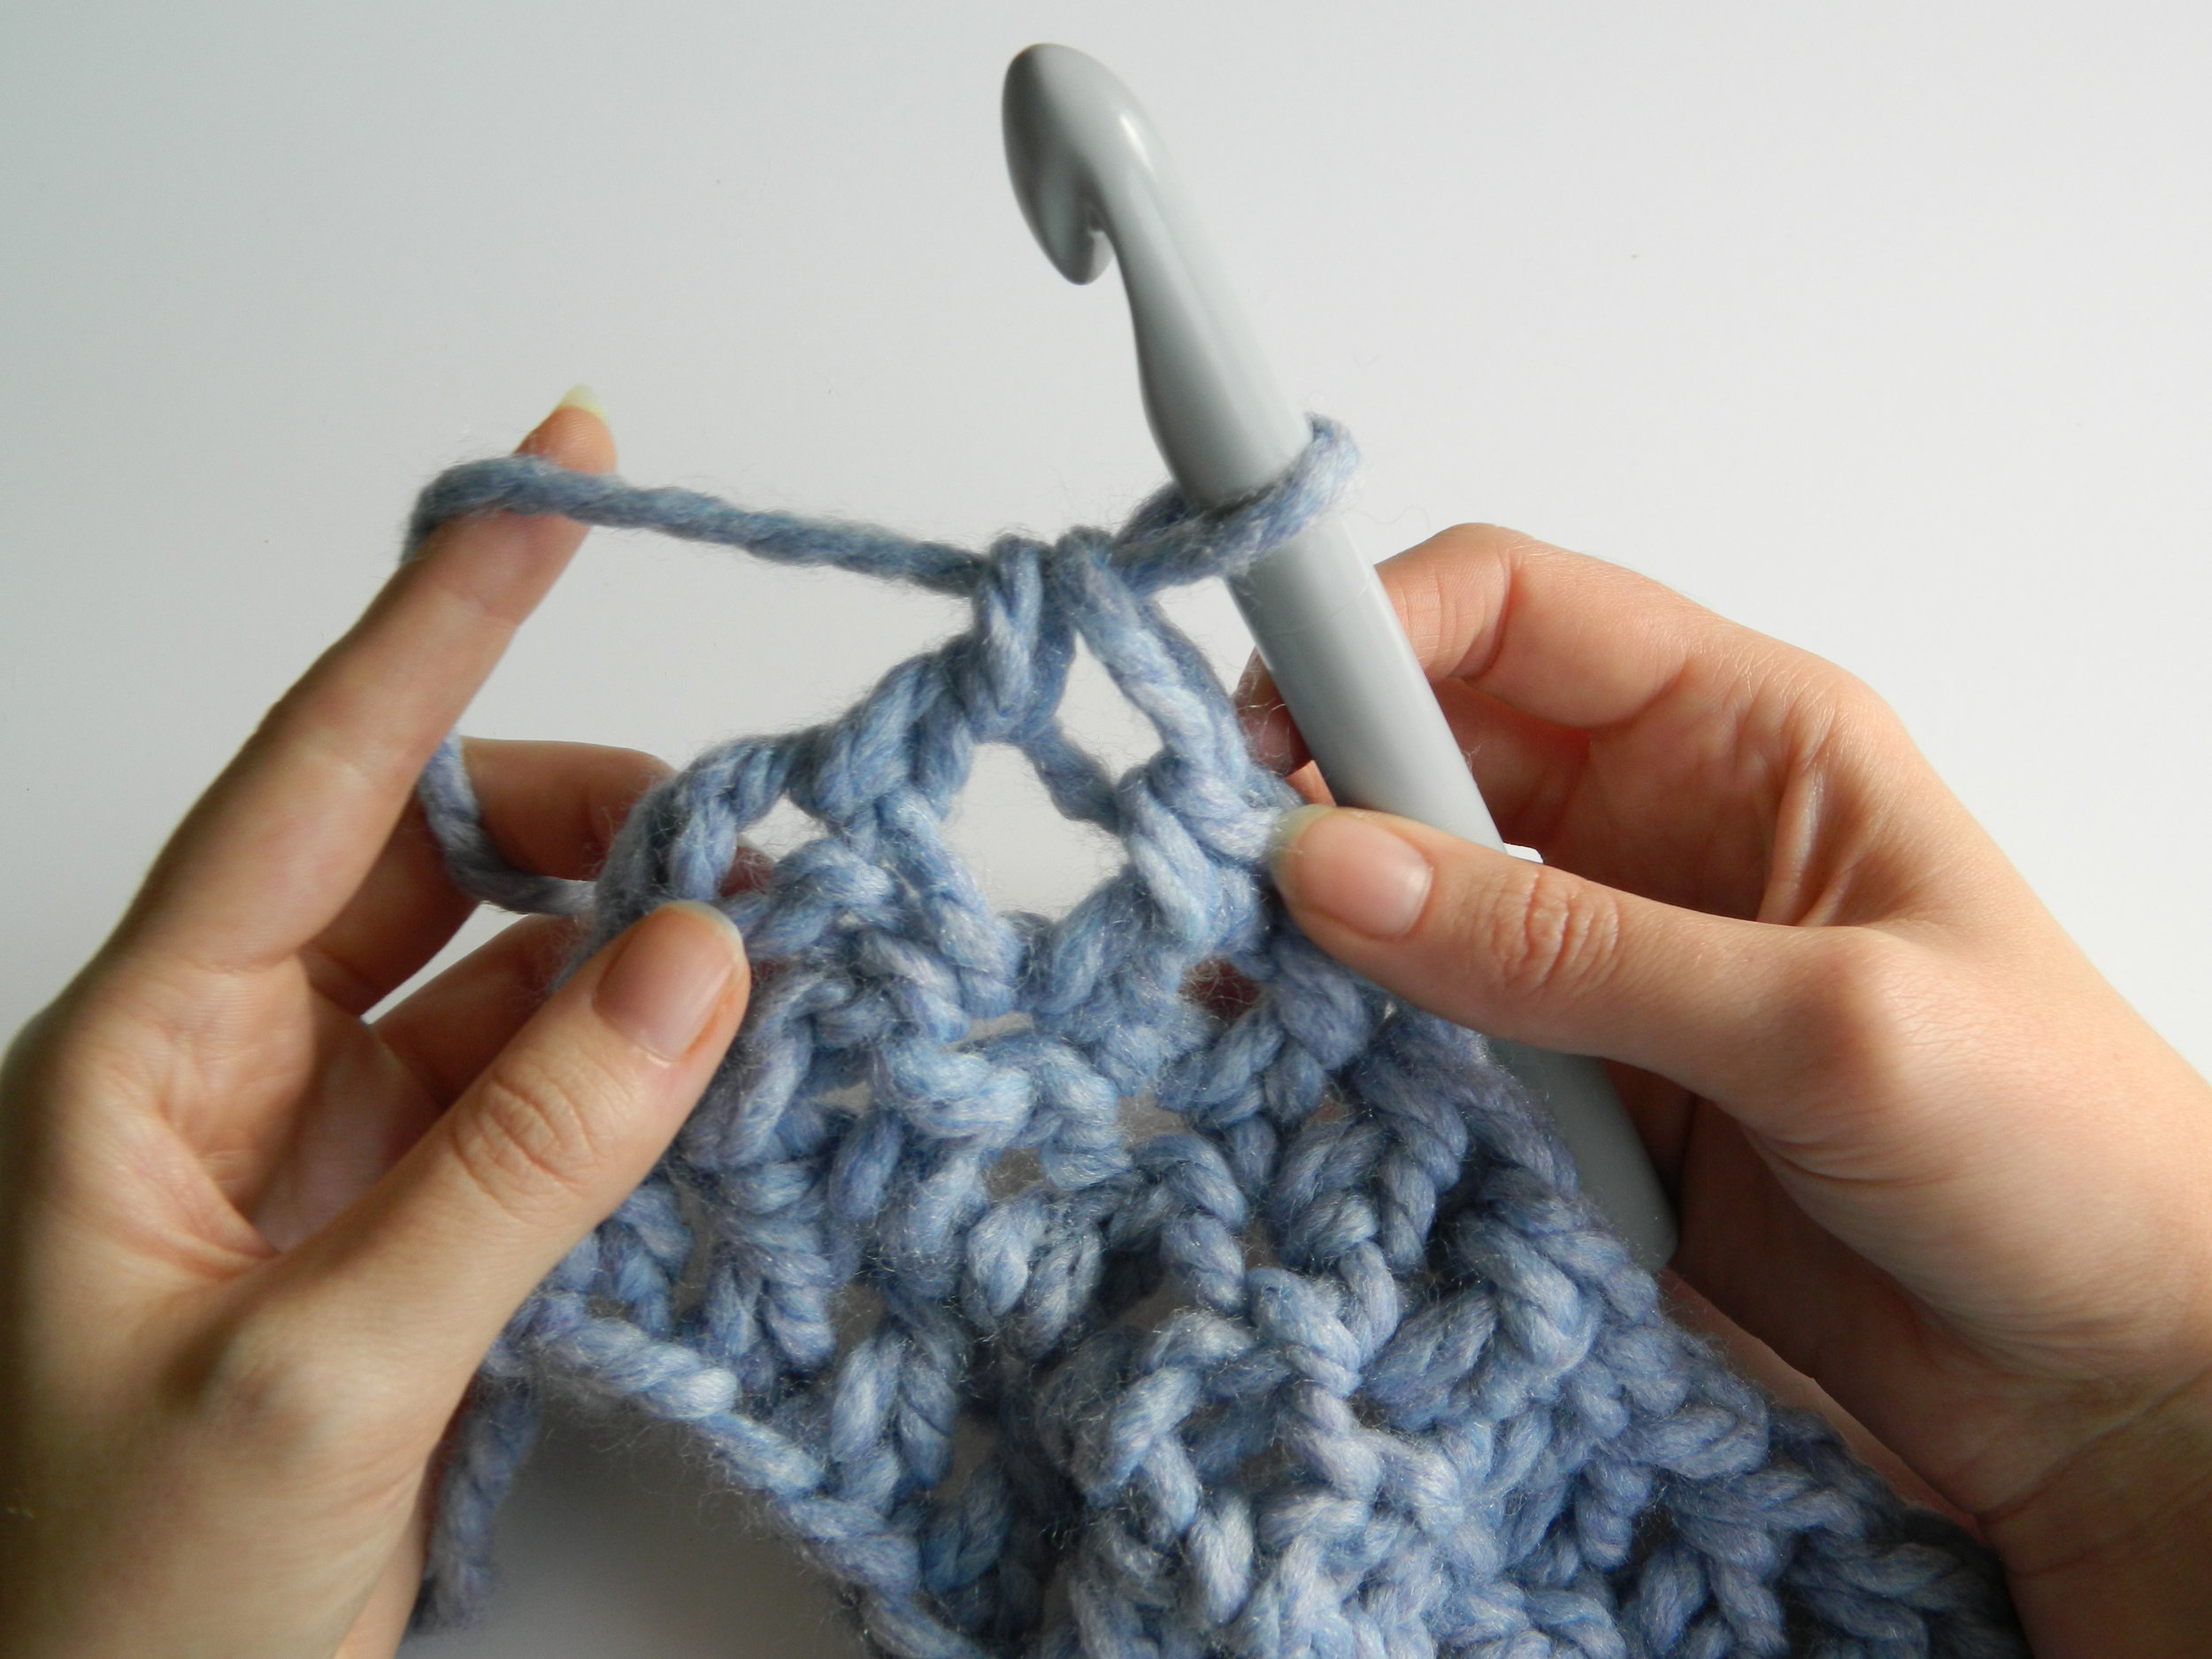
Step 1: Using a length of scrap yarn form a slip knot into which you will insert your crochet hook. Hold your knitting needle with the crochet hook on top to form a cross.

Step 2: Take the yarn around the back of the knitting needle, hook the yarn and pull through the slip knot on the hook to form the first stitch. Repeat this process until you have the desired number of stitches on your knitting needle.

Step 3: Using the crochet hook and yarn only, make five more chain stitches, cut the scrap yarn and pull the tail of the yarn through the final chain to prevent this from unravelling. You are now ready to begin your knitting project as usual.
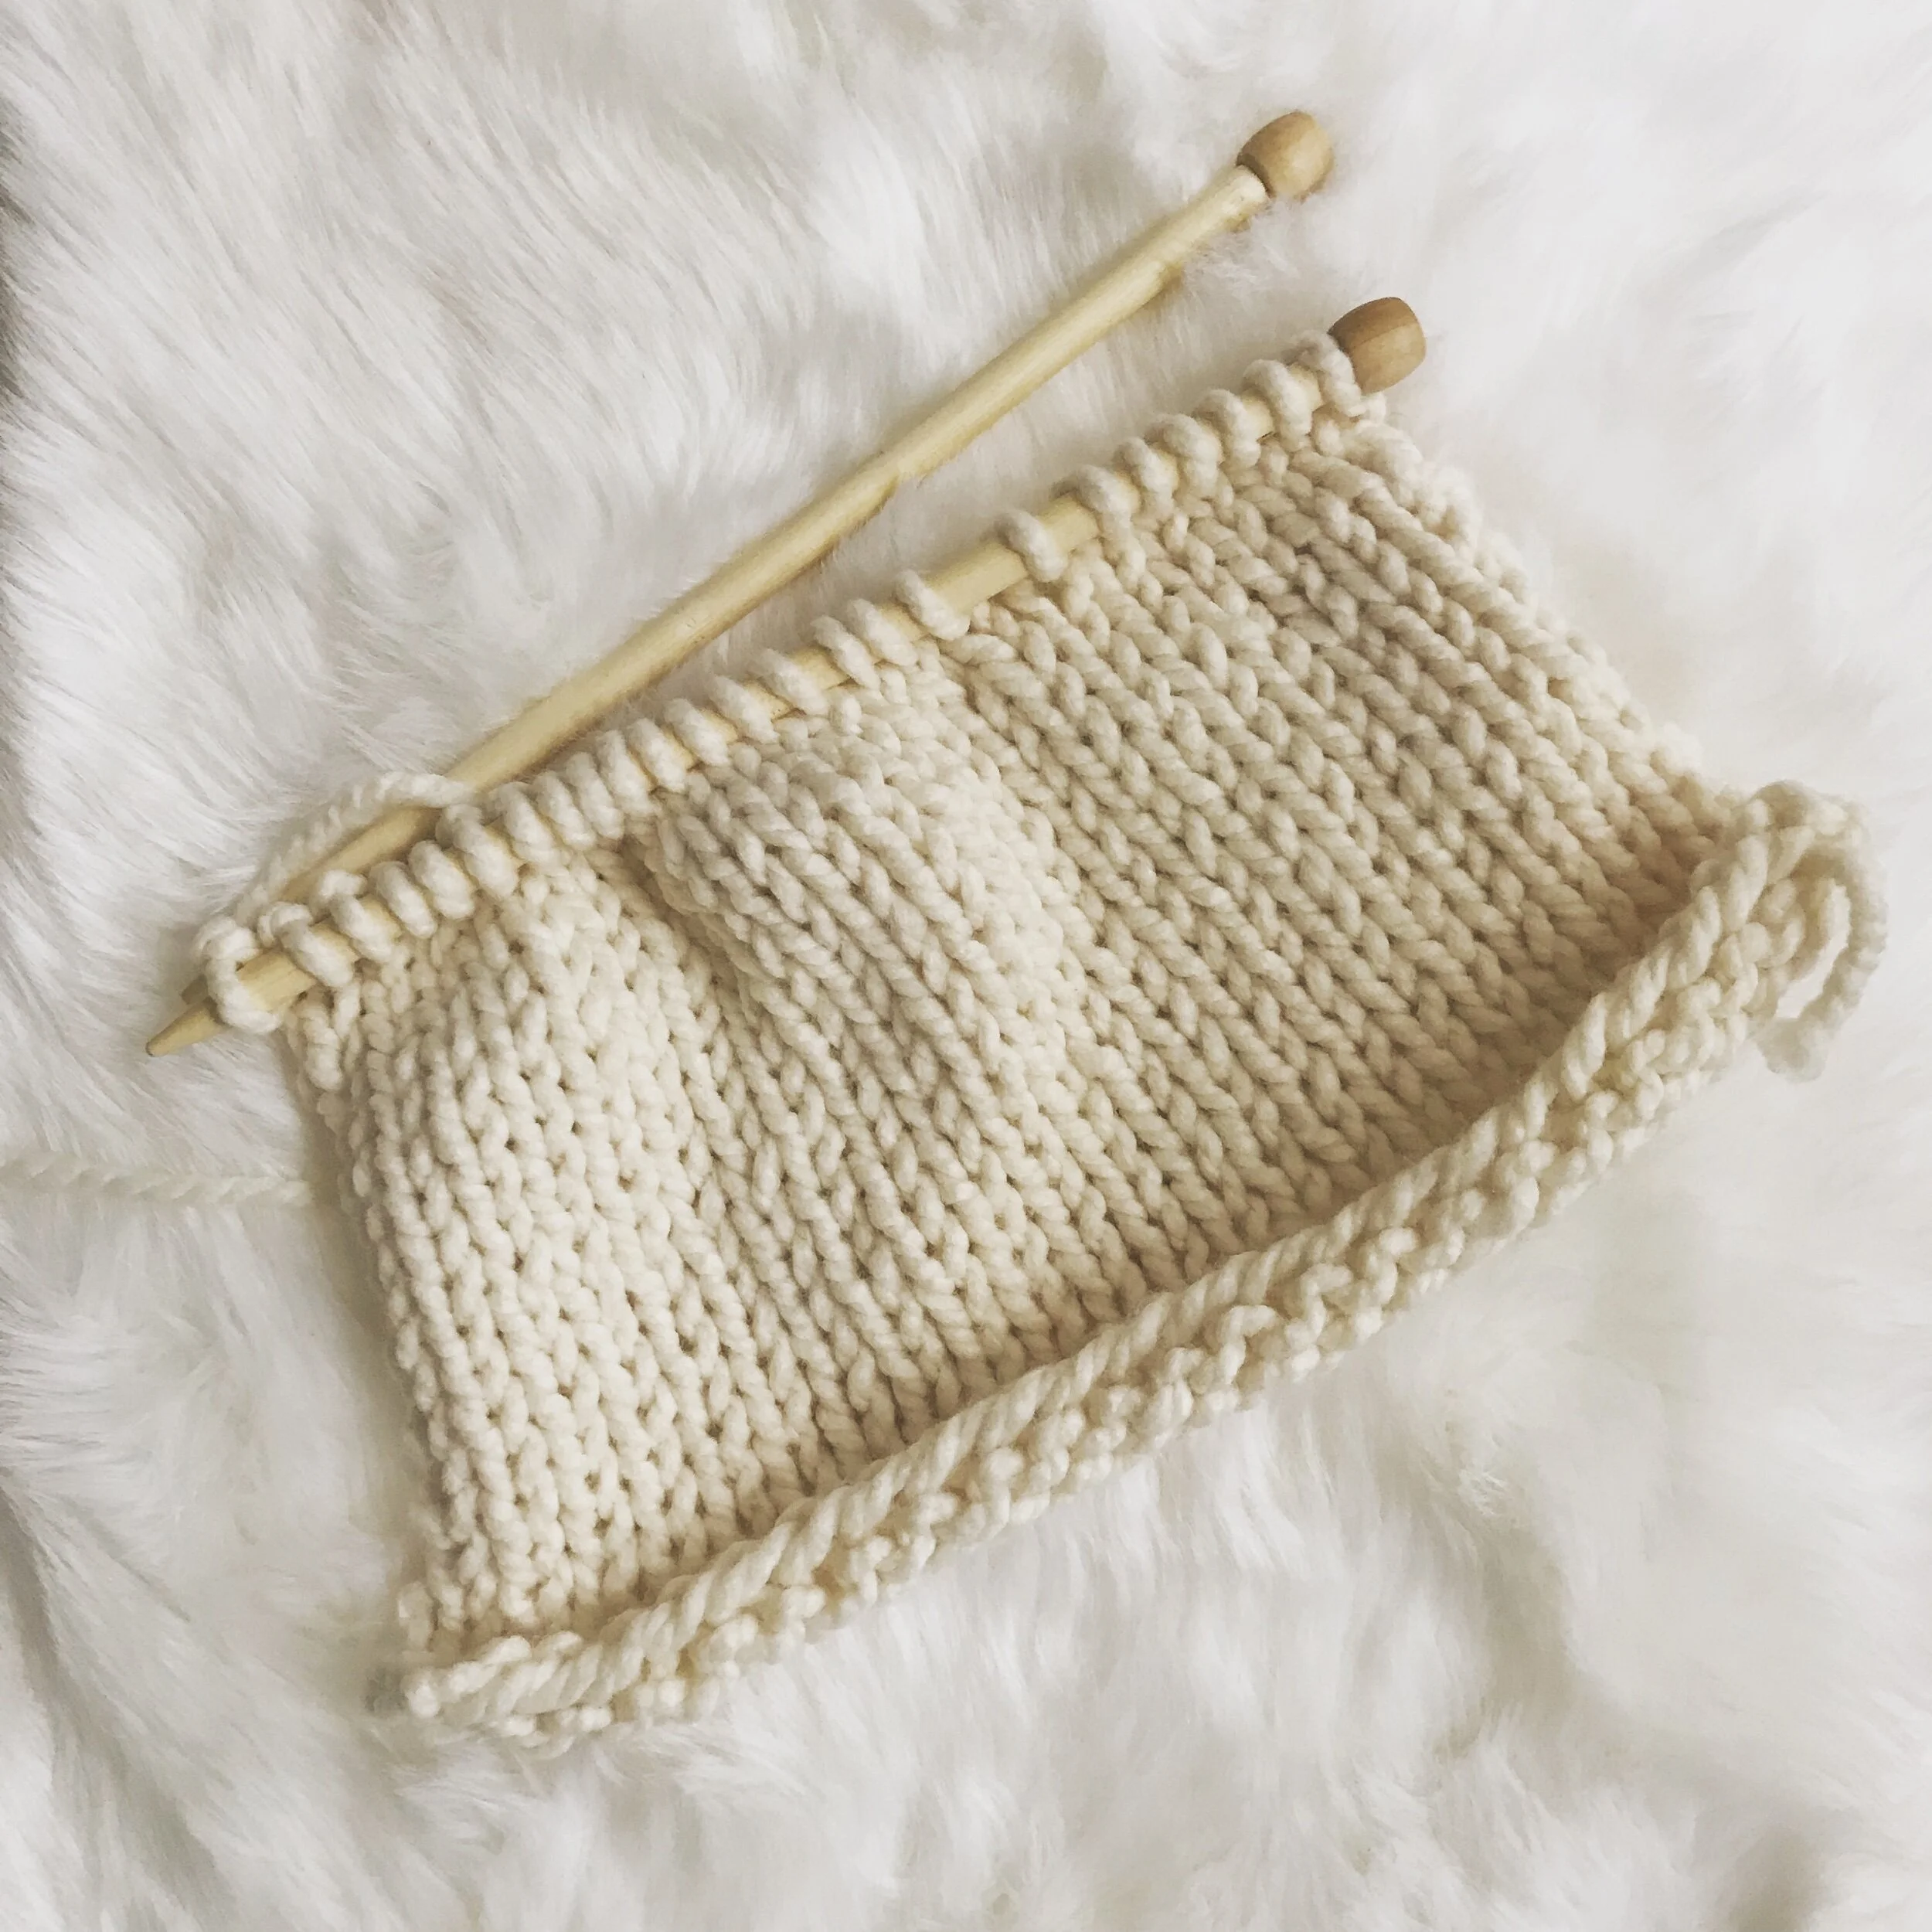
NB: The provisional cast on stitches will later be removed and so do not count as the first row.

Revealing Your Stitches

When you are ready to use your live knit stitches you will remove the crocheted chain. Have your extra knitting needle ready to pick up the live stitches as they are revealed. I recommend using a needle one or two sizes smaller to make picking up the stitches easier.

Step 1: Beginning at the end of the chain with the final five chain stitches unpick the chain and pull gently to slowly unravel the scrap yarn. As you pull the live stitches will be revealed, pick these up with your extra knitting needle.

Step 2: Once the entire scrap yarn chain has been removed and all live stitches picked up, you are ready to work your knit stitches.

 I hope that you find this method useful - I would love to hear your thoughts and comment and, as always, please feel free to get in touch if you have any questions, SJ

Sew Your Own ... Cushion Cover - Beginner's Sewing Pattern

Sewing PatternsSarah Jane Pitchford
33 Finished front stuffed.JPG

Making your own cushions is a great project to personalise your space and using an envelope opening makes this project really quick and easy. If you have a sewing machine you should be able to produce a cushion over in around 30 minutes. 

You will need: 

  • a cushion (mine is 18" square)

  • your chosen fabric

  • matching thread

  • pencil or fabric chalk

  • long ruler / tape measure

  • sharp scissors / rotary cutter

  • iron & ironing board at the ready

Your fabric

I have chosen to use this floral linen which has a bold and colourful design. The fabric has a big repeat and I want to make sure that the front on my cushion has the colourful pattern and the reverse has the grey pattern.

If you have a pattern on your fabric make sure that you consider the direction and size of the pattern when you are measuring & cutting. 

01 Fabric.JPG

Step 1 - Measuring & cutting

This pattern uses a single piece of fabric so you will need to calculate the length of your fabric to cover the front and back and the overlapping opening sections. This is your calculation:

Width of cushion = x

Length of cushion = y

Width of fabric = x + ½" + ½" - this gives you the width to cover the cushion plus a 1/2" seam allowance on either side.  

Length of fabric = y + (2/3 of y +1") + (2/3 of y + 1") - this gives you the length to cover your cushion plus two sections to cover the reverse which overlap by 1/3 of the length of the cushion. In my example my cushion is 18" square so my piece of fabric is 19" x 44", i.e.

Width = 18” + ½" + ½" = 19”

Length = 18 + ( (18 ÷ 3) x 2) + 1” + ( (18 ÷ 3) x 2) + 1” = 18” + 12” + 1” + 12” + 1” = 44”

Step 2 – Hemming the short ends

The short ends are hemmed to give a nice neat finish to the envelope opening and to stop the fabric from fraying.

Fold the edge over by ½” and press. Fold the edge over by ½” again enclosing the first fold, and press. You have now folded over 1" in total from each of the short ends. 

Sew a neat line along the open edge to fix the hem in place. You can use a matching thread or something contrasting, in my example I have used white thread.

15 Sewing fabric hem.JPG
19 Fabric hem sewn.JPG

Once both short ends are hemmed press the piece again.

Step 3 – Making the envelope

Lie your piece of fabric face down and measure along the long edge from the hemmed edge. Measure 2/3 of the length of your cushion and mark a line, this line indicates where you will make your fold. Repeat this at the other end of your fabric. My cushion is 18" so 2/3 of this is 12". I measured and marked my line 12" from the hem running parallel to the hem. 

21 Measuring edges.JPG

Place your fabric right side up and fold each end towards the centre, rights sides together, along the new lines that you have drawn. Your ends will overlap by 1/3 the length of your cushion. In my example the ends overlap by 6" which is a third of my cushion length.

22 Folded fabric ends.JPG
23 Folded fabric ends.JPG

Align the edges of your fabric and pin in place securely, ready to sew.

24 Folded fabric ends.JPG

Sew along the long edges using a ½” seam, focus on the very edges of the fabric and the join between the two over-lapping ends to ensure a really secure seam. I use the reverse function on my sewing machine to stitch over the edges several times. 

26 Sewing edges.JPG

Step 4 – Finishing

Turn your cushion cover right side out and press. Make sure to really turn out the corners so they are nice and square.

30 Finished front.JPG

That’s it! Your cushion is finished and ready to display proudly! You can really make this project your own; why not try adding some buttons to the reverse to secure the opening and add some colour?